I believe one of the more interesting parts of World War 2 airplanes is the engine. In terms of visual impact, the kit engine is one part of a model where it is worth the time to improve – especially if it is a radial engine. It is also one of the easiest ways of “improving” model airplane builds.
Before there were jets… and for a while after, there were two main types of engines used to turn propellers: Inline and Radial. With a few exceptions, the inline engine was used for land-based fighters and bombers.
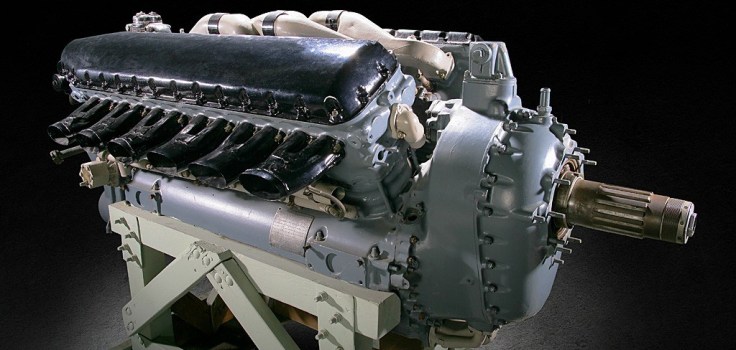
The radial engine (ie, the big blunt opening in the front of the fuselage) was also used for land-based airplanes like the Thunderbolt, B-17, and B-29 but, outside a few exceptions, it was preferred by navies and was pretty much the only type engine used by all sides in the Pacific War.


Why was that? There are a few reasons:
- The short length of the engine allowed for shorter airframes than in-line engines and this had two big advantages: the planes were easier to move around and store on the carrier and with a short nose, pilots could see over it during a carrier landing.
- Radial engines are generally air-cooled, while inline engines are liquid-cooled. This means that radial engines generally perform better at low- and medium altitudes, while inline engines tend to perform better at high altitudes. Unlike land-based fighters, naval aircraft weren’t expected to escort or engage high-flying bombers, so this worked out well.
- Radial engines require less equipment to maintain and a lightened workload for maintenance crews.
- Radial engines are lighter which is again helpful getting airborne after a short, catapult type, takeoff.
- Radial engines proved to be surprisingly resistant to battle damage – there are even reports of aircraft getting home with entire cylinders shot away. This becomes even more important for naval airplanes as they usually didn’t have any alternative airfields available to them.
Radial Engine Parts
Model radial engines are right up front and lucky for us modelers, kit designers have put a lot of thought into them. Simply taking the time to paint it properly will be worth the effort because it will be displayed front and center for all to see. Contrast that with spending a month super-detailing a cockpit where most of your work won’t be seen once it is inside the fuselage!
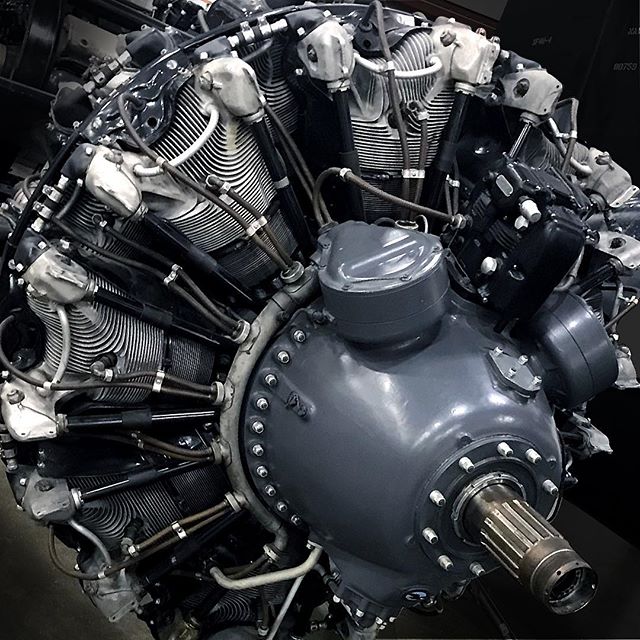
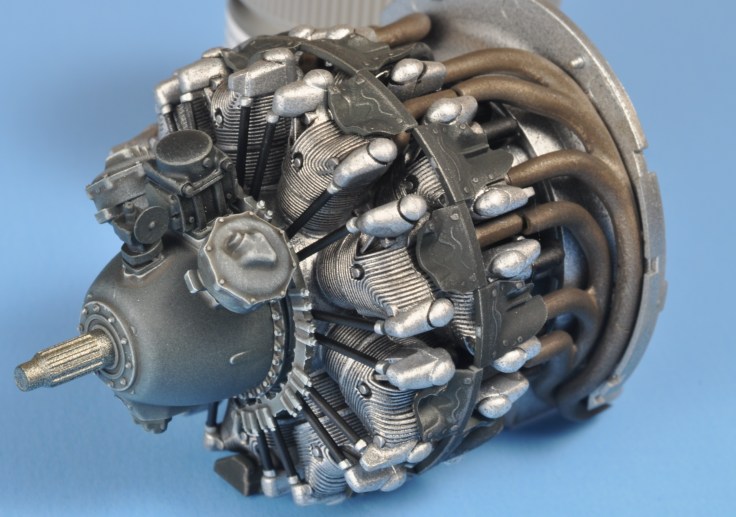
Making a better model engine starts with knowing the parts of the radial engine and what colours to use. Keep in mind: the colours can vary! And different nations had slight variations in layout. So it is always best to check references if you want to be as accurate as possible. Case in point: While building a Ki-45, I found out its engines did not have an ignition ring; the ignition wires came from the back of the engine directly from the distributors.


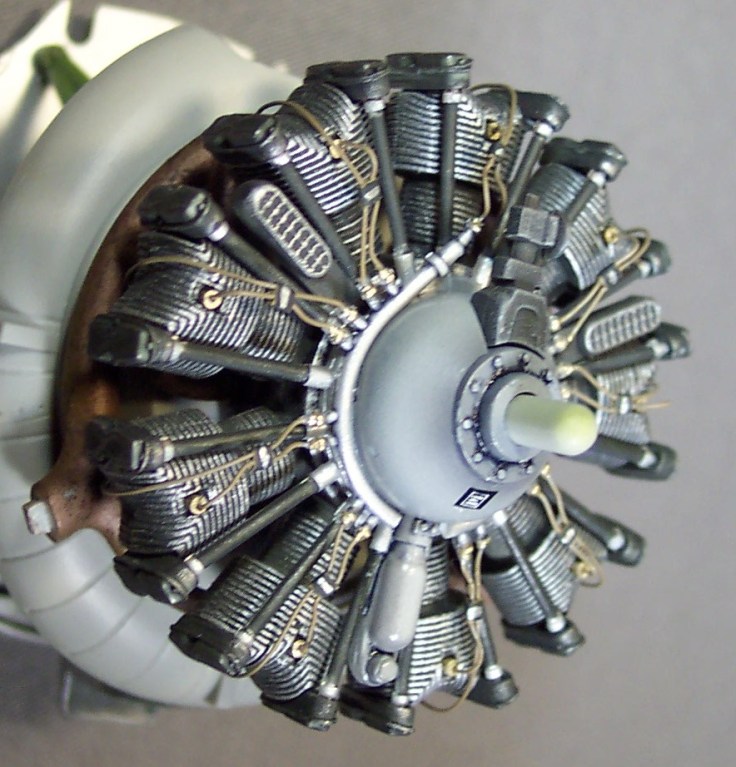
It seems as though there is a pile of different parts but if you look closely, it is not all that complicated. Keep in mind, the picture on the left is of a restored and museum-curated engine. I suspect radials in the field could look very different – the exhausts appear gloss black and due to the heat of the exhaust, these would quickly rust up in the field. I also included a Tamiya 1/32 R-2800 because my prototype photos were not clear enough. There is a nice variety of colours to use to really bring out the detail:
| Engine Part | Likely Colours |
| Crank Case | Medium Gray |
| Oil Sump | Medium Gray/Black |
| Cylinders | Aluminum |
| Ignition Ring | Aluminum |
| Spark Plugs | Aluminum/Titanium/White |
| Ignition Wires | Black/Khaki/Brown |
| Rocker Arms (Valve Pushrod Housings) | Gloss Black |
| Exhausts | Rust |
| Intakes | Gloss or Flat Black |
| Propeller Governor | Black or Medium Gray |
| Distributors | Black or Medium Gray |
These are what would be “standard” colours for US aircraft. Other nations will have similar colours but not always the same. It is best to do a google search for the engine you are working on and finding any high-quality images.
How I do it
There is no right way to make these things and after putting a few together you will find your own way to get things done. But here is how I do it:
Cylinders:


You can go all black and then drybrush aluminum and that does work well. I go aluminum from a Tamiya Spray Can (AS-12 Aircraft Aluminum) and then I use Tamiya’s black panel line wash to bring out the detail. Most of the time this requires a few applications of the wash.
Exhaust Manifold


Again I start by spraying AS-12 Aircraft Aluminum. Once that is dry I mix Tamiya’s Medium Brown with a few drops of Nato Black. This is thinned to about 2/3 thinner to 1/3 paint mix and almost “misted” over the aluminum structure. You should get to a point where you have a metallic brown and you can do this by just patiently applying layers of the thinned paint. Lastly, I add on some Ammo Washes: Track Wash and Light Rust. I am pretty messy and uneven with it as rust tends to have a mind of its own. The last step is dabbing a bit of Tamiya Modeling Powders Rust all over the part. This gives it that rough rusty texture. I seal it all in with a coat of flat paint.
Crankcase and Ignition Wires


Both of these are 1/32 scale engines. On the left, the crank case was painted in a medium gray. To highlight the front I used a pencil to draw around the edge where the bolts are. I also used a wash around each of the bolts. I then used a very thin mix of darker gray and blended in the pencil line. Finally, I highlighted all of the bolts in silver.
On the right, I simply glossed and used a couple washes on the crankcase and around the bolts. Each was highlighted in silver. I think the copper cooling jacket around the crankcase adds a lot of interest to the engine. It was pained in copper and the brackets were masked and painted in silver. The whole thing was given several washes of Tamiya black panel line wash. Truly a versatile product!
For ignition wires, I have tried everything from the flat profiled things you get in Eduard Photoetch sets to copper wire and stretched sprue. Each has its charms. But the one thing that I truly like is Lead Wire:

I found this stuff at an outdoor store – they use it to tie fly fishing lures and it comes in a variety of sizes. I prefer lead wire because it has a wonderful combination of being rigid and flexible at the same time. In other words, it is very easy to work with and it keeps its shape once it is bent. It also paints up nicely.
Some Examples
Of course the larger the scale, the more you can do to bring out the detail. However, even in smaller scales, a lot is possible by only using paint. This one is a very small 1/48 Radial from a Japanese Ki-15 recon airplane. Paint and washes only. To accentuate the molded on ignition wires I first painted them black before only painting the very front of them in a Khaki colour:


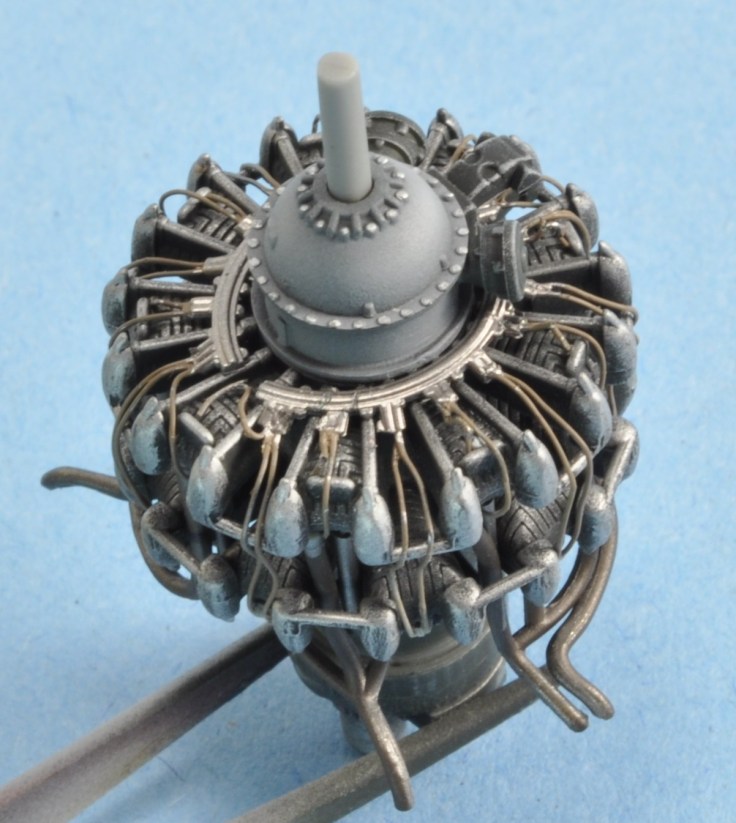
With the 1/32 Dauntless engine, I used shading and washes around the crankcase. I used thin lead line for the ignition wires and I scratch-built “connectors” for the wires from small bits of Tamiya tape and some paint:
On this 1/48 HobbyBoss Corsair engine, I used lead line for the ignition wires and did shading on the crankcase. Actually, it is one of the better stock R-2800 engines out there. Just never mind the exhausts, I did not have my rusting technique down back then!
The 1/32 Tamiya Corsairs come complete with gorgeous R-2800 radials. A friend asked me to build one for a build article so I stuck to an out-of-box build of the engine but I took advantage of the detail and carefully painted it. I did not add in the ignition wires but I followed the rest of my process.
Final Thoughts
The engine is one of my favorite parts of the model build. Detailing radial engines is a lot of bang for the buck and you really do not have to go out and buy aftermarket components to make this part of your model stand out. Some good reference photos, careful painting, washes, and even dry brushing can go a very long way.
I hope you found this article helpful. If you have any questions, other ideas on how to make model kit engines pop, or if you have some tips to share then please let me know in the comments!

This is a great article! I’ll be sure to refer to this when I next model a radial engine. Thanks for sharing!
All the best,
Darren
LikeLiked by 2 people
This is your best blog entry yet. Very informative and excellent photography.
LikeLiked by 1 person
Another A+ article that I will read over and over again.John
LikeLiked by 1 person
Impressive!
LikeLike
I’ve just found this article though you posted it some months ago. Very well written and quite inspirational! I’d like to ask about a couple of details —
1. What size wire do you usually use for 1/48th scale and for 1/32nd scale for the sparkplug wires?
2. I would guess you use super glue to attach the wires?
I too have bookmarked your site and will keep an eye open for more great tips and inspiration!
Best regards,
Mike
LikeLike
Hi Mike – thanks for stopping by, I am glad you like the site! Definitely attach the lead line with super glue. Gauge – well, I always go with the smallest possible because once I add on some primer and/or paint, they will get thicker. .010 or .015 in 48th will work nice. You can go a bit bigger in 32nd but not much.
LikeLike
Do you have any references for the BMW 801 and the associated details for the cowling I am desperate trying to dress up my 1/24 FW 190
LikeLike
Hi David – unfortunately I don’t have anything more than I could find on a google search. That said, there are tons of books on 190s out there.
LikeLike