I have always liked the look of golden age aircraft. The more streamlined the better. Something about polished metal, wheel pants and big engine cowlings. Aviation technology was changing so rapidly between the wars and it seemed as though every new model broke some sort of record.
First flying in May of 1936, the Mitsubishi Ki-15 was designed as a fast reconnaissance aircraft and a light bomber. It was nicknamed “Babs” by the allies and used by both the Imperial Japanese Navy and Army.
The Ki-15 has been kitted by a number of makers in 1/72 scale but it really wasn’t available in 1/48. That is until Fine Molds announced the entire family of Ki-15s in 2018. And what a kit it is! Well engineered and it fell together without any filler or fuss. In all it was an excellent build experience and up there with any Tamiya kit.
Parts and Instructions
The instruction booklet is very well done. It includes clear instructions with very clear pictures and the build sequence is broken down logically. You know, something that instructions are supposed to do.
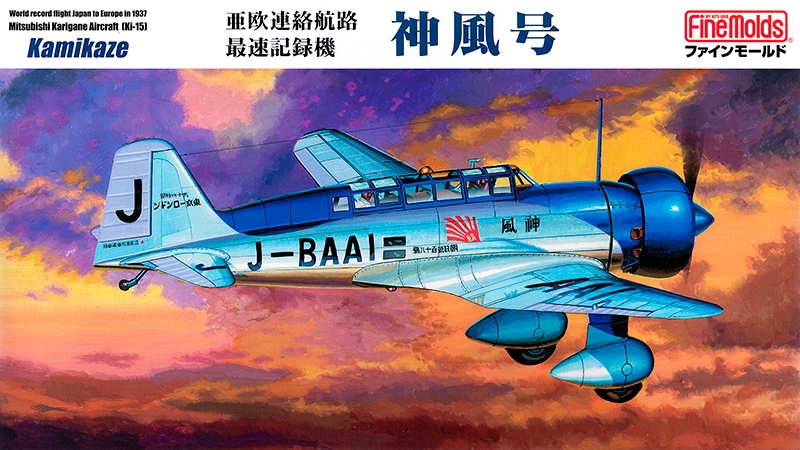
The instruction booklet also contains a detailed and accurate history of the Ki-15 called “Kamikaze” – at least I believe it is but it is entirely in Japanese, so I have no idea. Too bad as I really like this aspect of a model when the designer takes the time and include a short (or long) history. In this case it takes up a few pages with a lot of pictures and diagrams.
From what I have been able to find online: the Ki-15 was remarkably fast despite its relatively weak engine and the fixed undercarriage. At some point during the flight test phase, a Japanese newspaper purchased the second prototype. The aircraft was named “Kamikaze” and would go on to some fame: it was the first Japanese-built airplane to fly to Europe from Japan. Not only did it fly to England, it did so with a record setting time of just over 51 hours.
After its return to Japan, the Kamikaze continued to work for the newspaper until it encountered bad weather on a flight from China and had to be ditched. It was later recovered and put on display only to be destroyed in a bombing raid late in the war.
Cockpit
As far as kit cockpits go – this one rates up with the best current models from the top manufacturers. However, there is a slight downside: due to the “closed” nature of the cockpit, much of the detail will be lost forever. The sidewalls are molded separately so it is easy to paint and highlight all the detail. The seats and instruments can also be painted or decaled. I’ve included these pictures to remind me of the nice cockpit this kit has.


Engine
What a little gem of an engine. Unlike the cockpit, the open cowl will allow you to see a lot of this engine. So it pays to invest your time and to do a nice finish. The details are very easy to paint. I did not bother adding wire as the molded on detail was perfect. I simply sprayed aircraft silver, highlighted with panel line wash and then hand painted the “wiring”. The exhaust was sprayed silver and then a diluted spray of brown/black was applied. Before I installed the engine I used tamiya’s weathering powders to get an even deeper rusty look. The ends of the exhausts were treated to some black panel line wash as well.


Paint
I decided to forego priming this model as I used decanted Tamiya AS-12 spray lacquer for the main colour. AS-12 is the perfect colour and sprayed beautifully with a bit of Tamiya lacquer thinner. Some modelers have luck spraying decanted paints without thinning. I am not one of these modelers.
The blue wave was the reason I went for this model and I used Vallejo Model Air “Deep Sky” for the blue parts. The wave was masked using the diagrams in the instructions as a guide. I created a custom paper template to figure out the contour of the wave so I could replicate it on both sides of the model.
I painted the fabric surfaces a mix of Tamiya Medium Grey and white. I do not have exact proportions but I wanted to lighten the grey until it had a nice contrast with the silver but not overpower the plane’s finish.

There were a couple of oopses (paint bleed) but this is where using Tamiya AS-12 comes to the rescue. Just reverse the mask and spray more silver.
Decals
I am always apprehensive about using kit decals but these were excellent. They are perfect, in register and easy to work with. I glossed the surface with a coat of Tamiya Clear followed by a misting of Mr. Color Leveling Thinner.
The large lettering on the wing tops and bottoms are two very large decals with a lot of clear film between the letters. I was very worried about air bubbles and silvering so I cut these apart and trimmed the letters. I then soaked the decals in a little warm water and used microset to place them. I was very happy to see these decals immediately begin to settle into panel lines and over fine details. Keeping things aligned was easy and I only used a little microsol on the rising sun decals on the wing tips.

")
Finish
My guess was that the Kamikaze was a gleaming polished work of art on this historic flight. So after the decals were on, I re-glossed with more Tamiya Clear followed by Mr. Color Leveling Thinner.
The landing gear fits positively into the slots at the bottom of the wing. No worries about alignment here – once they “snap” in, you have no need for further adjustments. The little tailwheel is tricky to paint due to its very small size but just take your time with it and have a very small brush handy.
The engine unit easily slips on the front of the model – again, the engineering of the pieces is perfect. I chose to drill and install some Ushi line for the radio aerial to complete the kit.


Final Thoughts
This was an excellent kit with a unique paint scheme that will light up my display case. As I said before, the engineering and fit were excellent. I would go so far as to rate it as good as any Tamiya kit. The wonderful surprise was the quality of the decals. Downsides? I’d have to say that despite the quality of the cockpit, the design of the airplane makes for seeing the cockpit almost impossible – this is probably why the canopy comes in one piece.
Given it’s sleek lines, I believe the kit looks a lot better with the canopy all closed. I highly recommend a masking set for that canopy because it took a long time to mask. However I wouldn’t recommend anything else: if you invest in a vac canopy and cut it open, very little of the cockpit would be visible anyway.

Thanks for writing about Kamikaze, I’m glad you found one to build!
LikeLiked by 1 person
An excellent build of a beautiful aircraft! I have built a few Ki-15 / C5M in 1/72 scale and have always liked their looks.
LikeLike
Thank you! I bet it is very small in 1/72
LikeLiked by 1 person