Small, sleek, nimble and for a while during the first half of the Pacific War the Zero was deadly. While the Japanese Army Air Force seemed to constantly be looking for new models for a variety of tasks, the Navy stuck to this airframe and squeezed every ounce of performance out of it. By the end of the war the Zero was outclassed by its opposition despite a considerable number of performance improvements.
After my Corsair collection, I have three Zeros built including another A6M2 and an A6M5 – both of which are featured on this site. Hasegawa, and Tamiya allow modelers to collect nice models of pretty much every variant of the Zero.
This model is of the A6M2 version of the Zero as it was after November 1940. There are plenty of places on the internet to help you figure out the differences between all of the many variants (and sub-variants) of the Zero so I won’t replicate that information here. Suffice it to say: if you want to model a Zero that was flying at the time of the Battle for the Coral Sea, Pearl Harbor or Midway, this is your model. Starting with the Solomons and thereafter, the IJN began introducing later Zero variants.
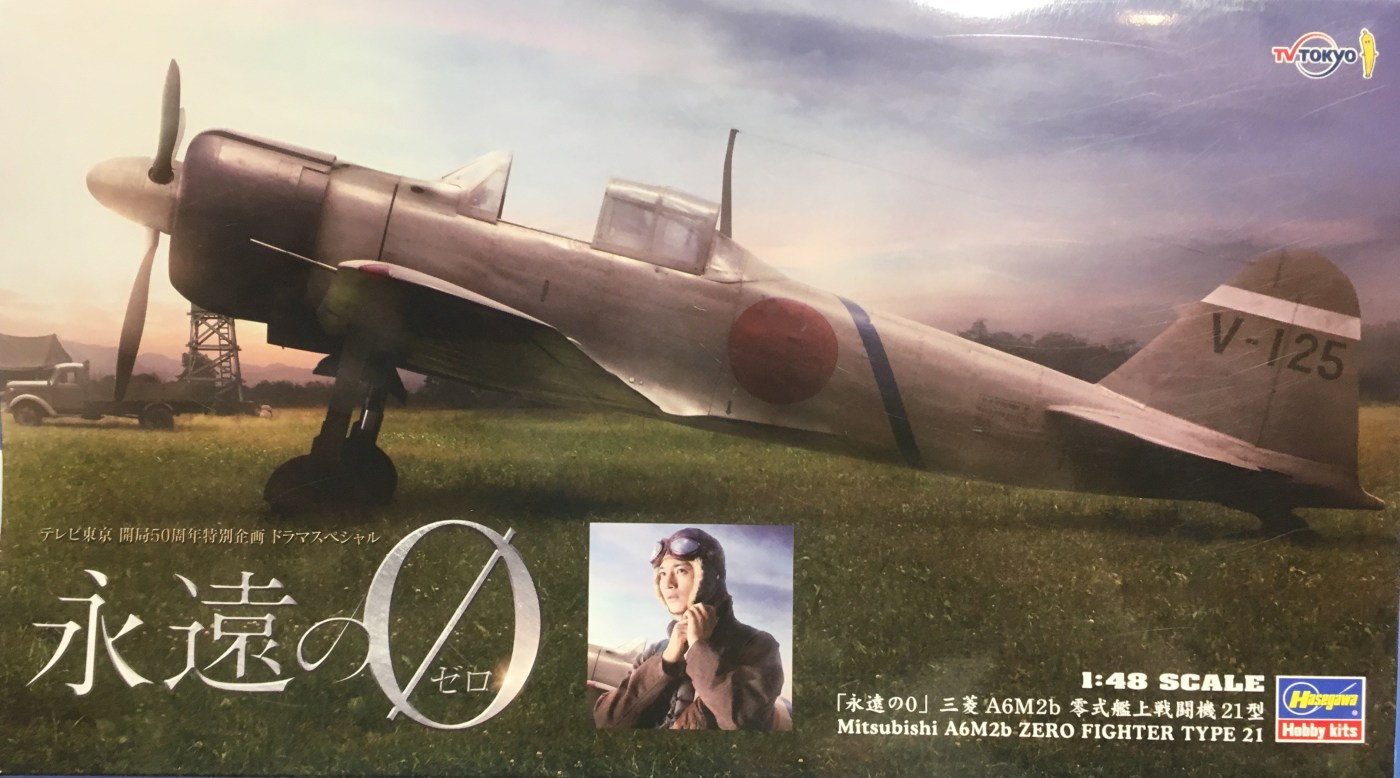
Hasegawa’s 1/48 kit of the A6M2 is from 1996 and like most Hasegawa kits, it seems to be re-released regularly with new parts and decals. This particular boxing was released in 2015 with updated decals. This model is a movie tie in for the Japanese Language movie “The Eternal Zero” (an excellent movie with stunning flying sequences).
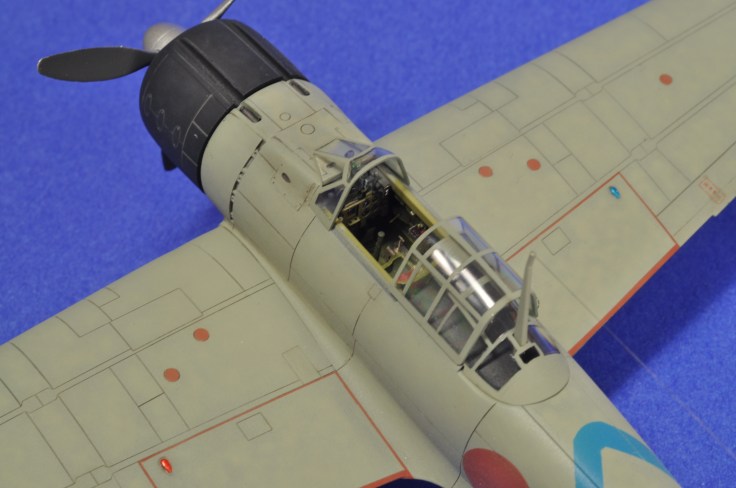
This build was the last of my shelf queens that I wanted to complete this year. While you are not getting a 2018 kit, the detailing is good and there is no flash. I found and fixed a couple sink marks on the wings. The cockpit detail is excellent on its own but I incorporated a color Zoom set from Eduard which really kicked things up. Considering the large canopy, this additional detail will be seen and appreciated after the cockpit is closed up.
This truly is a “two sprue wonder” if there ever was one. I encountered no true build challenges with this one. Everything fell together nicely and no filler was needed. The one piece lower wing keeps everything aligned if you are careful when mounting the fuselage.
I didn’t run into any difficulties – but you might want to be careful with the following parts of the model:
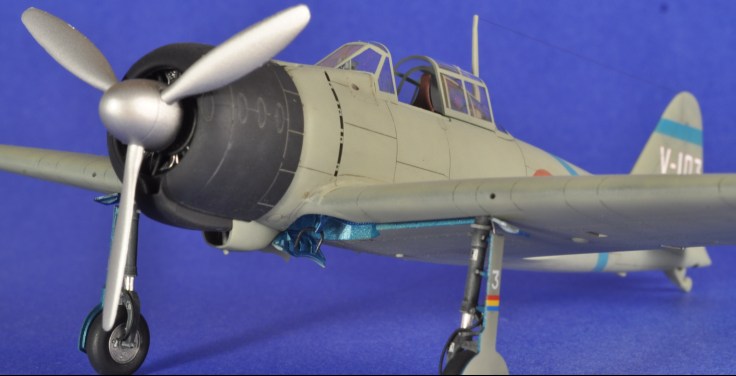
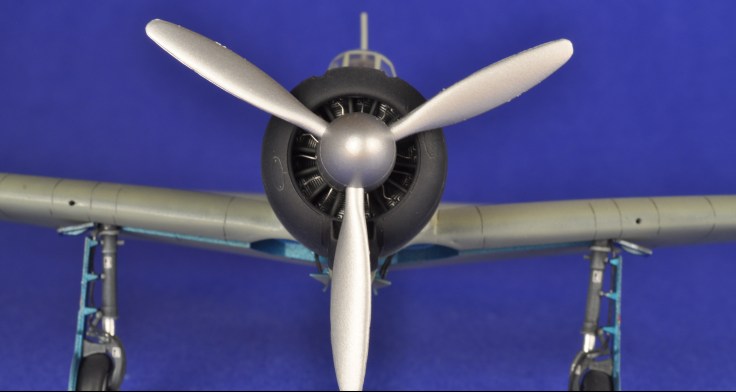
Cowl Guns
The Zero is armed with cannons in the wing and machine guns on the upper cowl. At this scale the cannons are simply represented by holes in the wings. The machine guns are represented by mini barrels that have to be nestled into troughs by the cowl. The fit is not precise and if you are not careful you can lose a barrel inside the closed up fuselage…. never to be seen again. Yes I have practical knowledge of this.
Wing Tip Lights
I did not glue on the wing tip lights (nicely molded on the clear sprue) until after the painting was complete. This required some careful cutting and sanding in order to blend the curve of the lenses with that of the wing (without leaving any gaps). All this needs is light sanding and constant checking to get a great fit and it saved me from trying to keep on the corner masks that would have been necessary had I glued them on earlier in the build.
Rear Deck of the Canopy
The windshield fits like a dream. Seriously – the fit is as good as or better than anything I’ve come across. But he rear canopy? Not so much. I am not sure why it did not lie perfectly flat and when I build another zero I will spend more time with this. Its not awful but its not perfect either.
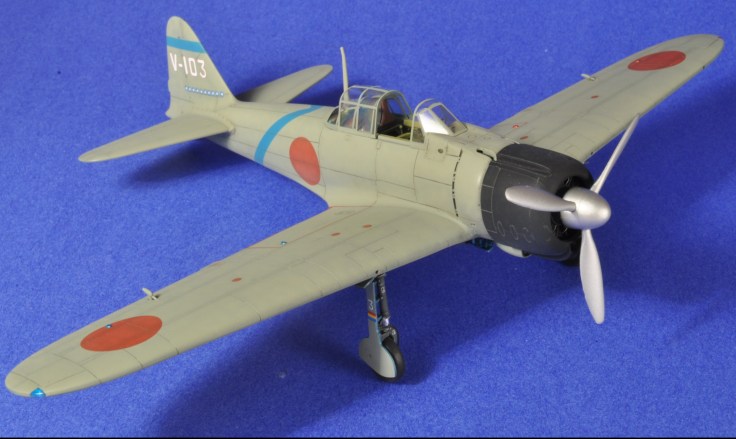
As far as challenges go – that is it. I decided to avoid one potential challenge by avoiding the kit decals as much as I could. I painted on the markings (with the exception of the tail markings). I am pretty much convinced the Japanese put diagonal stripes on their aircraft in order to frustrate model builders 80 years later. But I did paint it on after very careful and creative masking.
Paint
The model was primed in black and marbled using various shades of Tamiya XF-76. I did some thin coats of XF-76 to blend everything in. I am still getting used to this technique. I aim for more subtle than obvious. I am not sure whether I have it right though.
Techmod Markings
I chose to finish this one as one of Saburo Sakai’s Zeros. There is plenty written about him including this excellent autobiography. I could’t put it down. Whether or not his experience is unique among the IJN pilots, his flight home with his damaged Zero and horrific injuries is the stuff of legend. The Techmod set is excellent – the decals are very thin and in perfect register. I caution any use of sets or sols – warm water and a glossy surface will do.
Final thoughts
If you want to try a WW2 prop and you don’t want to put down a lot of cash for the experience, the Hasegawa Zero is hard to beat. They almost assemble themselves with very little fuss. I see them at pretty much every hobby show I attend for very reasonable prices. There are also plenty of marking options out there. On the shelf I have Zeros from A6M1 all the way to A6M8 and I intend to build all of them.

Looking to get back into the hobby after a 20+ year hiatus. Looks like this might be a good one to do. Love your blog and your appearances on the modeling podcasts.
LikeLike
Hi George – I agree, you can’t go wrong with the hase or tamiya zeros and they are easy to find. Thanks for your kind words – much appreciated!
LikeLike