
An Apache?!?
This one has been a long time coming because I have always been inspired to build an Apache. The inspiration came from my days of “flying” it in Gunship – a Microprose Flight Simulator. This was my first taste of a flight sim and I played the hell out of it. No, it was not realistic but it certainly gave players a sense of flight and did have basic weather effects. More importantly, it was a fun game to play without the learning curve of many “realistic” flight sims. I got pretty good at it as well except that I could never get the Medal of Honor. Every time I tried to, I’d just end up getting shot down. I’m sure there was an easier way to get it. I loved loading up my FFARs and Hellfires as well as a couple of Sidewinders (just in case a “Hind” came along) and then getting out to the helipad.


While it definitely shows its age now, Microprose’s Gunship started a love affair with all things Flight Sim (at least until Falcon 4.0 came along) and contrary to one of those long standing hobby myths: this video game definitely kept my interest in model building.
Ever since playing Gunship I wanted the big Revell 1/32 Apache but it was just too big and too expensive and completely out of the reach of this modeler when he was in middle school. However, I did build a 1/144 Dragon Apache back in the day and I remember that I did a pretty good job on it.
Most recently while attending the IPMS Nationals in August 2018 – came across this model of an Arizona National Guard Apache:
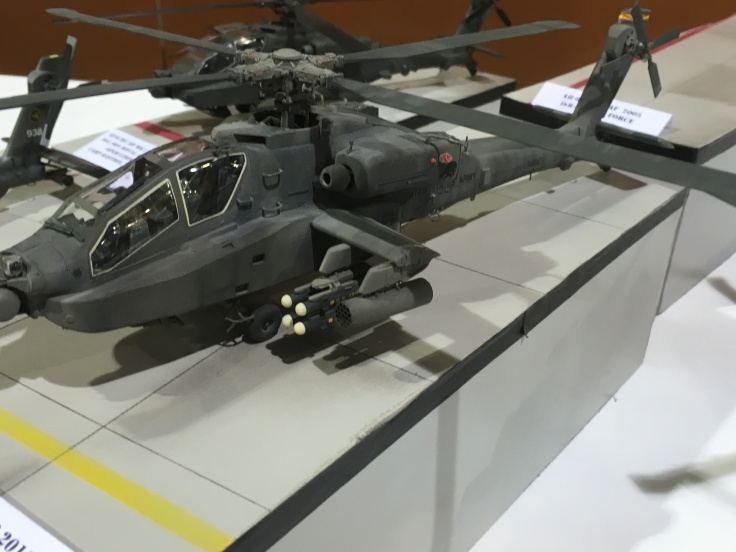
I then had to build this mean looking thing to commemorate my own IPMS Nationals visit.
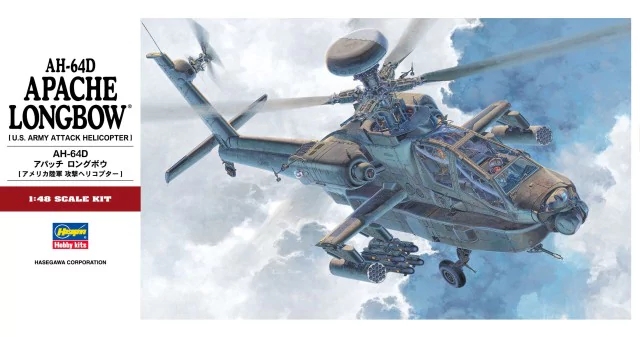
The 1/48 Hasegawa AD-64D was released in 2001 as a New Tool and has been re-released a number of times. And for a while the Hasegawa Apache was THE kit for any Apache builder. There are plenty of open box reviews of the kit out there and it is a very impressive kit in the box. I bought mine at the Ajax Show years ago for $15. A definite steal.
In terms of aftermarket, I went with the Master AH-64 barrel, pitot and antenna set, the Eduard color set for the AH-64D and the Eduard mask set. An ARC buddy sent me the Apache decals from the 2010 IPMS Nationals (thanks again Dutch!):


The Build
Now let me first say that my Hasegawa kit building experience comes from their excellent 1/48 WW2 kits. The Tony, Zero, Corsair, Tojo, Oscar, Jack and even the elder Shinden have been described as “2-Sprue Wonders” and “Shake ‘n Bake kits” – and save for the occasional (and ever so slight) mold misalignment issue, I can personally say they are wonders.
However, the Apache comes with considerably more than two sprues and not all the parts assemble so wonderfully:


And this was the best I could get it to fit. I was able to improve it with some strip and I’ll talk about these more in the build.
The Cockpit
Naturally the build starts with this very detailed cockpit. In my opinion you do not need to add a lot here. The eduard set certainly doesn’t add much to it – some armor plating, pedals, a couple of small details and the screens for the monitors. The bigger issue is how to paint it. The real thing is black but if you were to shoot flat black in here, you would lose a ton of detail. Keep in mind, the canopy on this model is huge and you will see a lot of your cockpit work. I chose to go dark grey (Tamiya Nato Black and RLM Grey in a 75:25 mix). I then did drybrushing with citadel paints (fortress grey and white) and a pin wash (Ammo Wash) to bring out the details.
The only issue I had with the pit was the short shot of the pilot’s console hood. To fix it I snipped the two pieces from the fuselage (which is a strange place to put them anyway), I cleaned up the short shot piece and I used evergreen styrene to match the thickness of the original plastic. It was an easy fix:


The Canopy
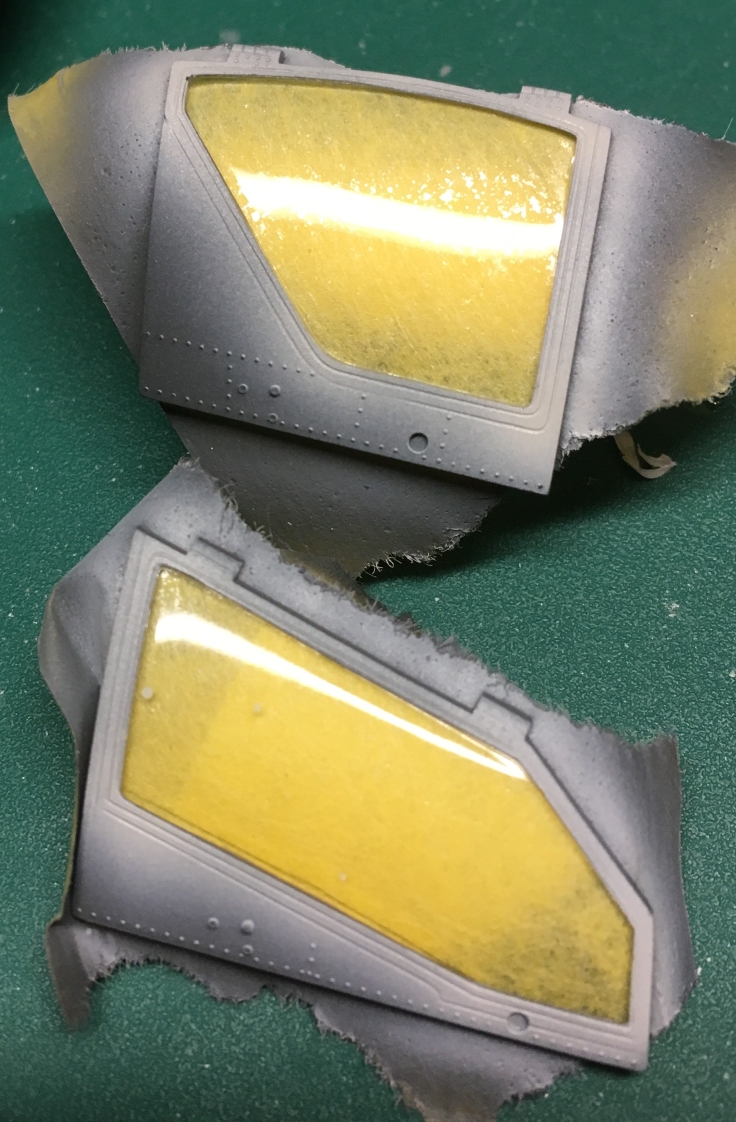
Helicopters tend to have a big glass canopy. The advantage is that after you painstakingly build, detail and paint your cockpit – it can actually be seen! The downside is that the glass panels tend to be large and flaws will show up easily. I decided to polish and wax the canopy on this build. I used Tamiya’s Fine and UltraFine polishes and then Tamiya wax. I am not sure I improved the canopy much but at least the masks adhered much better….speaking of which…
The Eduard canopy masks for the AH-64 are clever in that they have 2 slightly different sizes. This allows you to paint the “weather stripping” around the windows. I am 99% sure its not weather stripping but it tends to be lighter color than the rest of the canopy frame. I masked with the smaller masks; shot my dark grey mix to match the interior and then followed with an “off white” mix of Gloss White with some Buff mixed in (approx 75:25). I removed the small masks and put on the slightly larger masks to preserve this off white stripping when I apply the base color to the model.
The Fuselage
Despite the convoluted appearance of the instruction sheet (it is a hot mess) if you have a few builds under your belt, this model goes together like any other. And you can move around and build sub-assemblies while the main build is either getting clamped together or some putty is drying (yay).
I did have issues with getting the fuselage together on this model. No matter what I did, I could not get the fuselage to completely close with the cockpit tub installed. I checked everything and I just could not figure it out. Mind you, by the time I gave up, the “gaps” were such that all I had to do was clamp – but still, it was strange. As well the two halves did not mate 100% – I had a very small step at the bottom. I even did the “bit by bit” approach to gluing and aligned it as best I could. But if I wanted the top to be perfect, the bottom was going to have a slight step. On an airplane model this is no big deal and it happens. On an Apache with raised rivets – this is a bit of a problem! I lost some rivets to sanding and I got them back by punching in some replacements. Not perfect but there were only a few to replace.
The Eduard photoetch brass cuts, sands and fits very well and at least the Eduard instructions were clear. As a bonus, the photoetch actually improved the look of things so it is worth the effort and money. The only parts I didn’t use were the 2d wiring – for those I just used actual wire or lead line.
I kept my head on a swivel for this build as there are all sorts of bits and pieces that need to go on the fuselage in seemingly random order and placement. Some of these are replaced by or enhanced by photoetch.


Chain Gun
The Master bits to improve the chain gun were excellent, easy to work with and relatively easy to paint. This is a fairly prominent part of the model so I really wanted to accurately reproduce the cannon. Other than the barrel assembly, the Hasegawa parts are kept. Using some high resolution reference pictures I figured out where the hoses and wiring went as well as how to paint the whole thing. The end result was definitely worth the extra effort.
Main Rotor
Seeing as this part would be very visible to anyone looking at the model, I wanted to put on as much detail as possible to make it look busy. The Eduard set contained some “side plates” for each rotor blade assembly. But the piping was flat and didn’t look right. Again, high resolution pictures were used to figure our what is painted what as the Hasegawa instructions were not very helpful.
Pylons & Weapons
I can tell you that the hellfires that come with the kit are actually very nice. All I did was drill out the engines (thank you references) and use paint instead of the decals. The pylons are very easy to work with and detailed. My only issue here is the installation of the pylons onto the little winglets. Hasegawa has nubs that fit into very large openings on a wiglet with a curve and lots of rivets. In other words, I had to glue each pylon individually and hold them for what seemed like days. I am sure there is a better way of doing this.
Paint
I debated priming or diving right in with paint but priming won out. There is a lot of brass on this model and there are likely some areas that might need attention once they are revealed by primer.
So here is where I learned a few things. I do not usually build anything modern or army related so I just figured I would paint the Apache in “Olive Drab” but when I was looking at photos of the real thing, I noticed the paint looked different. I then searched the internet to see what others used to paint their Apache models. I am glad I did. This thing is painted in something called “Helo Drab” – and here is a comparison between a generic “Olive Drab” on the left with “Helo Drab” on the right:


Apparently this is a special paint that is designed to lower the IR signature of the Apache and it fades quickly. I do not know if this is true but I read it somewhere on a model forum – so it might be more myth than fact.
More importantly – this drab almost looks grey! And it looks completely different in different lighting conditions (even with high resolution shots of the same aircraft). I know there is a “match” with the Model Master line I tend to stay away from enamels and MM Acrylics as I do not find them easy to use. Instead I decided to mix my own. After some experimentation I came up with a mix of Tamiya Black Green with Flat black (10:1). I found that any more black in the mix just turns it into a variation of Nato Black.


Final Thoughts
I had some high hopes for this model but as my model buddy said: they can’t all be winners. The Apache is done and due to the fit issues, gaps and difficult to fix issues with this kit, I had a so-so time doing it. I think the aftermarket added to the final product. And despite my missing the mark with the build, the model definitely has presence with just a small splash of color.
I won’t rate the kit but I will offer some advice to anyone looking to build it:
- No matter what I did in terms of sanding, aligning, re-aligning and multiple attempts – I could not get the cockpit into the fuselage without the need to clamp the nose and the top of the fuselage pieces. It may have been that one of the fuselage halves was slightly warped but I couldn’t be sure. While I did get them pretty close to closing clean, I never could.
- Aside from the area directly in front and behind the cockpit, the top of the fuselage joined very clean but the bottom was stepped very slightly despite my careful “bit-by-bit” gluing of the join. Normally not a problem but this helicopter has raised rivets all over the back of the fuselage and I had to sand a few away to get the join perfect. Luckily there are quite a few doodads that attach to the bottom so there are few rivets to worry about. I ended up punching in the missing rivets as there were too few to justify buying an Archer raised rivet set
- Some major gaps on the bottom front of the fuselage. I suspect this has something to do with my not being able to get the cockpit in cleanly. I filled them in with styrene and putty.
- The shotgun explosion instructions – very problematic. While Hasegawa’s parts were extremely detailed and it was obvious that a lot of care went into the molds. The instructions were confusing and unhelpful. Not enough detail and/or an arrow pointing to the blind side of the model where a part was supposed to go. While I have no issue with reviewing references for paint and finish, builders should not have to hunt down reference photos to understand the placement or alignment of parts.
- Again… kit decals…. sigh…. due to the rivets and other raised features of this model, I urge everyone to dump the Hasegawa decals and get some aftermarket set. The IPMS Show decals went on beautifully…. just sayin….
Inspirations
I’ve already written about my like for all things Pacific War. This build was inspired by playing a flight simulator years ago as well as my seeing an excellent model of it at a show. I am glad I finally pursued it despite it not being my best work. So what inspires you? Video games, books, movies, trips to museums? Models you longed for as a kid?
I’d love to head about it in the comments!

Very nice build. I have this kit as well. Thank you for the detailed write up so I know what to expect.
LikeLiked by 1 person
Funny you say, the final inspiration came from a show. Quite a few kits in mu stash have been bought after seeing a made example on the tables. The last one I remember was buying the Trumpeter 1/48 Albatross after seeing a suburb engine grey and dayglo example on the comp table. That was 2 years ago, ands its still in the stash
LikeLiked by 1 person
Nothing wrong with a healthy stash! There have been a few show models that have inspired me to run back into the vendor tables to pick up a kit or two. Overall though, a show just inspires me to build in general. I love going to them.
LikeLike