It’s funny that I have a strict ‘no hoarding’ code when it comes to all things domestic. Yet, after every model build, I keep all of the ‘leftover’ model parts. These might be unused drop tanks, extra missiles or a myriad of optional bits. Sometimes it isn’t my fault – some kits just come with a pile of extra parts that can’t be used anyway.
But I always keep em!
So, after many many years of model building, I have amassed a few bins worth of “spare parts”. It’s ridiculous. I am wondering if I am the only one who does this. Why do I do it? I think I can count on half a hand how many times I gone into these bins to recycle a part. What do other people do? Just finish the kit and chuck whatever is left over?
Right now, that seems like such a good idea. Some of these parts are older than the Little Intern.
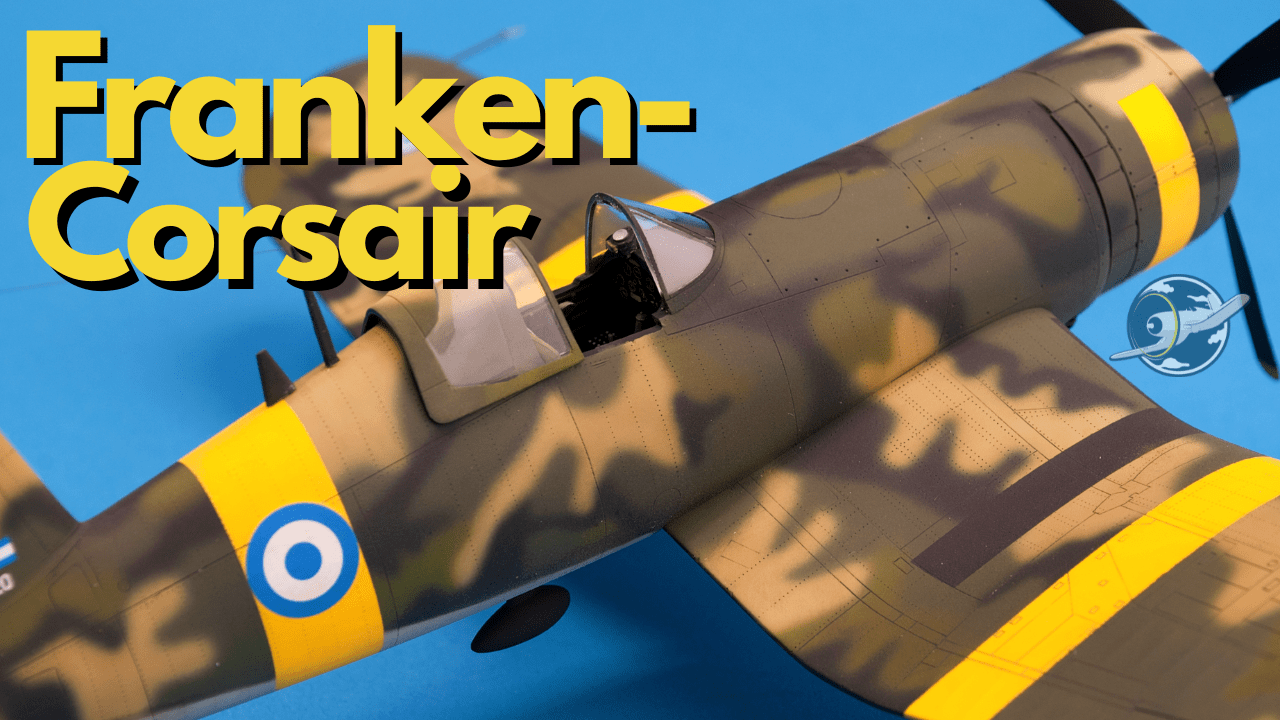
So, yeah, I have got to dump this detritus. This spring I am going to do it. I swear. But before I do that, I noticed a disproportionate amount of Corsair bits. And I wanted to know: Can a decent Corsair model be stitched together from spare parts left over from years of building kits?
Here Is What Am I Starting With

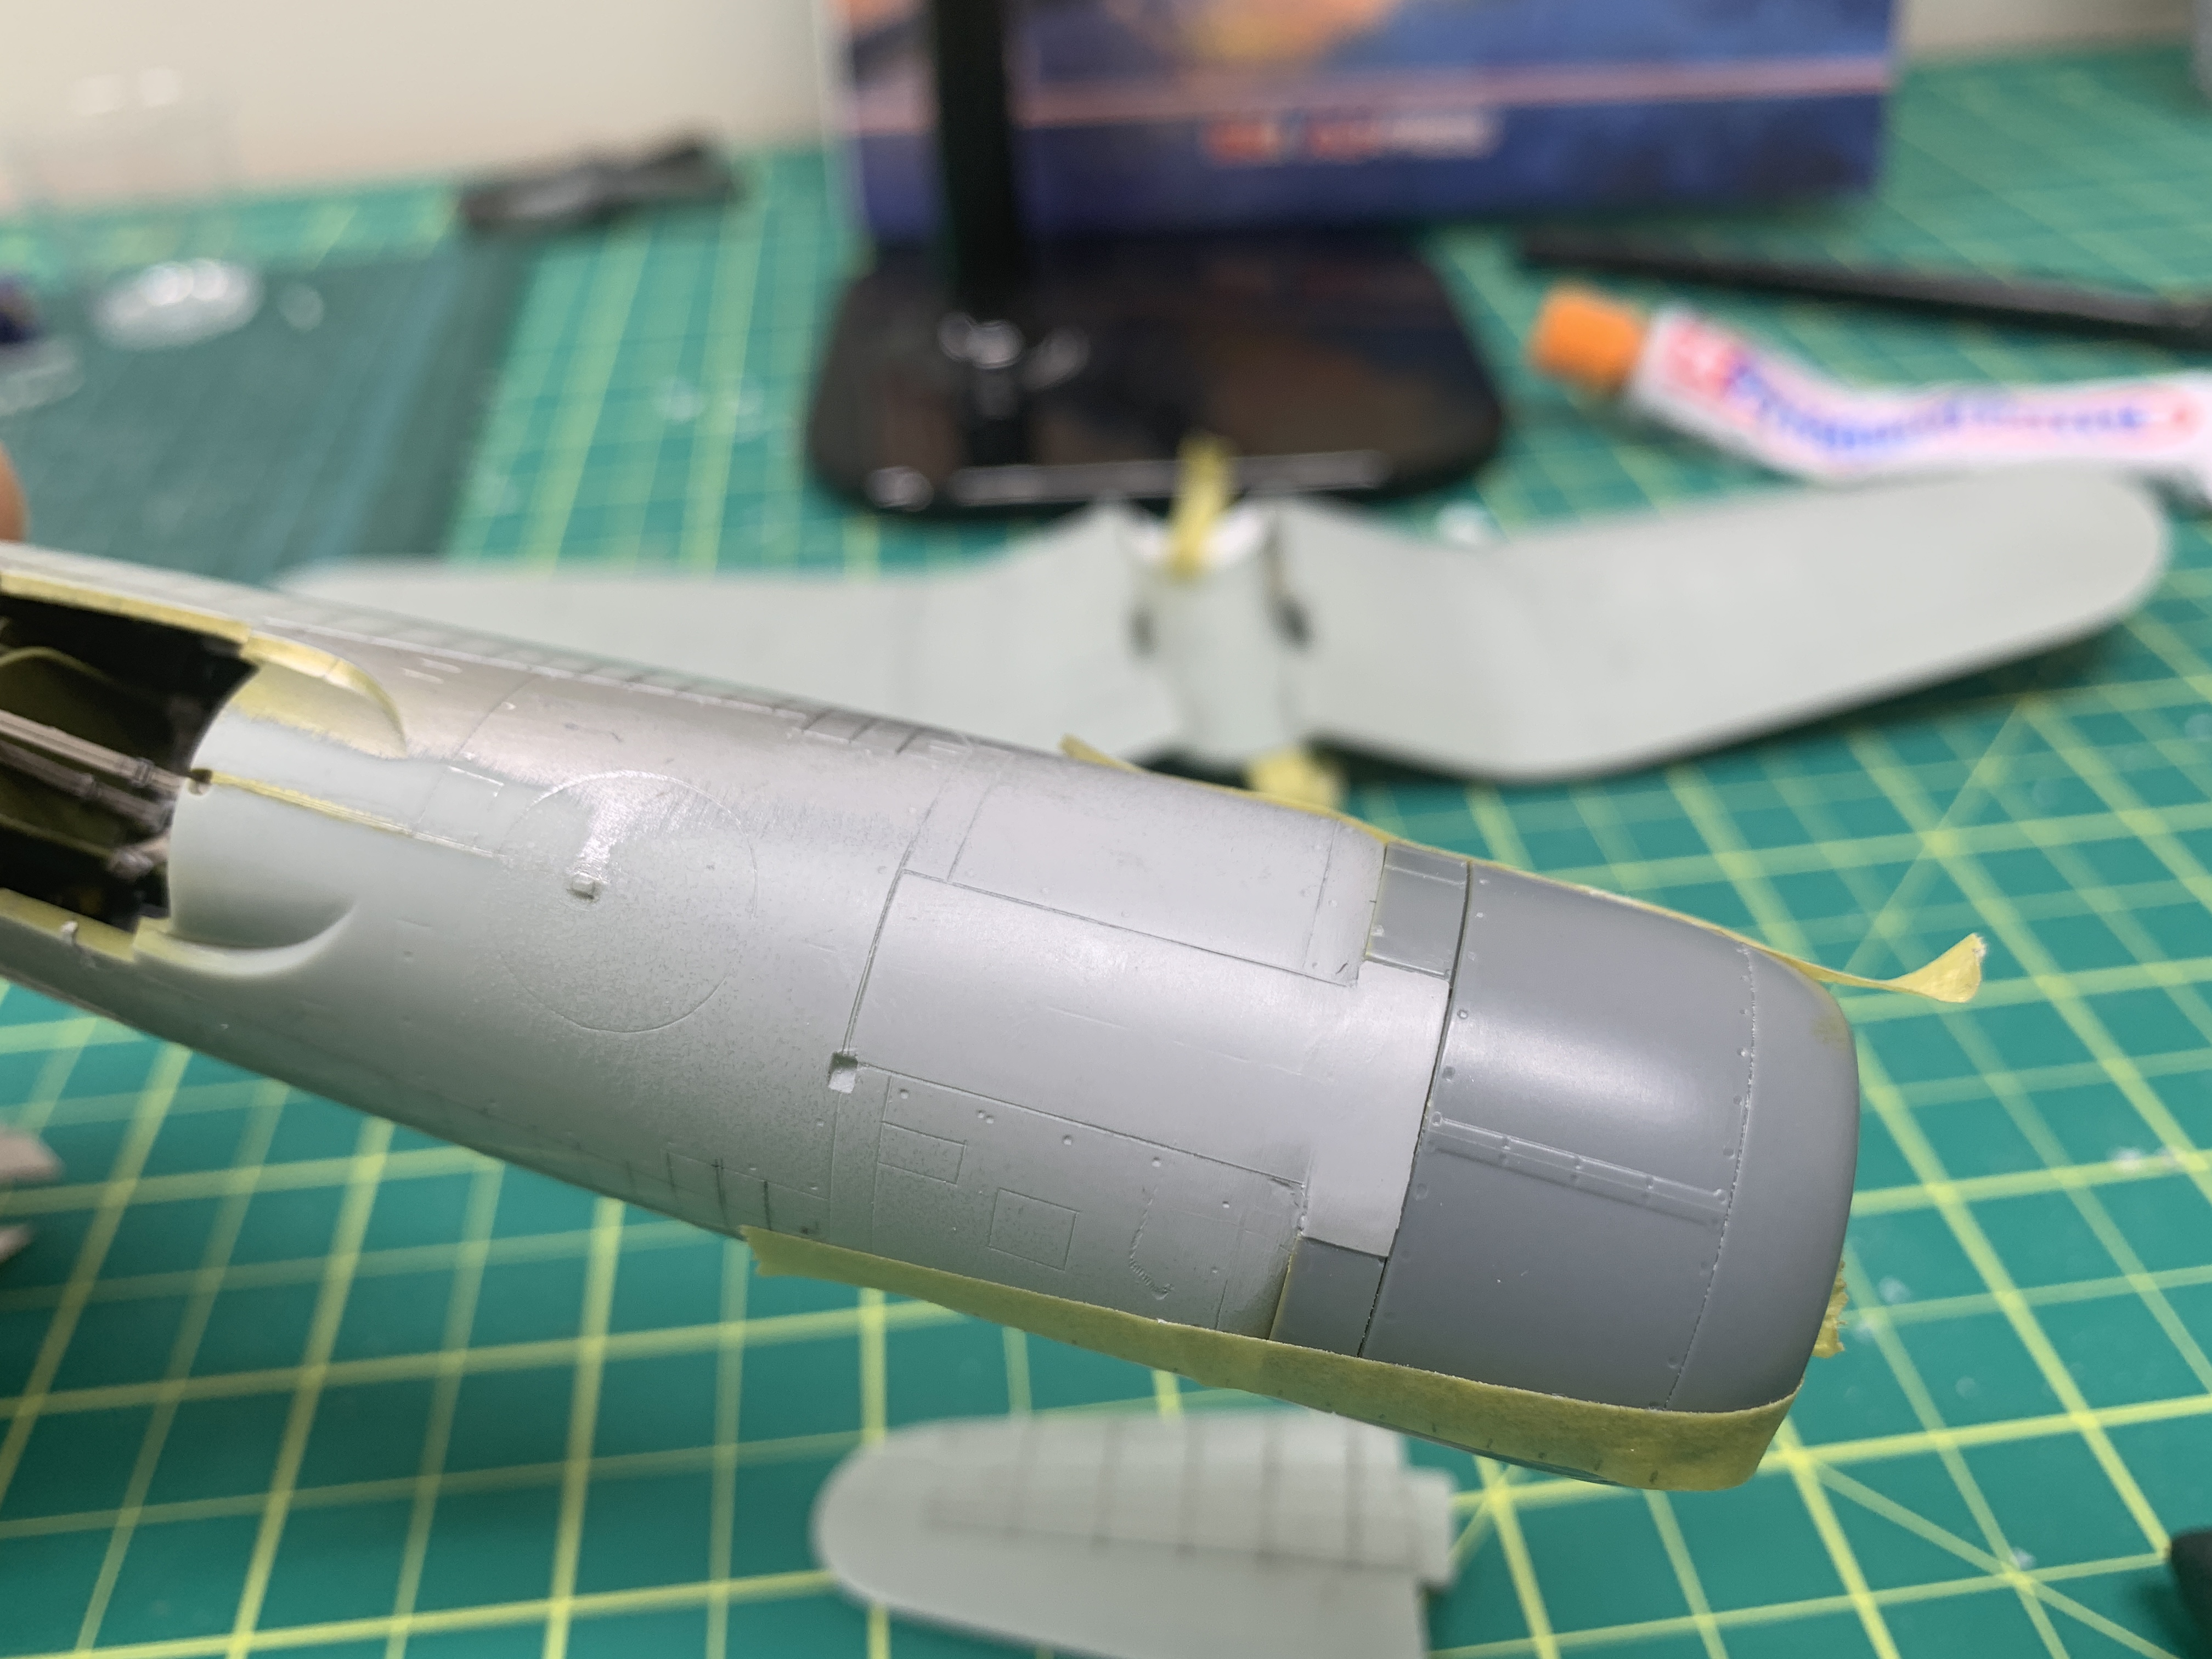
Well, let’s see. I have built more than a dozen 48th scale Corsairs. We’re talking Tamiya, Hasegawa, Hobby Craft, and Hobby Boss. Oddly, no Academy. And with these builds I have kept various bits that were replaced with aftermarket cockpits, engines, gearbays, and various prickly bits that look 1% better when they come in an aftermarket baggie!
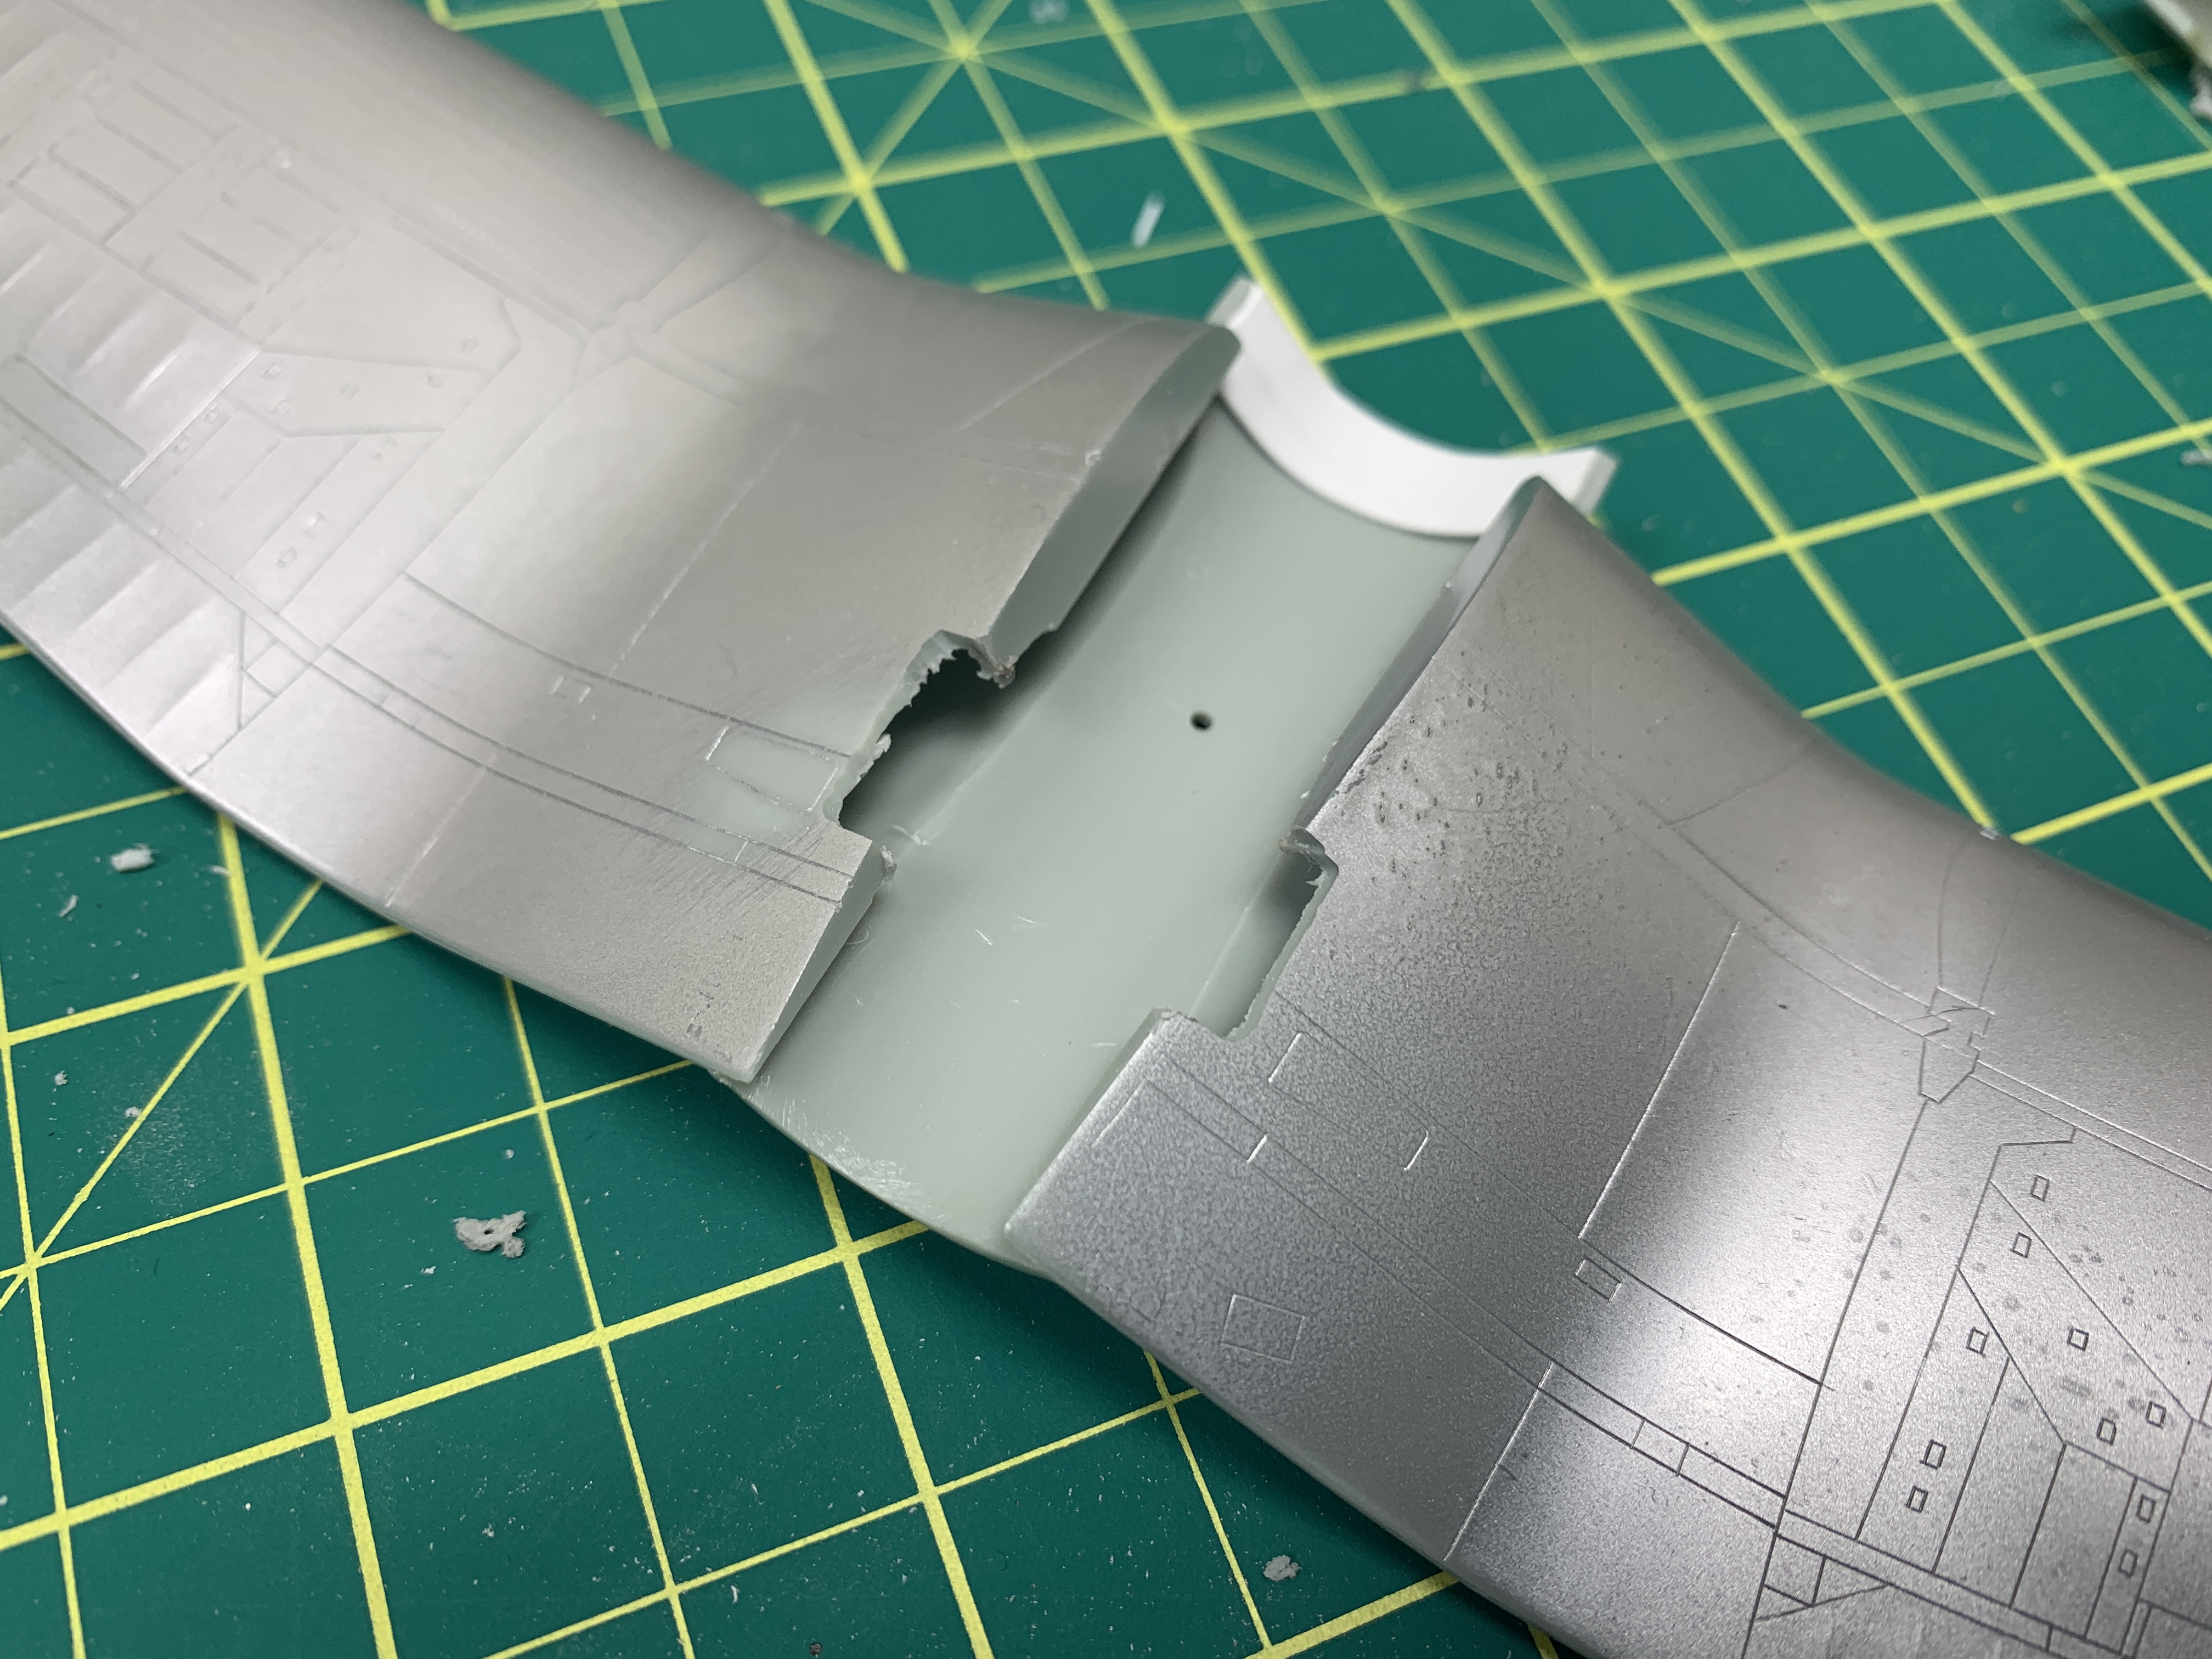
One of the bins had a mostly complete, but slightly pre-enjoyed Otaki Corsair. And don’t let some old modeler start to talk about how much “better” Otaki kits were. Oh sure, they may be “better” the way that the 1982 Dodge Omni was “better” than the 1978 Dodge Omni. But anything that is slightly better than crap, is still crap. Say it with me now: The Otaki kit is crap.
And that is what I am starting with. Actually, not all that bad – I know I can improve a number of things with the Otaki kit. I just have to hope I can fit them together.
What Is It Going To Look Like?
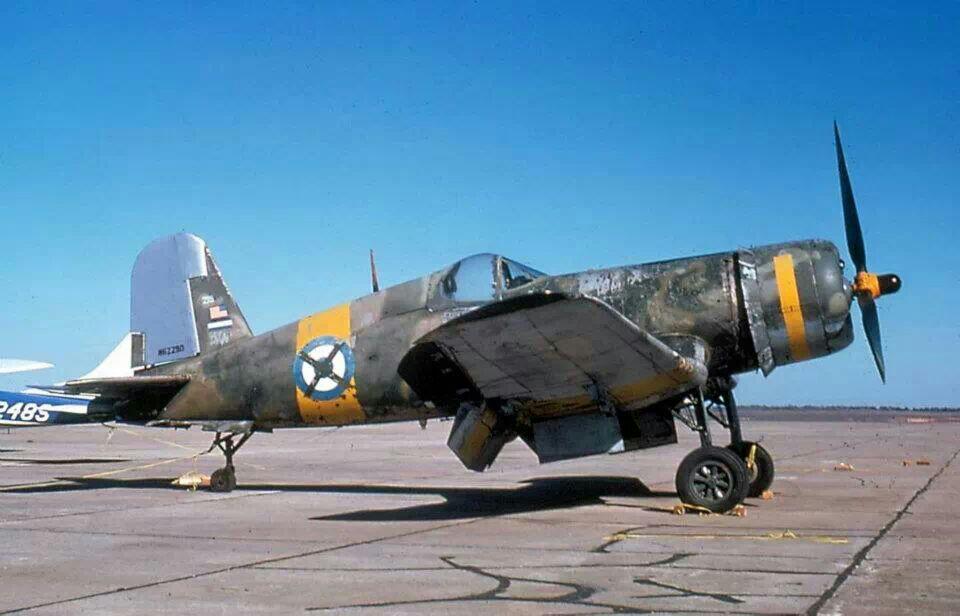
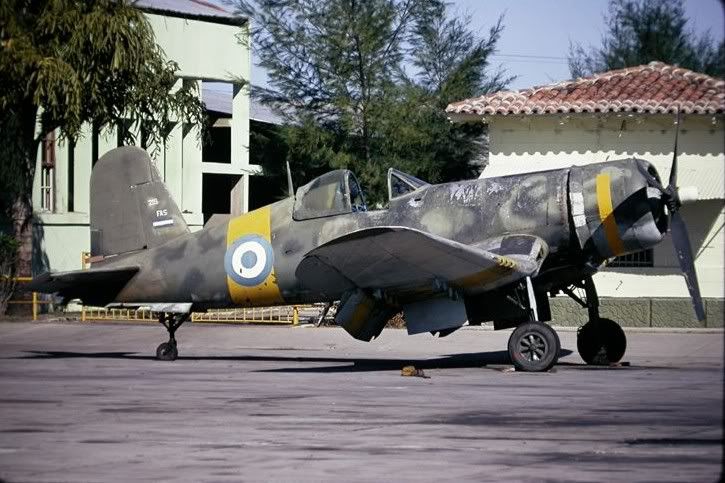
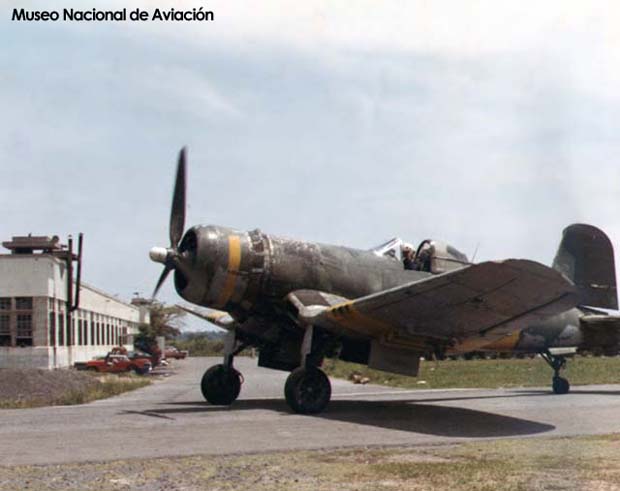
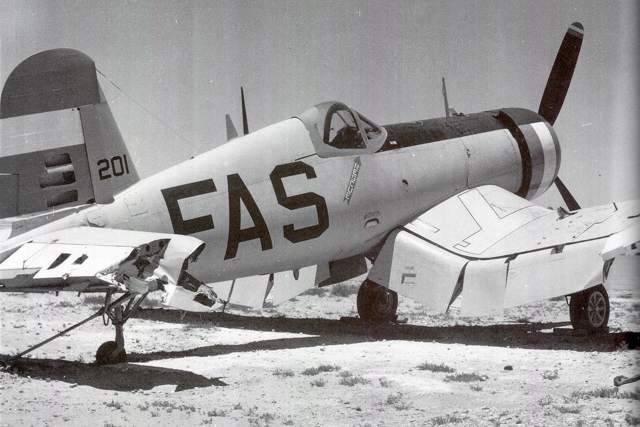
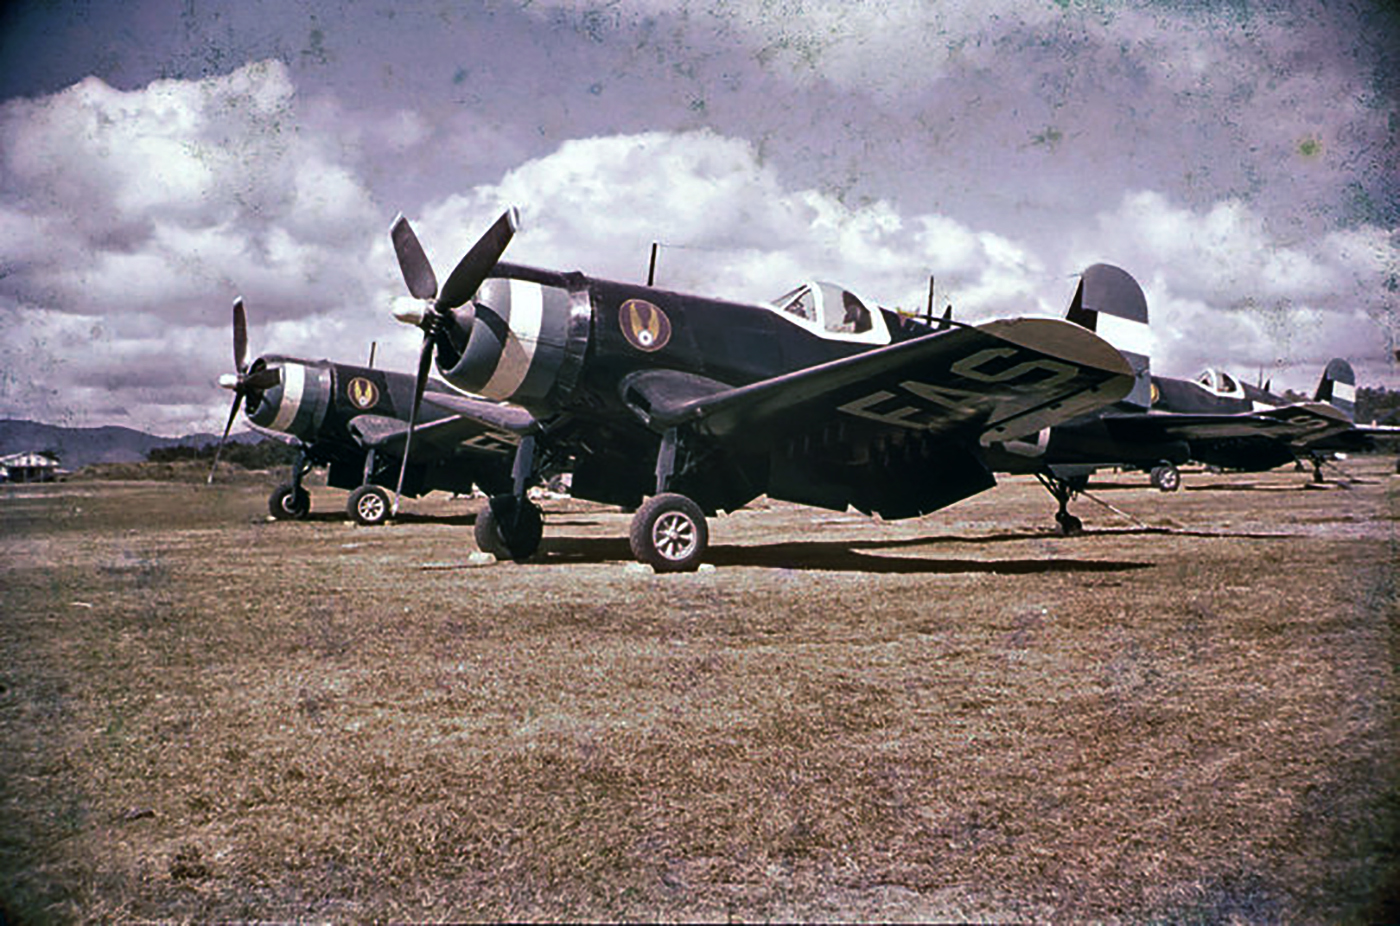
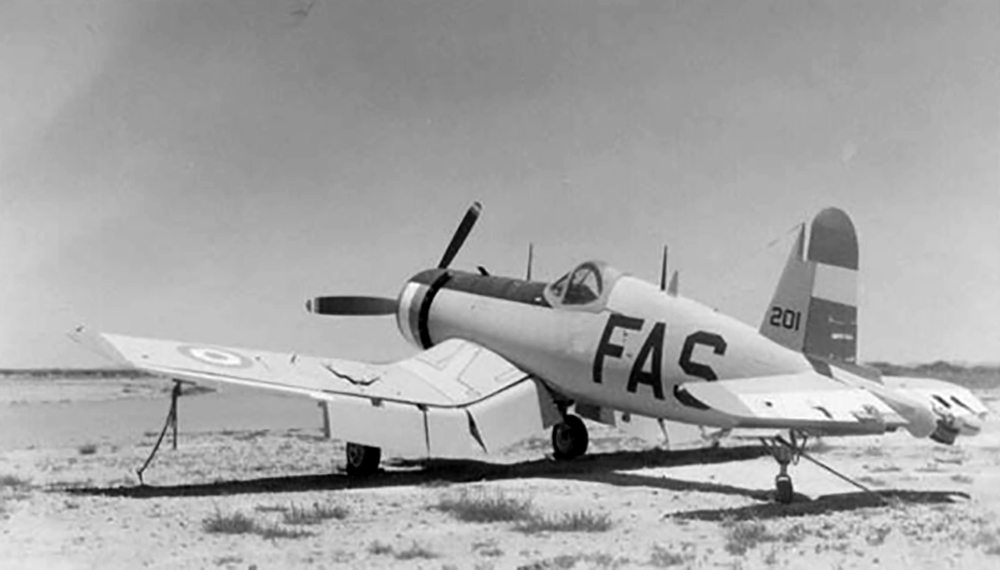
This will be the fun bit! For the longest time, I have been thinking of making a Salvadoran Corsair. While I do like all of the many schemes the FAS flew, I have my eye on the camouflaged FG-1D
Let’s Build This Thing
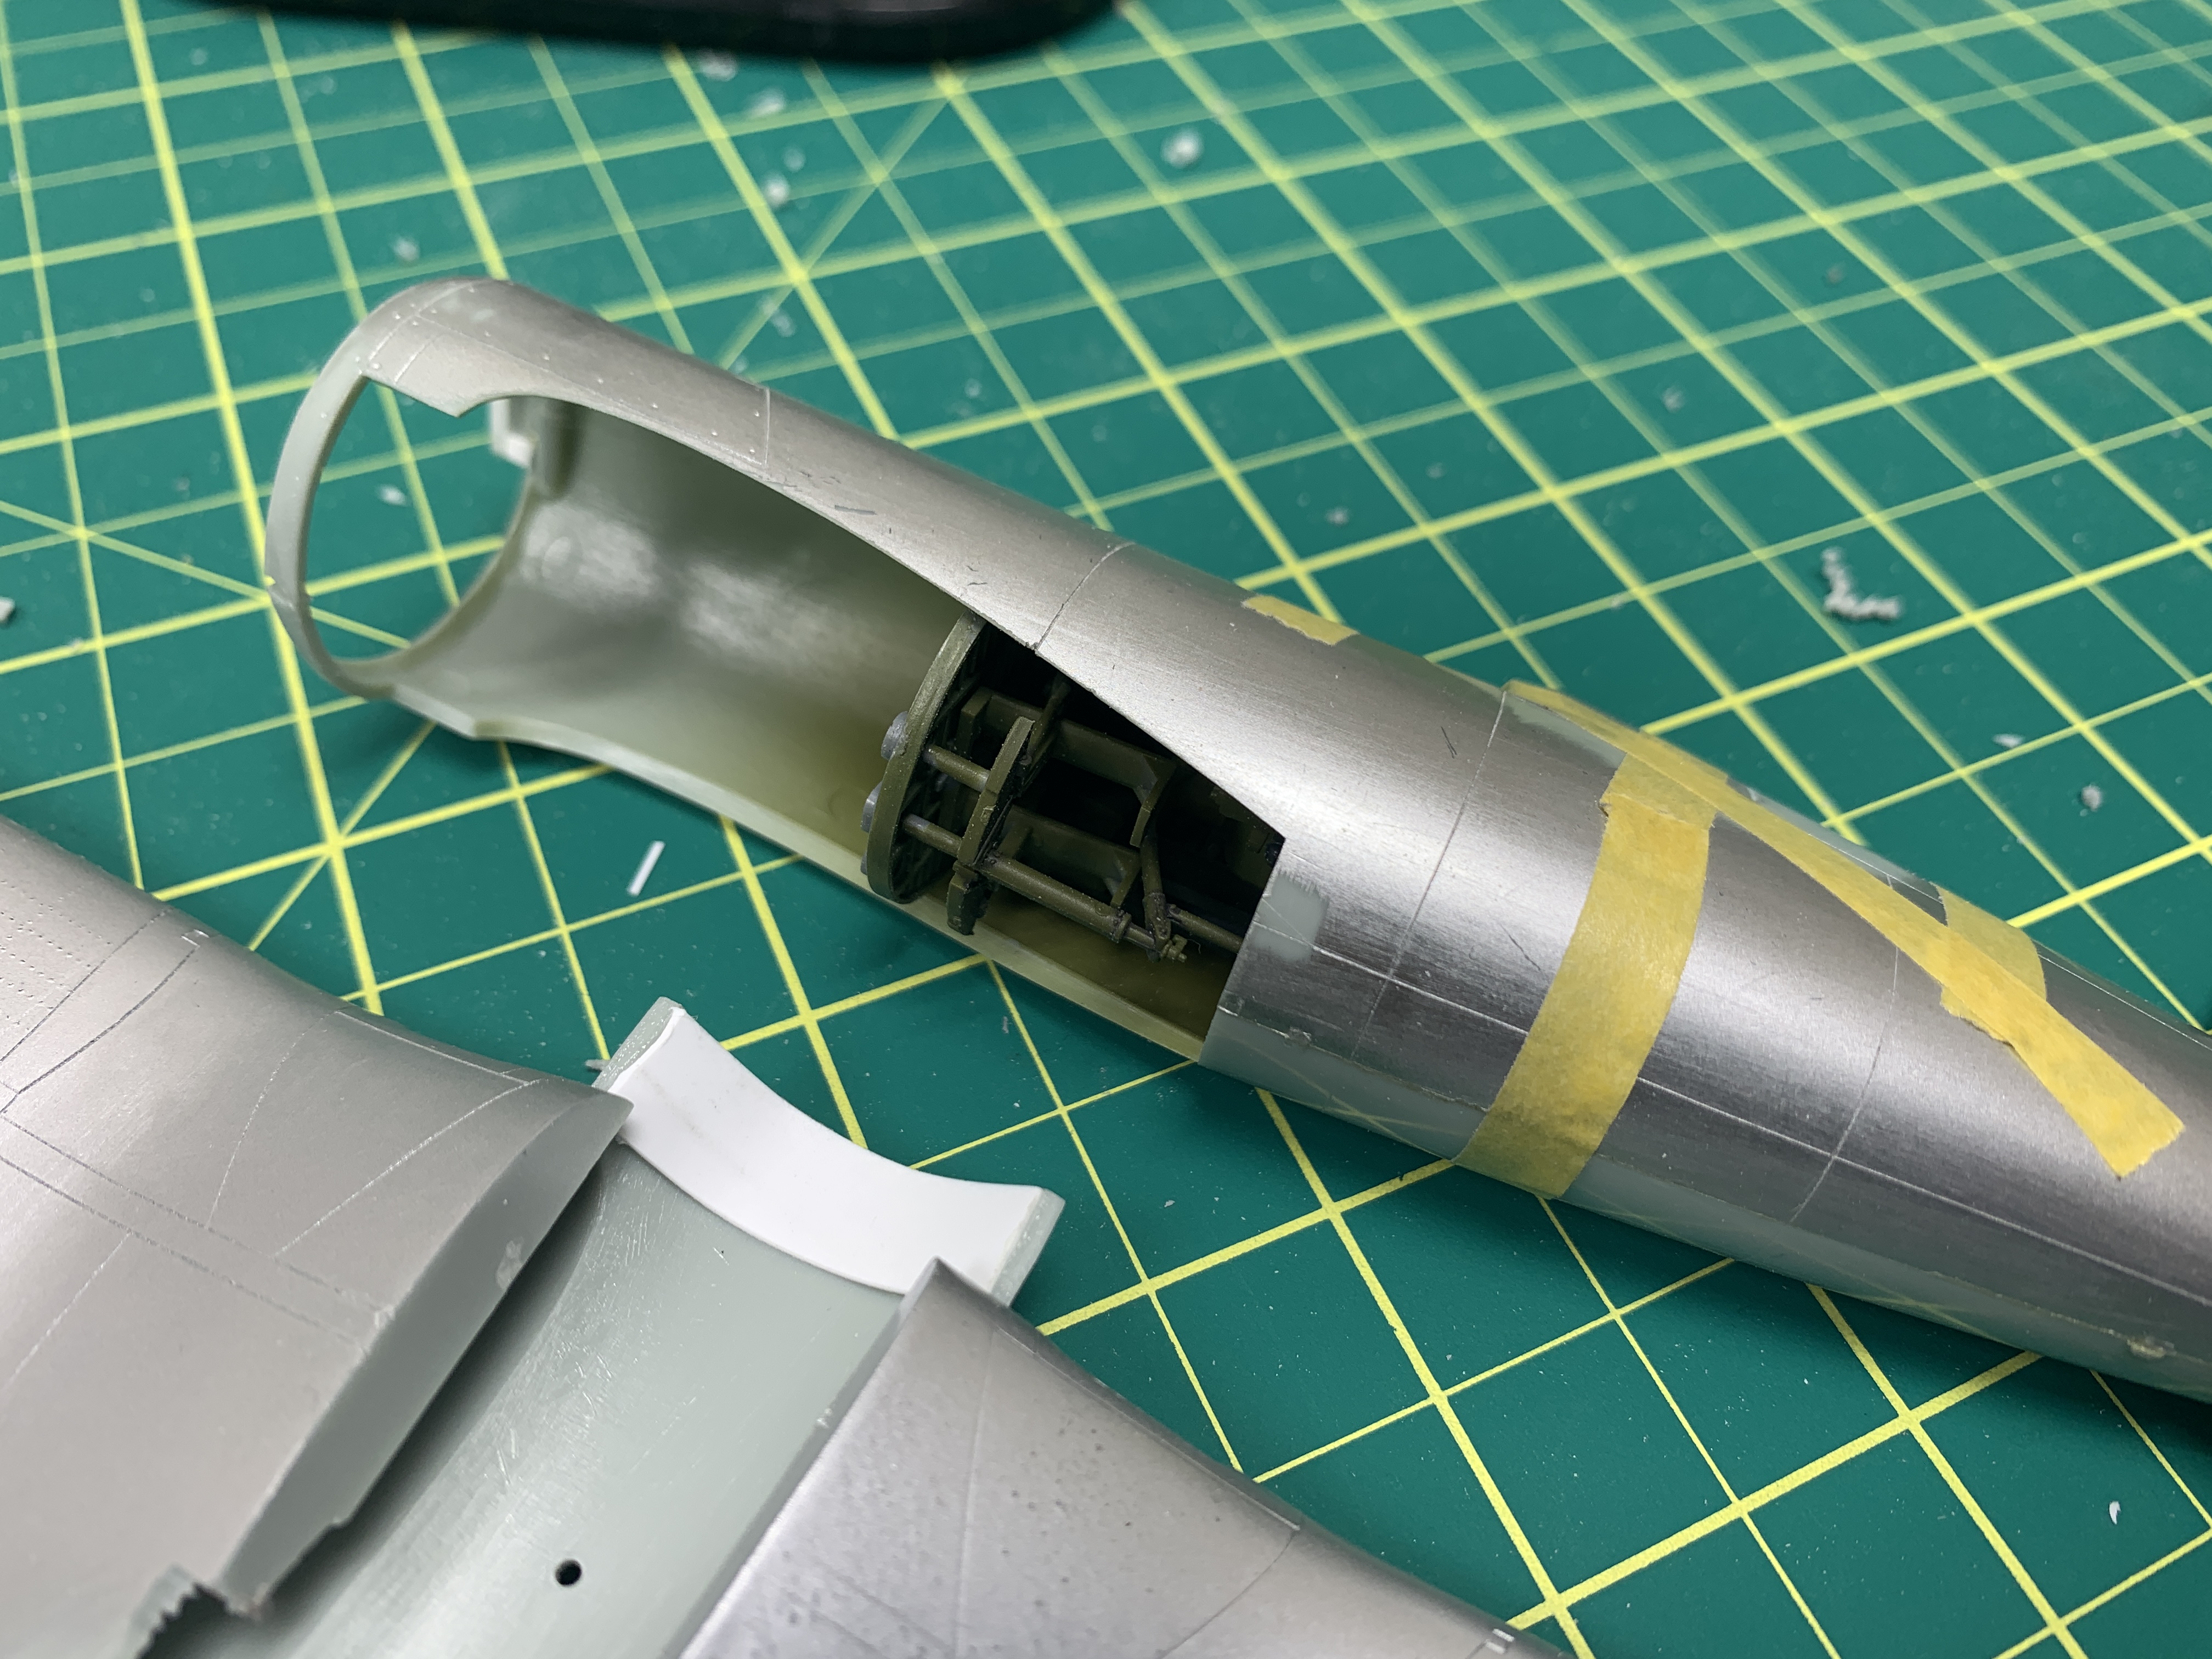
I replaced the kit’s cockpit with a mostly complete Tamiya cockpit. I replaced the kit’s cowl flaps, firewall, engine and cowl with Tamiya parts as well. I carved out the exhaust ‘panels’ and used the Tamiya exhaust pieces there. I was lucky in that the shapes and proportions of the Otaki Corsair made it easy to graft these parts onto the fuselage. There was a bit of styrene strip, sanding, and shaping needed. But this was nothing difficult.
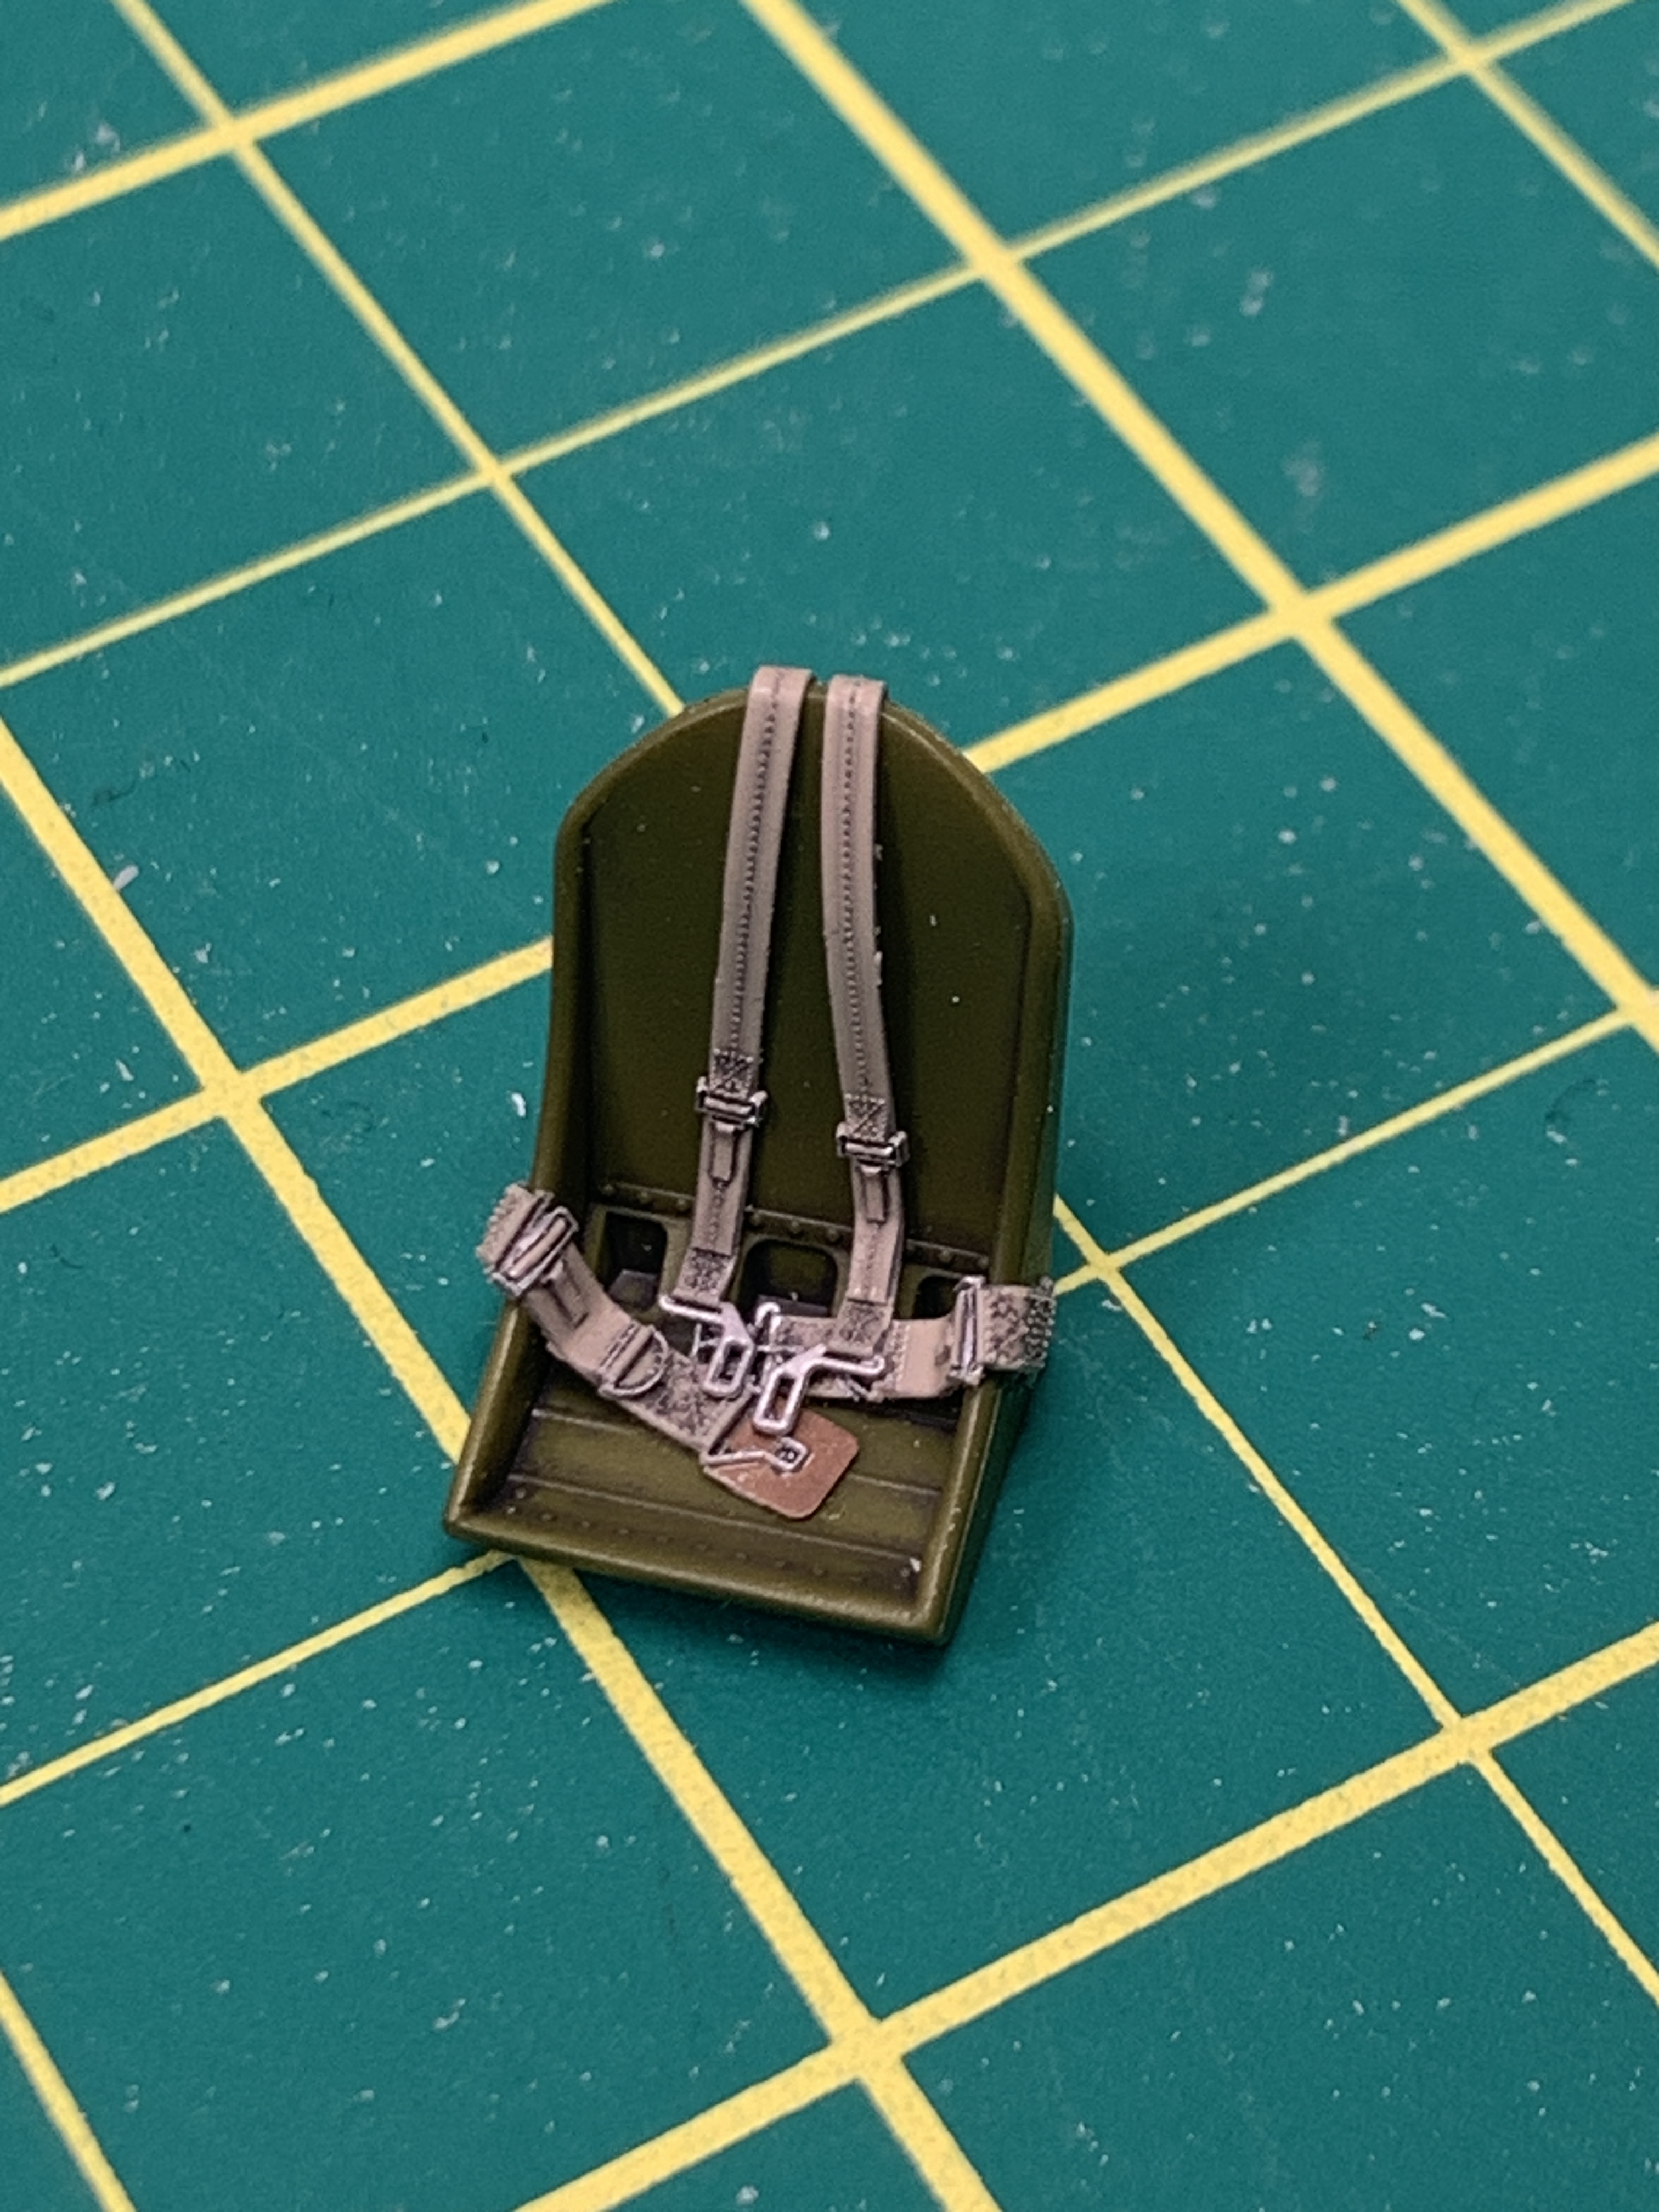
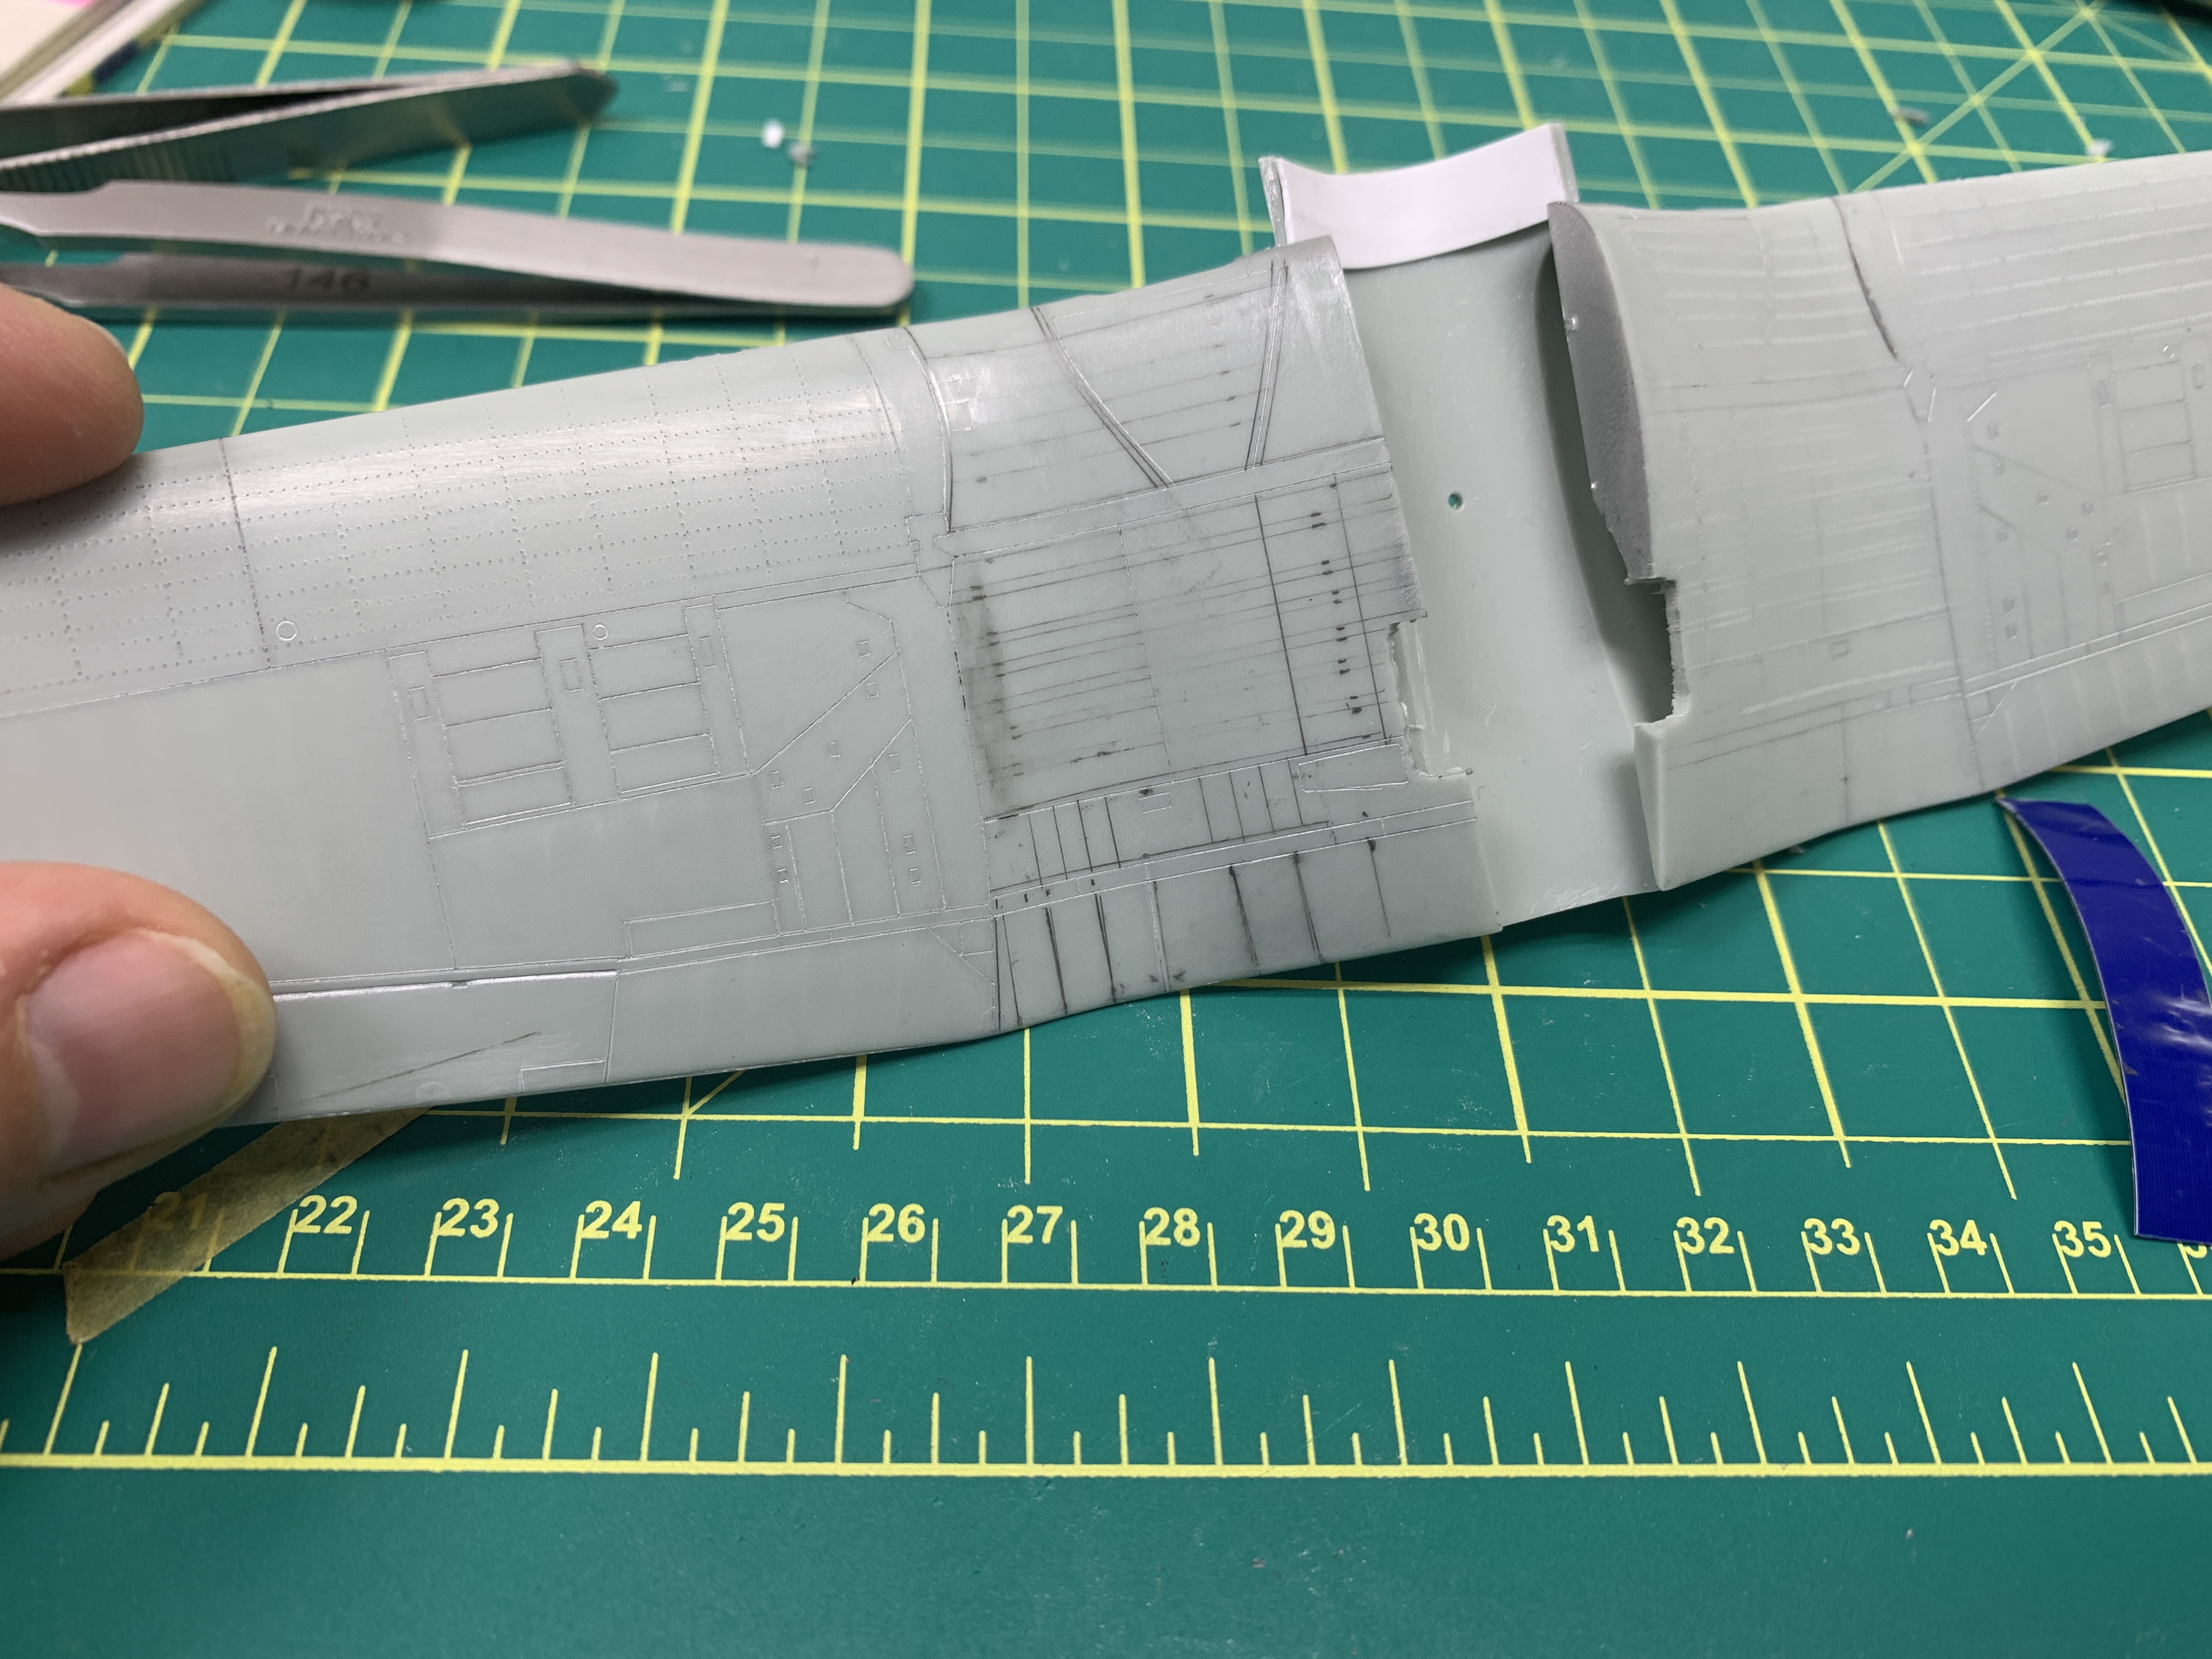
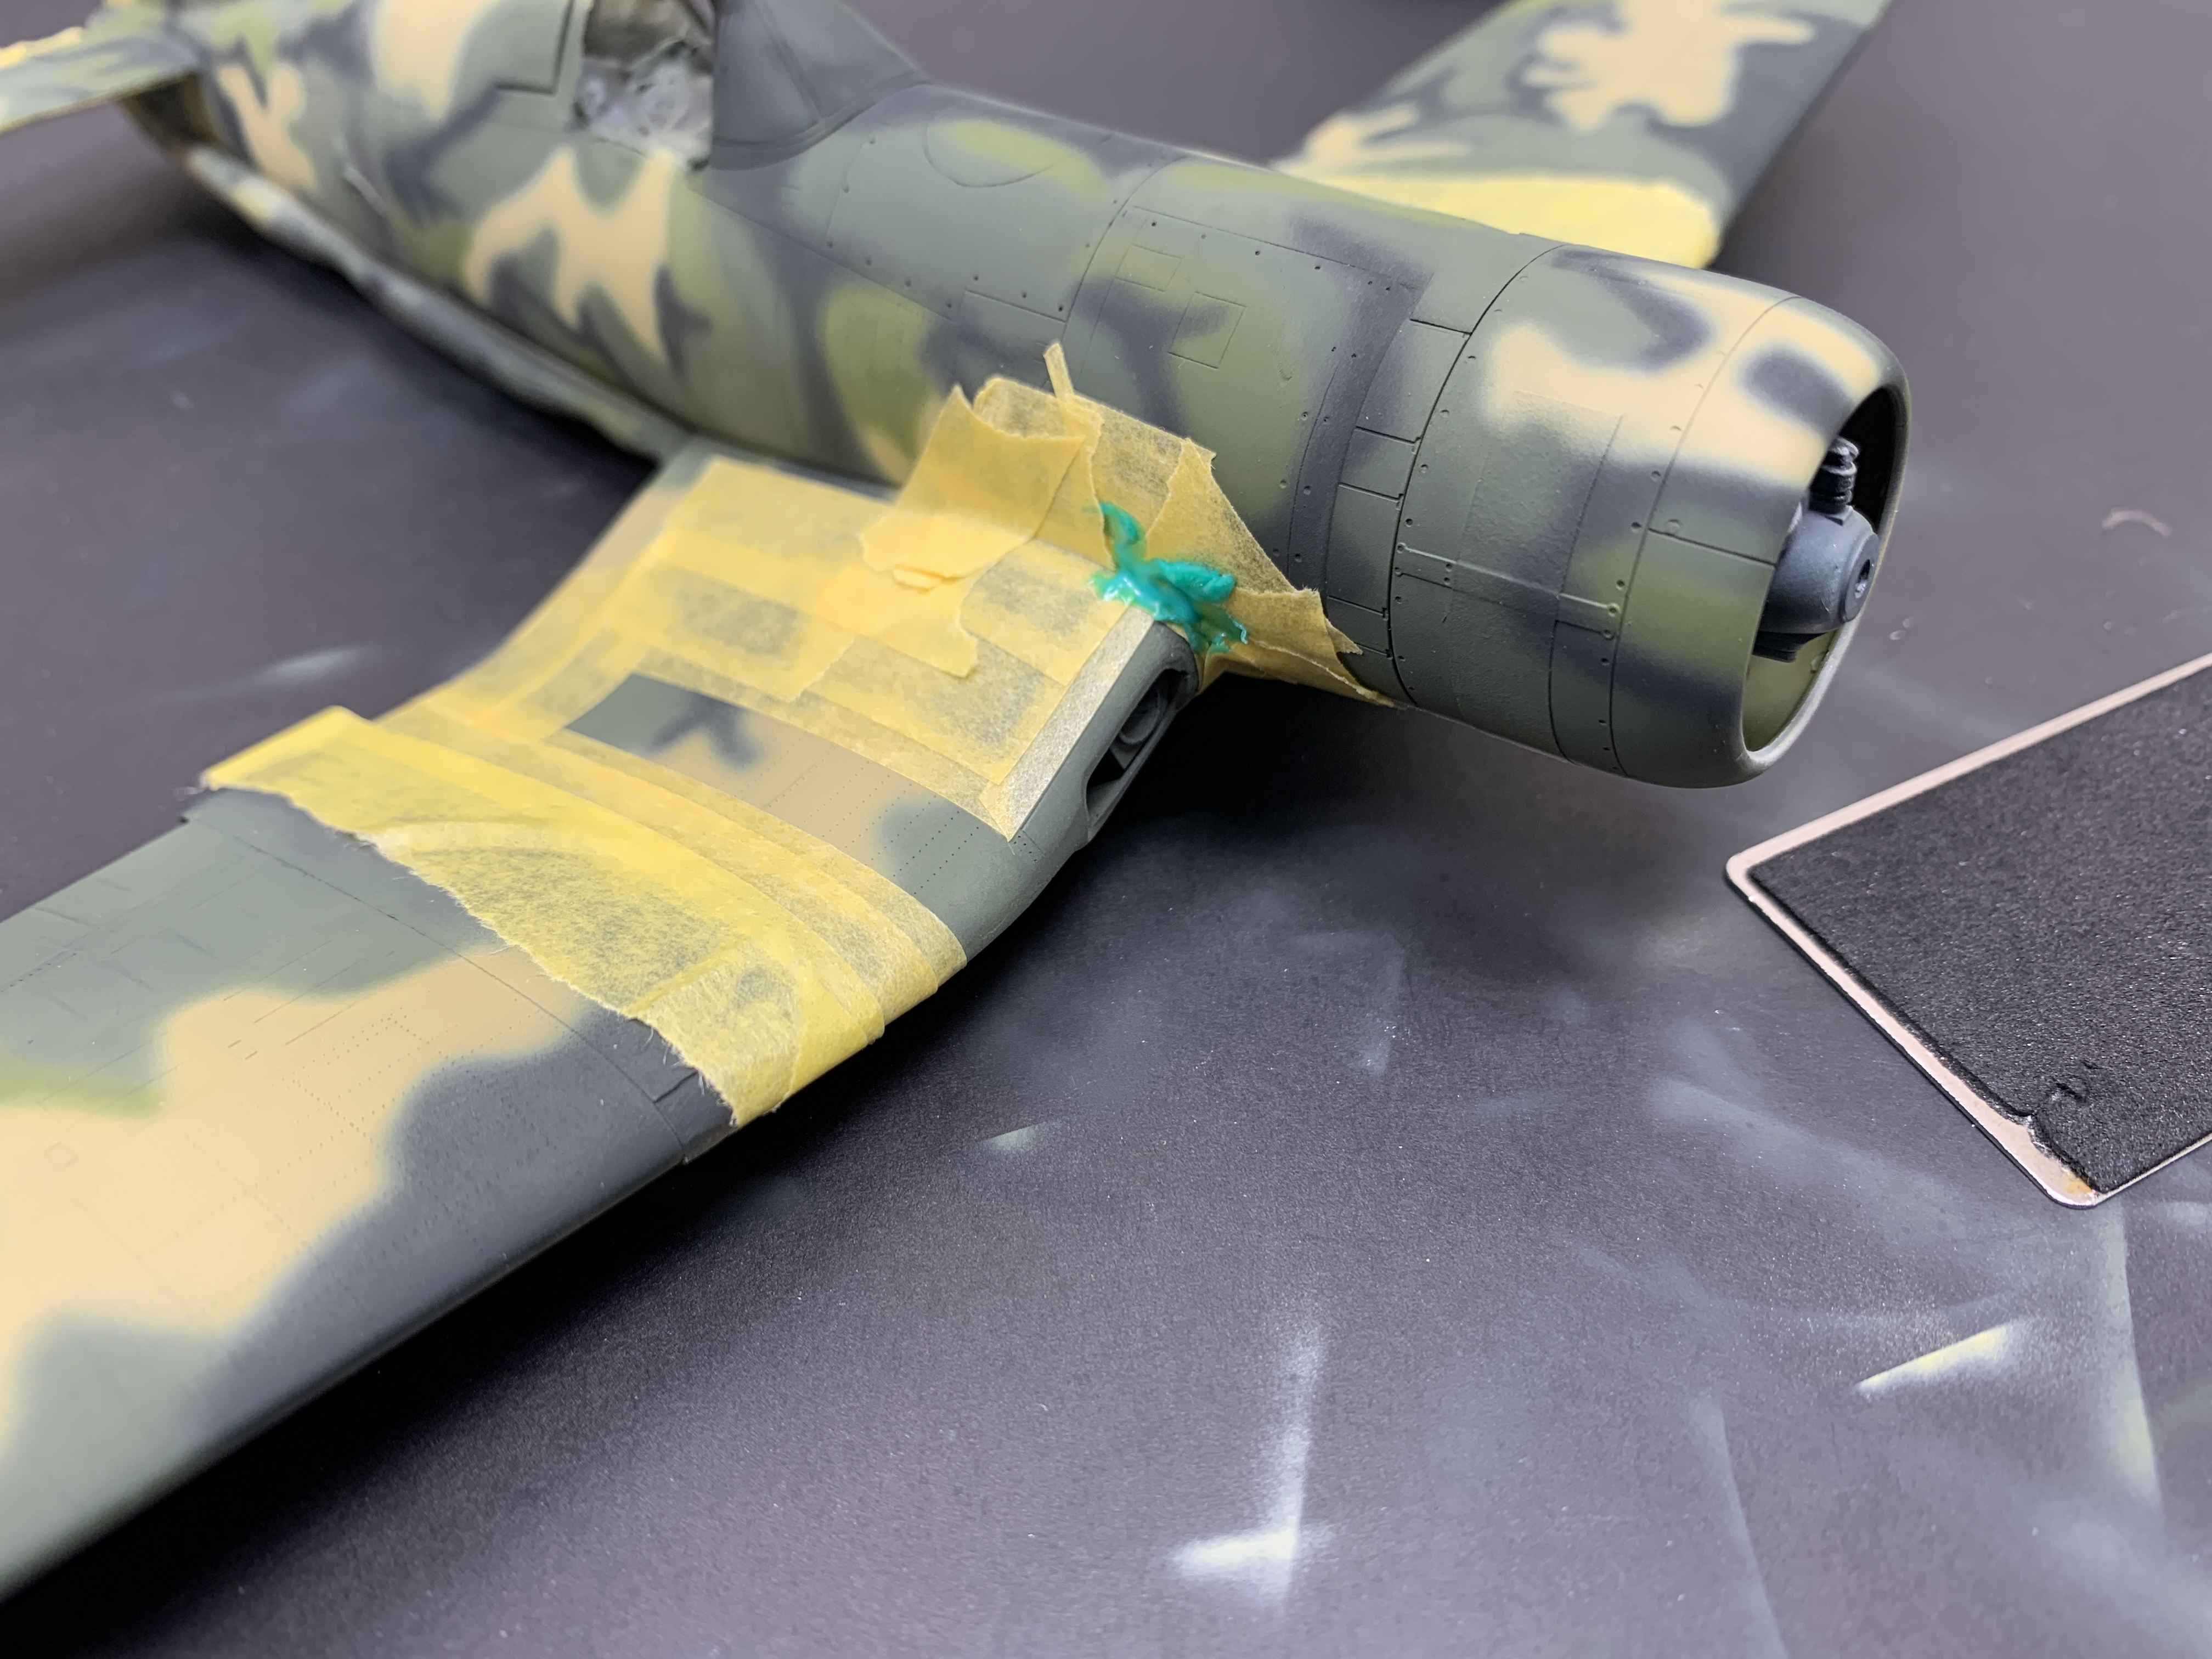
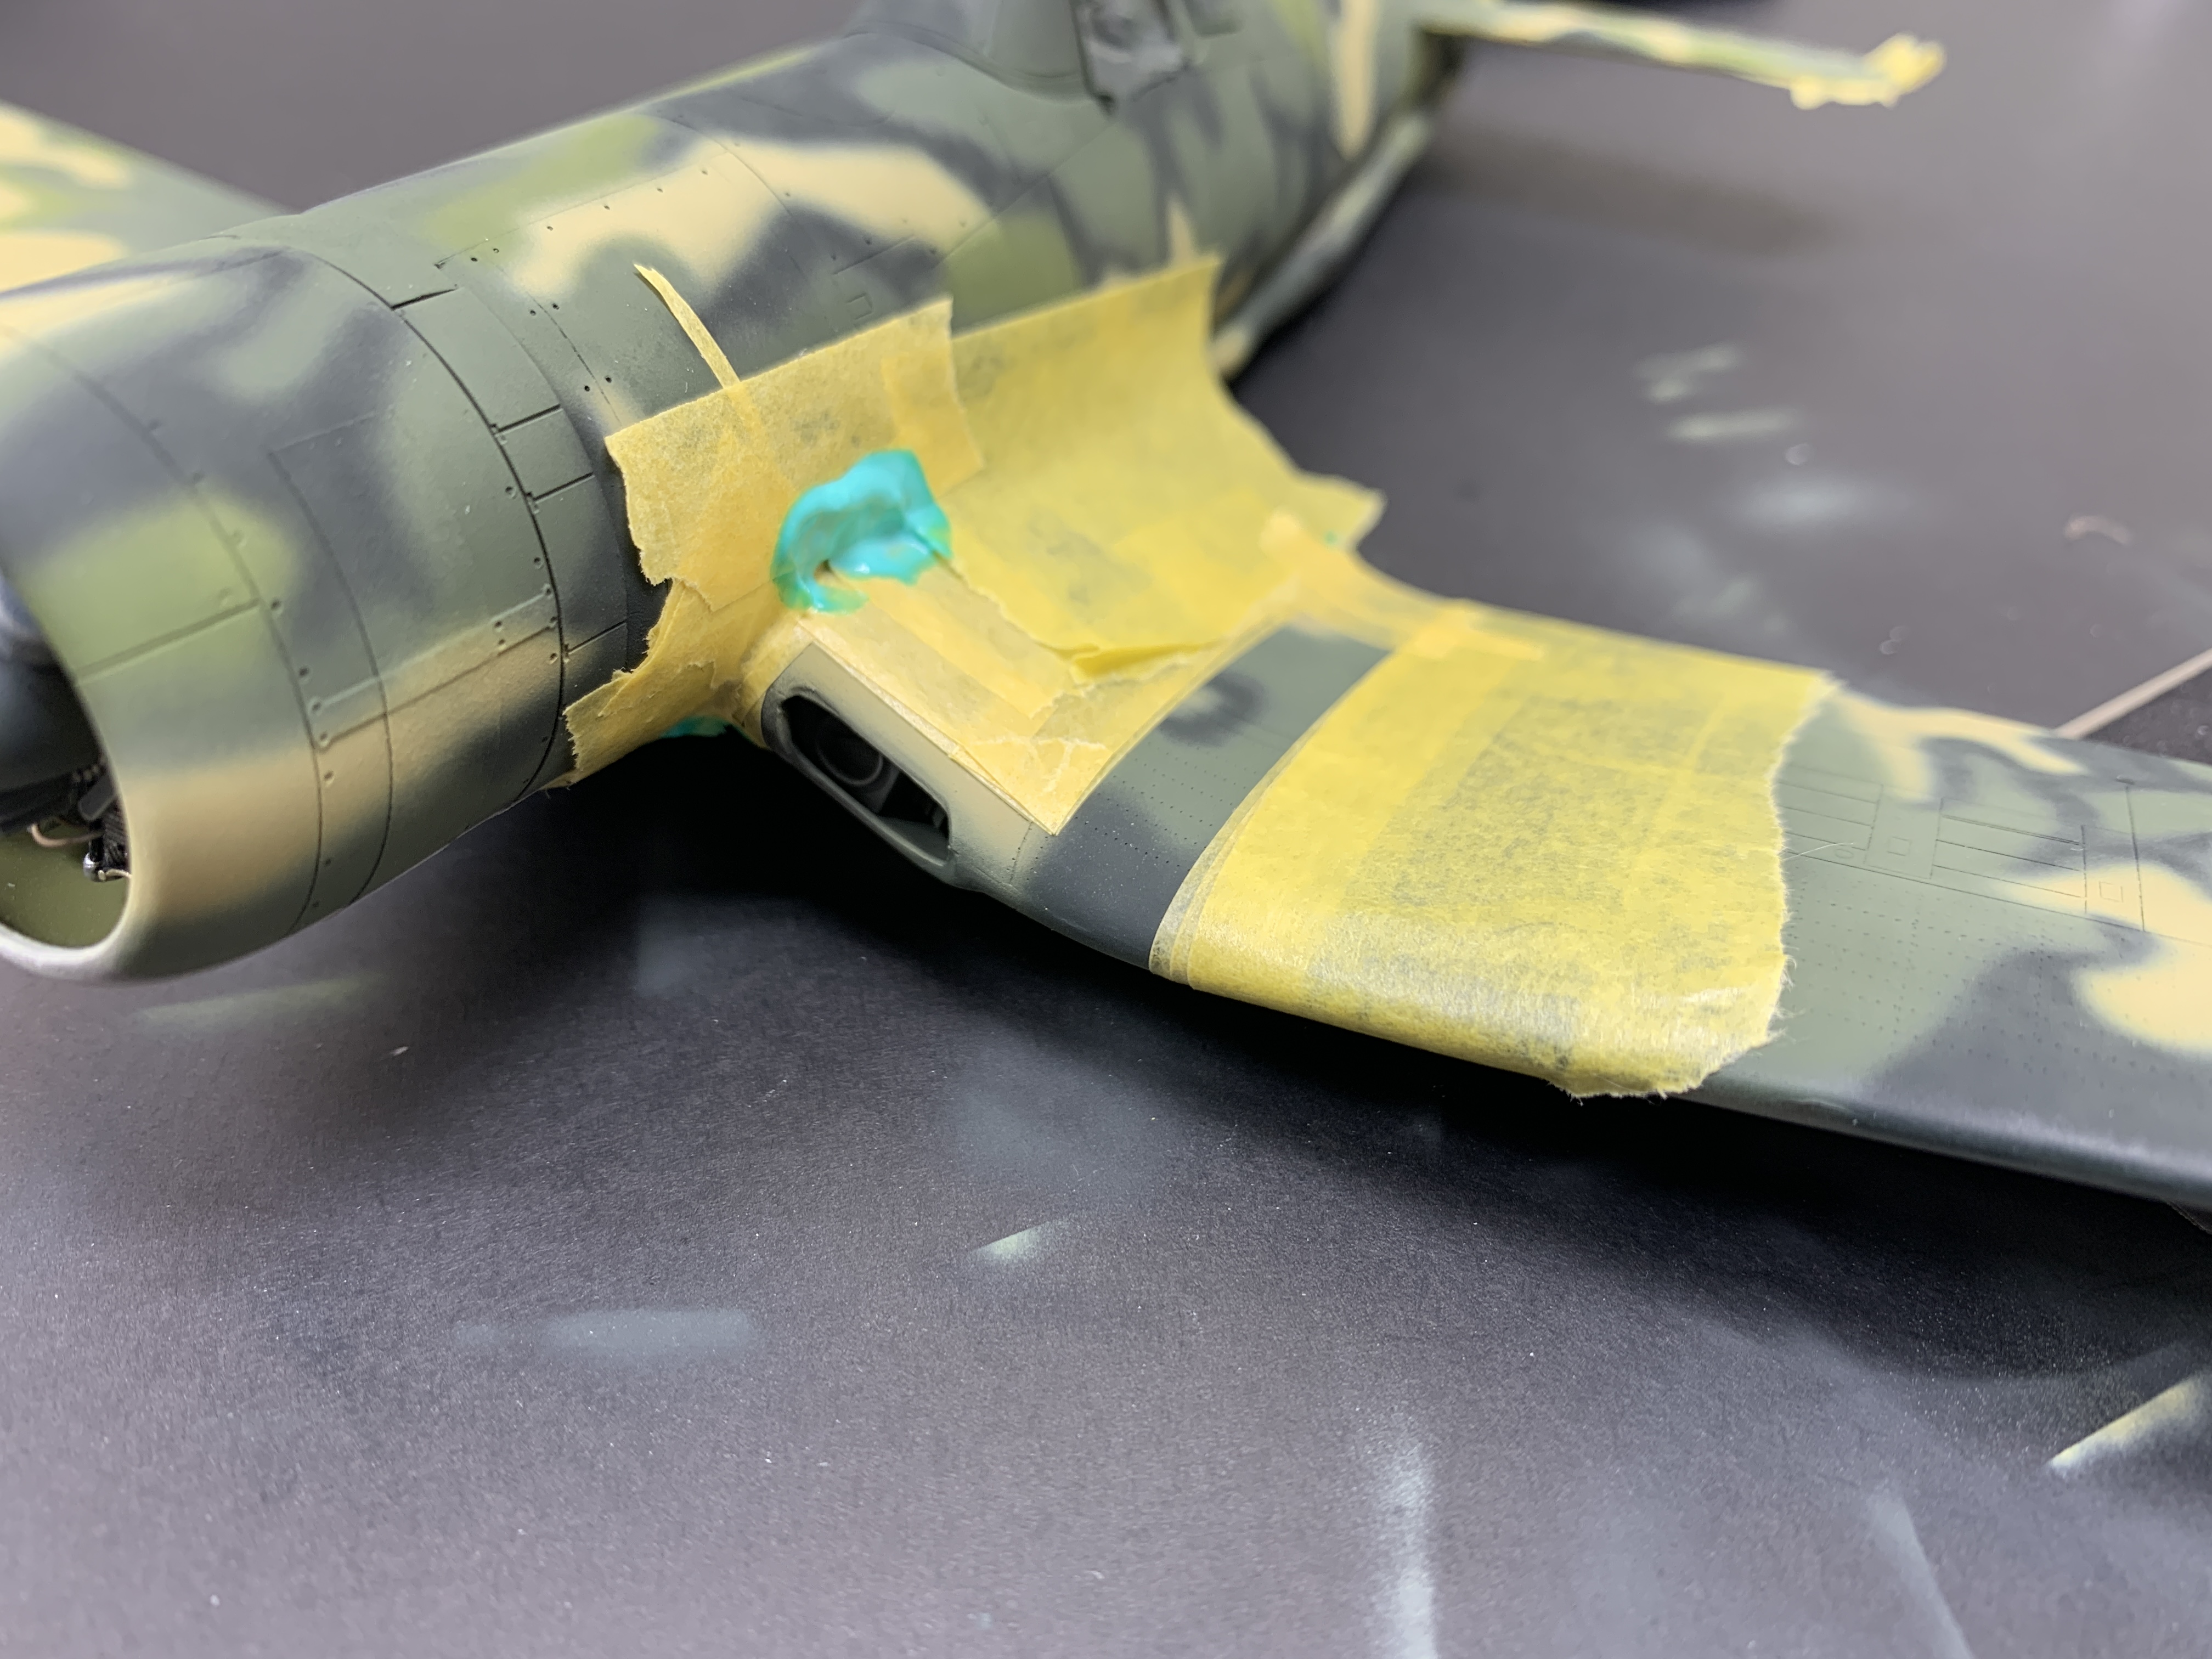
The vague cockpit sidewalls were replaced with scratch-built frames and bits. I also rescued some old resin bits in there as well. I scratch built the guns using hypodermic needles and I replaced the rudder antenna mount with a piece of photo-etch fret.
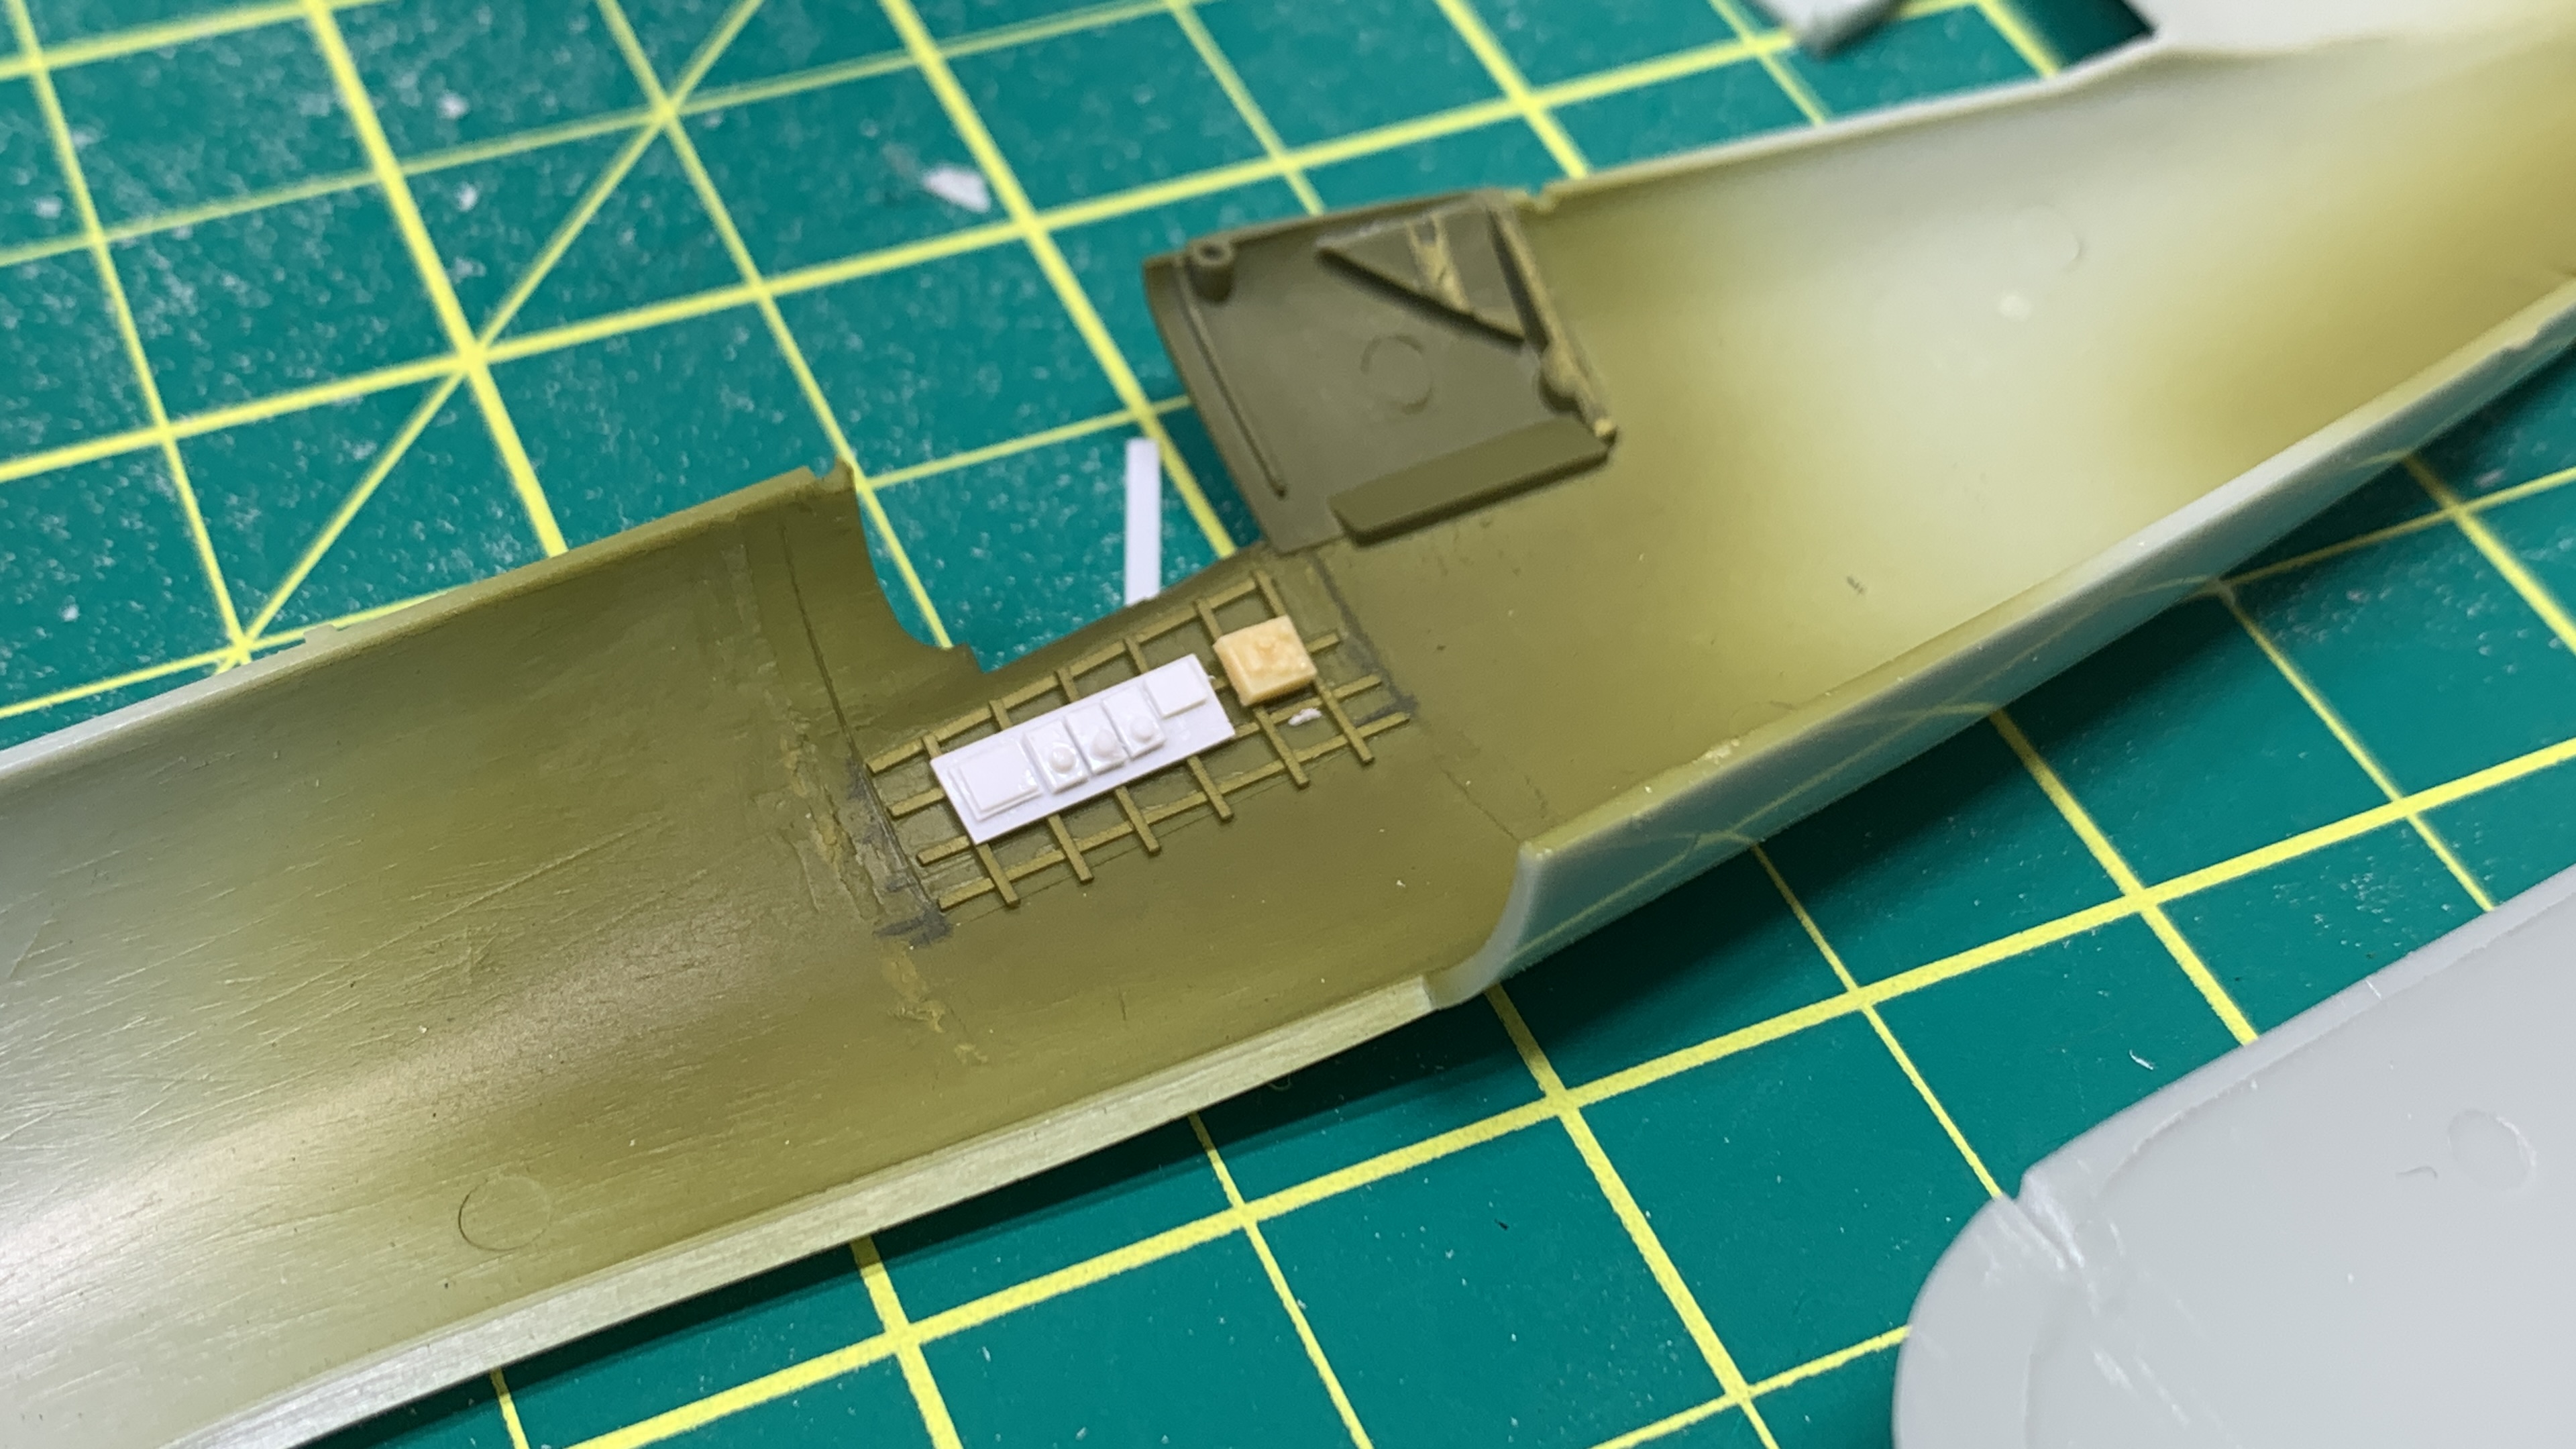
Something New
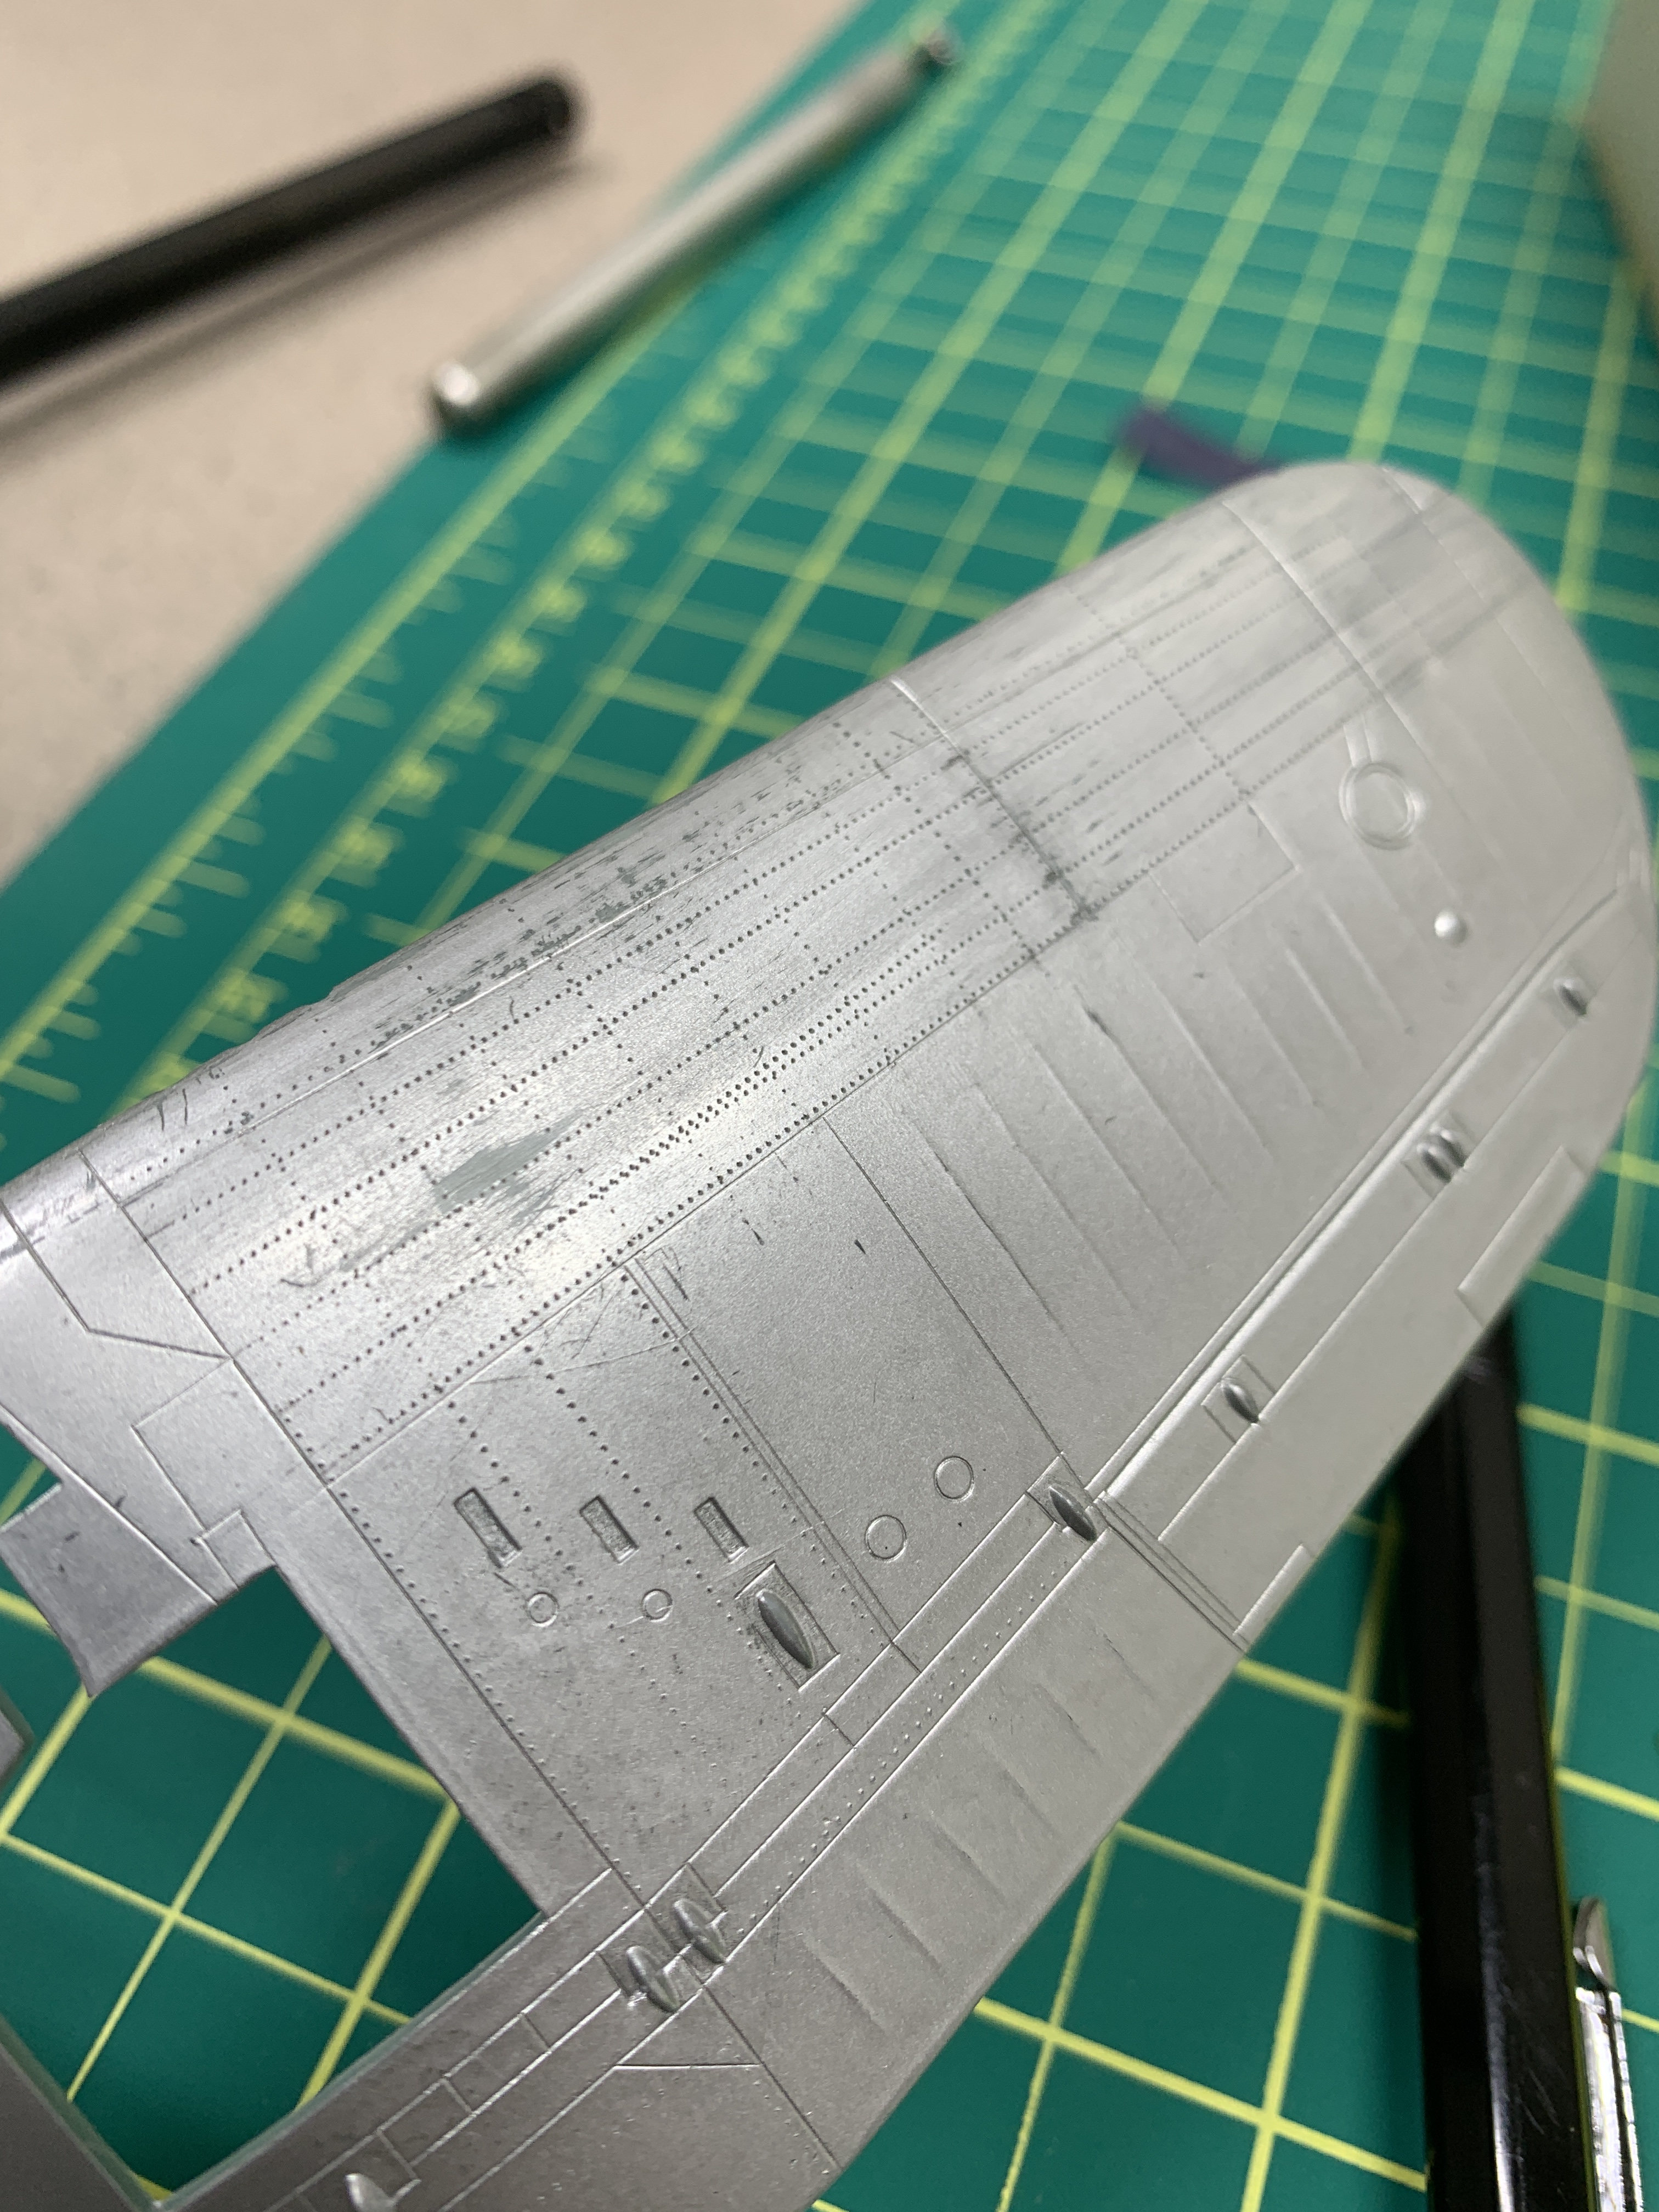
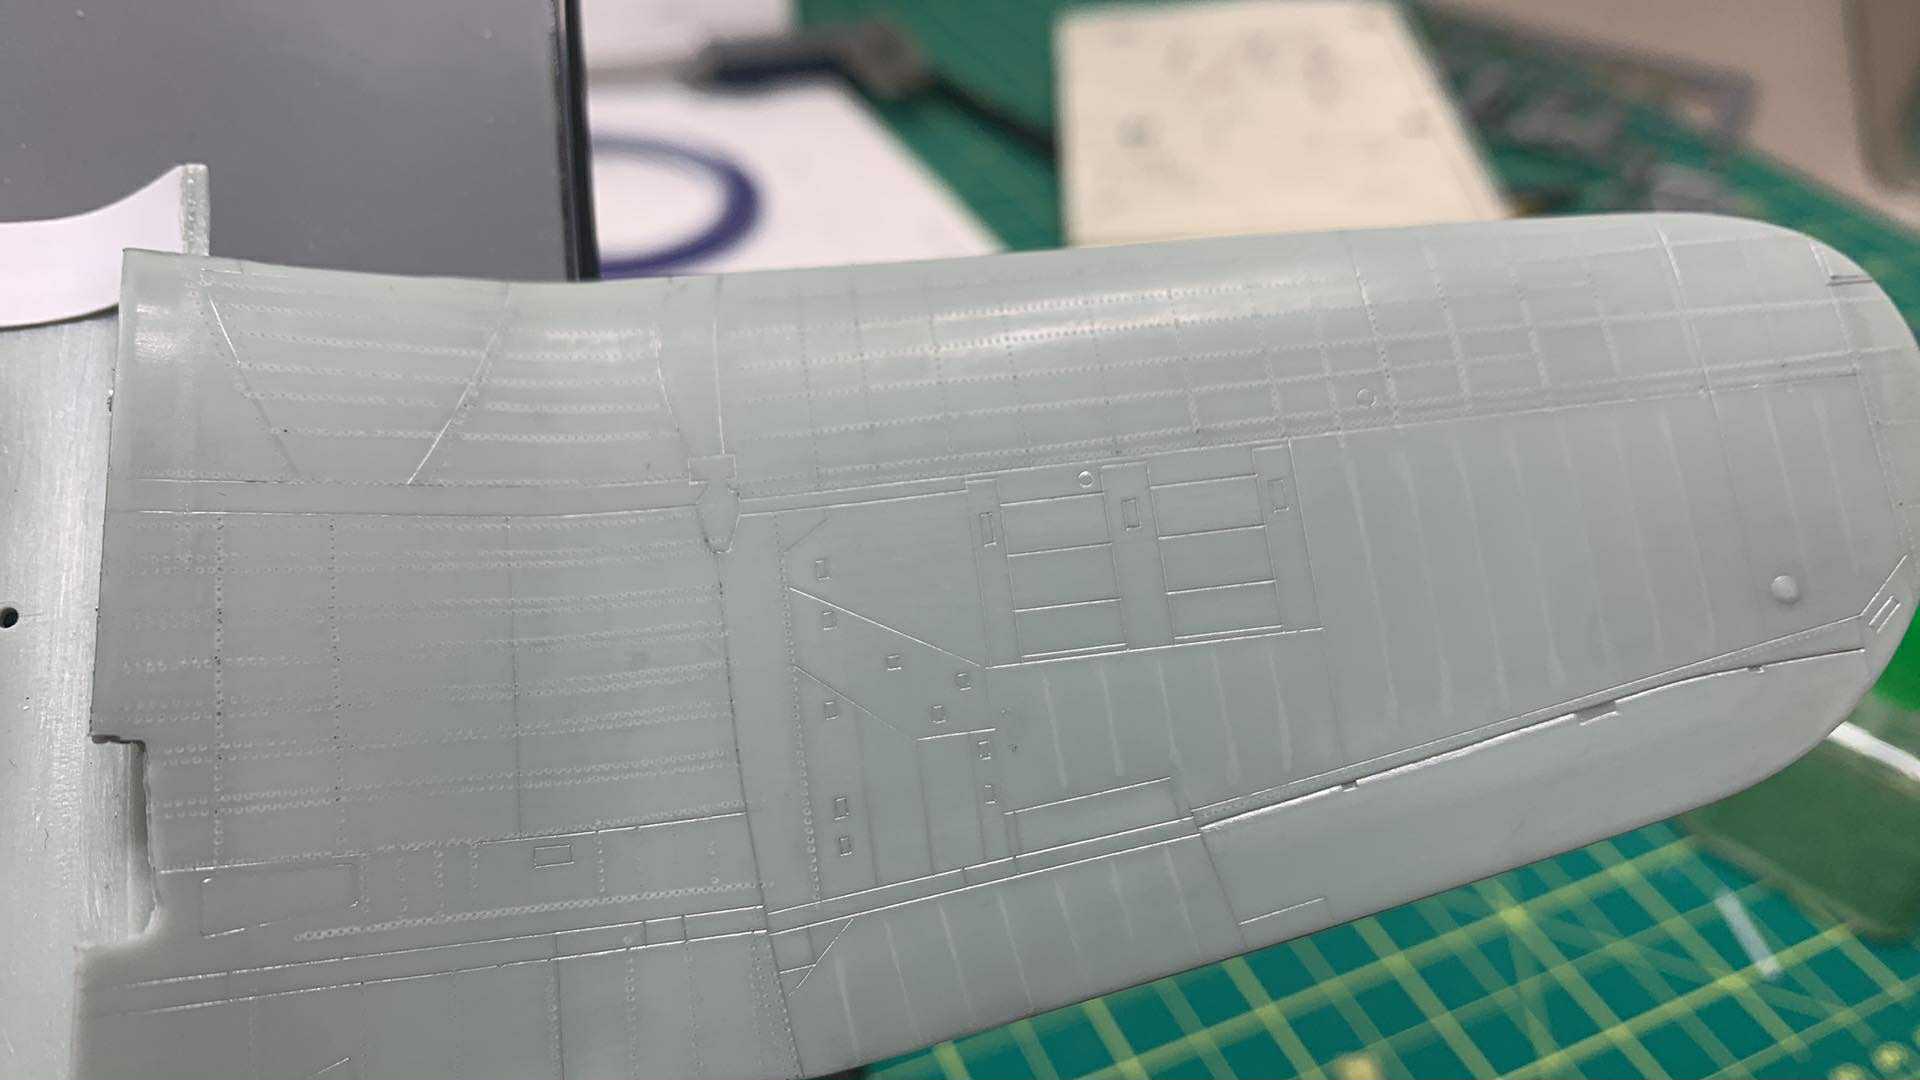
I wanted to have a go at adding rivets to a model and this model was the perfect opportunity to break out my AK Rivet wheel. Using a diagram of the Corsair with rivet patterns, I drew the appropriate rivet spacing onto Tamiya tape. Placing this on the model let me mark out the lines which were then traced using a straight edge.
At first, I was hesitant to roll the riveter across the model without a guide but I found I could easily follow the lines. It took way more time to measure and draw the lines than it did to apply the rivets onto them. Adding rivets to the fuselage was a bit trickier until I broke out my 3M detailing tape. Again, rolling the rivet maker was almost as easy as it was on the wings.
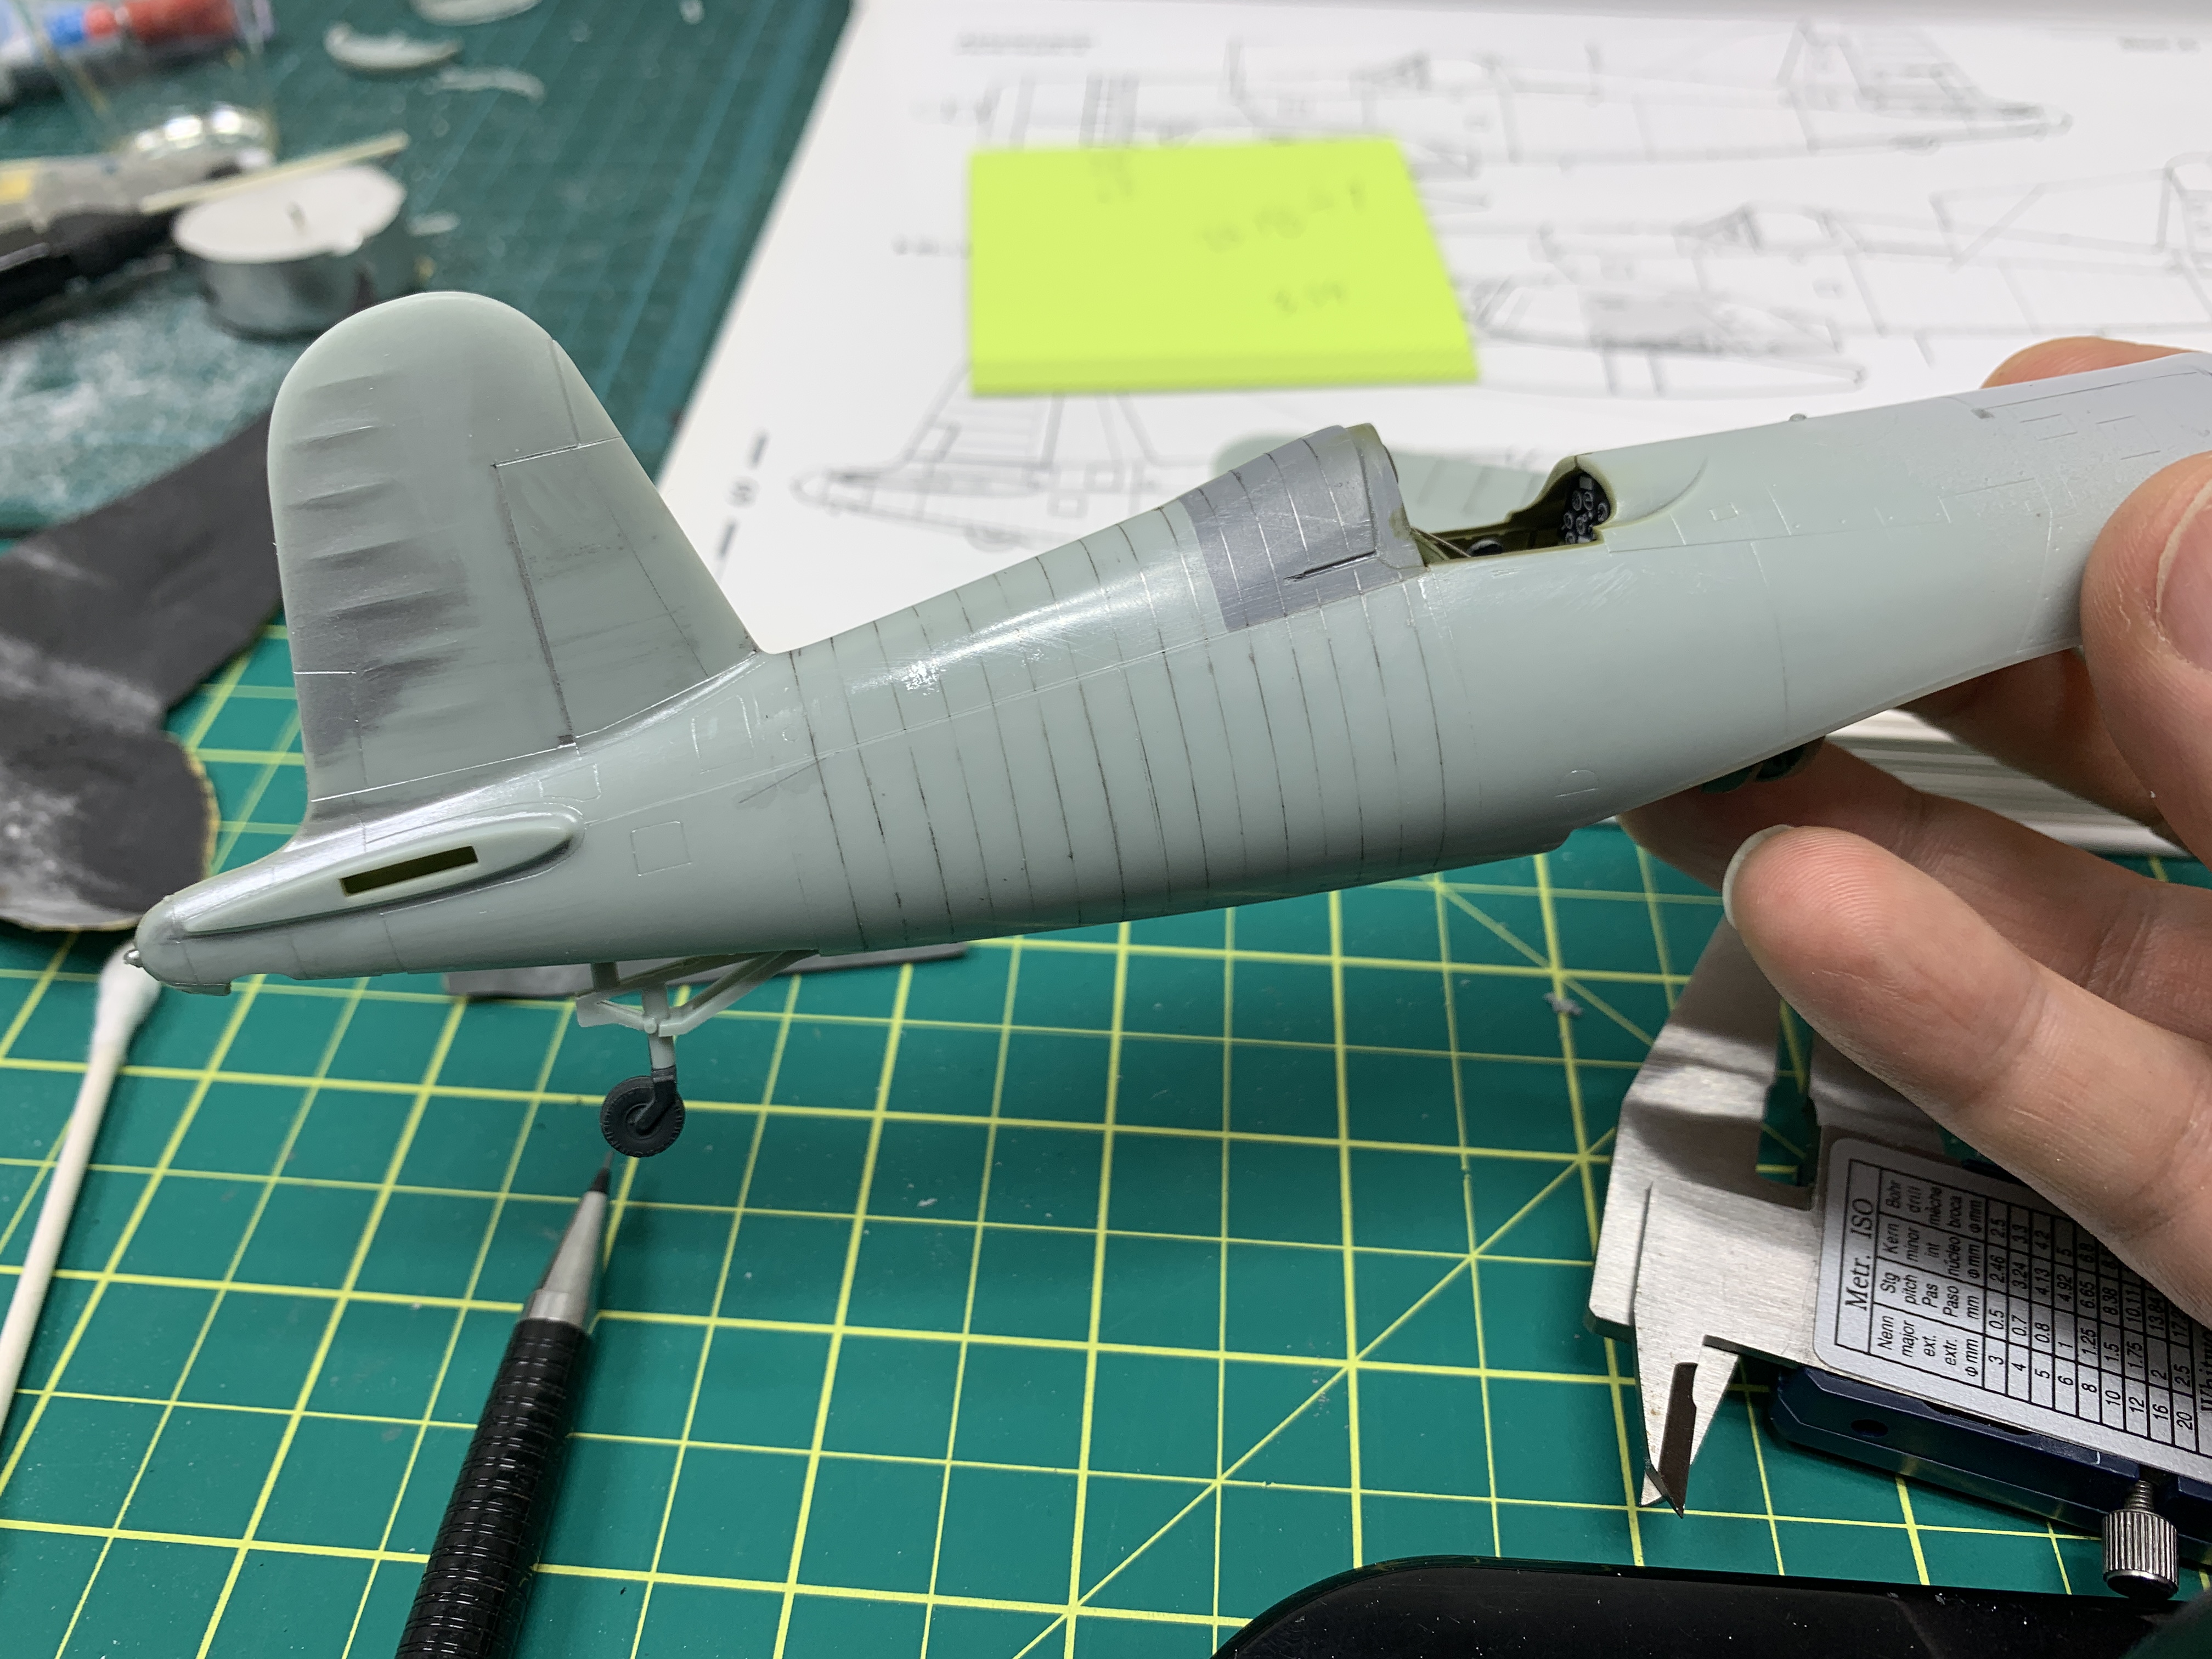
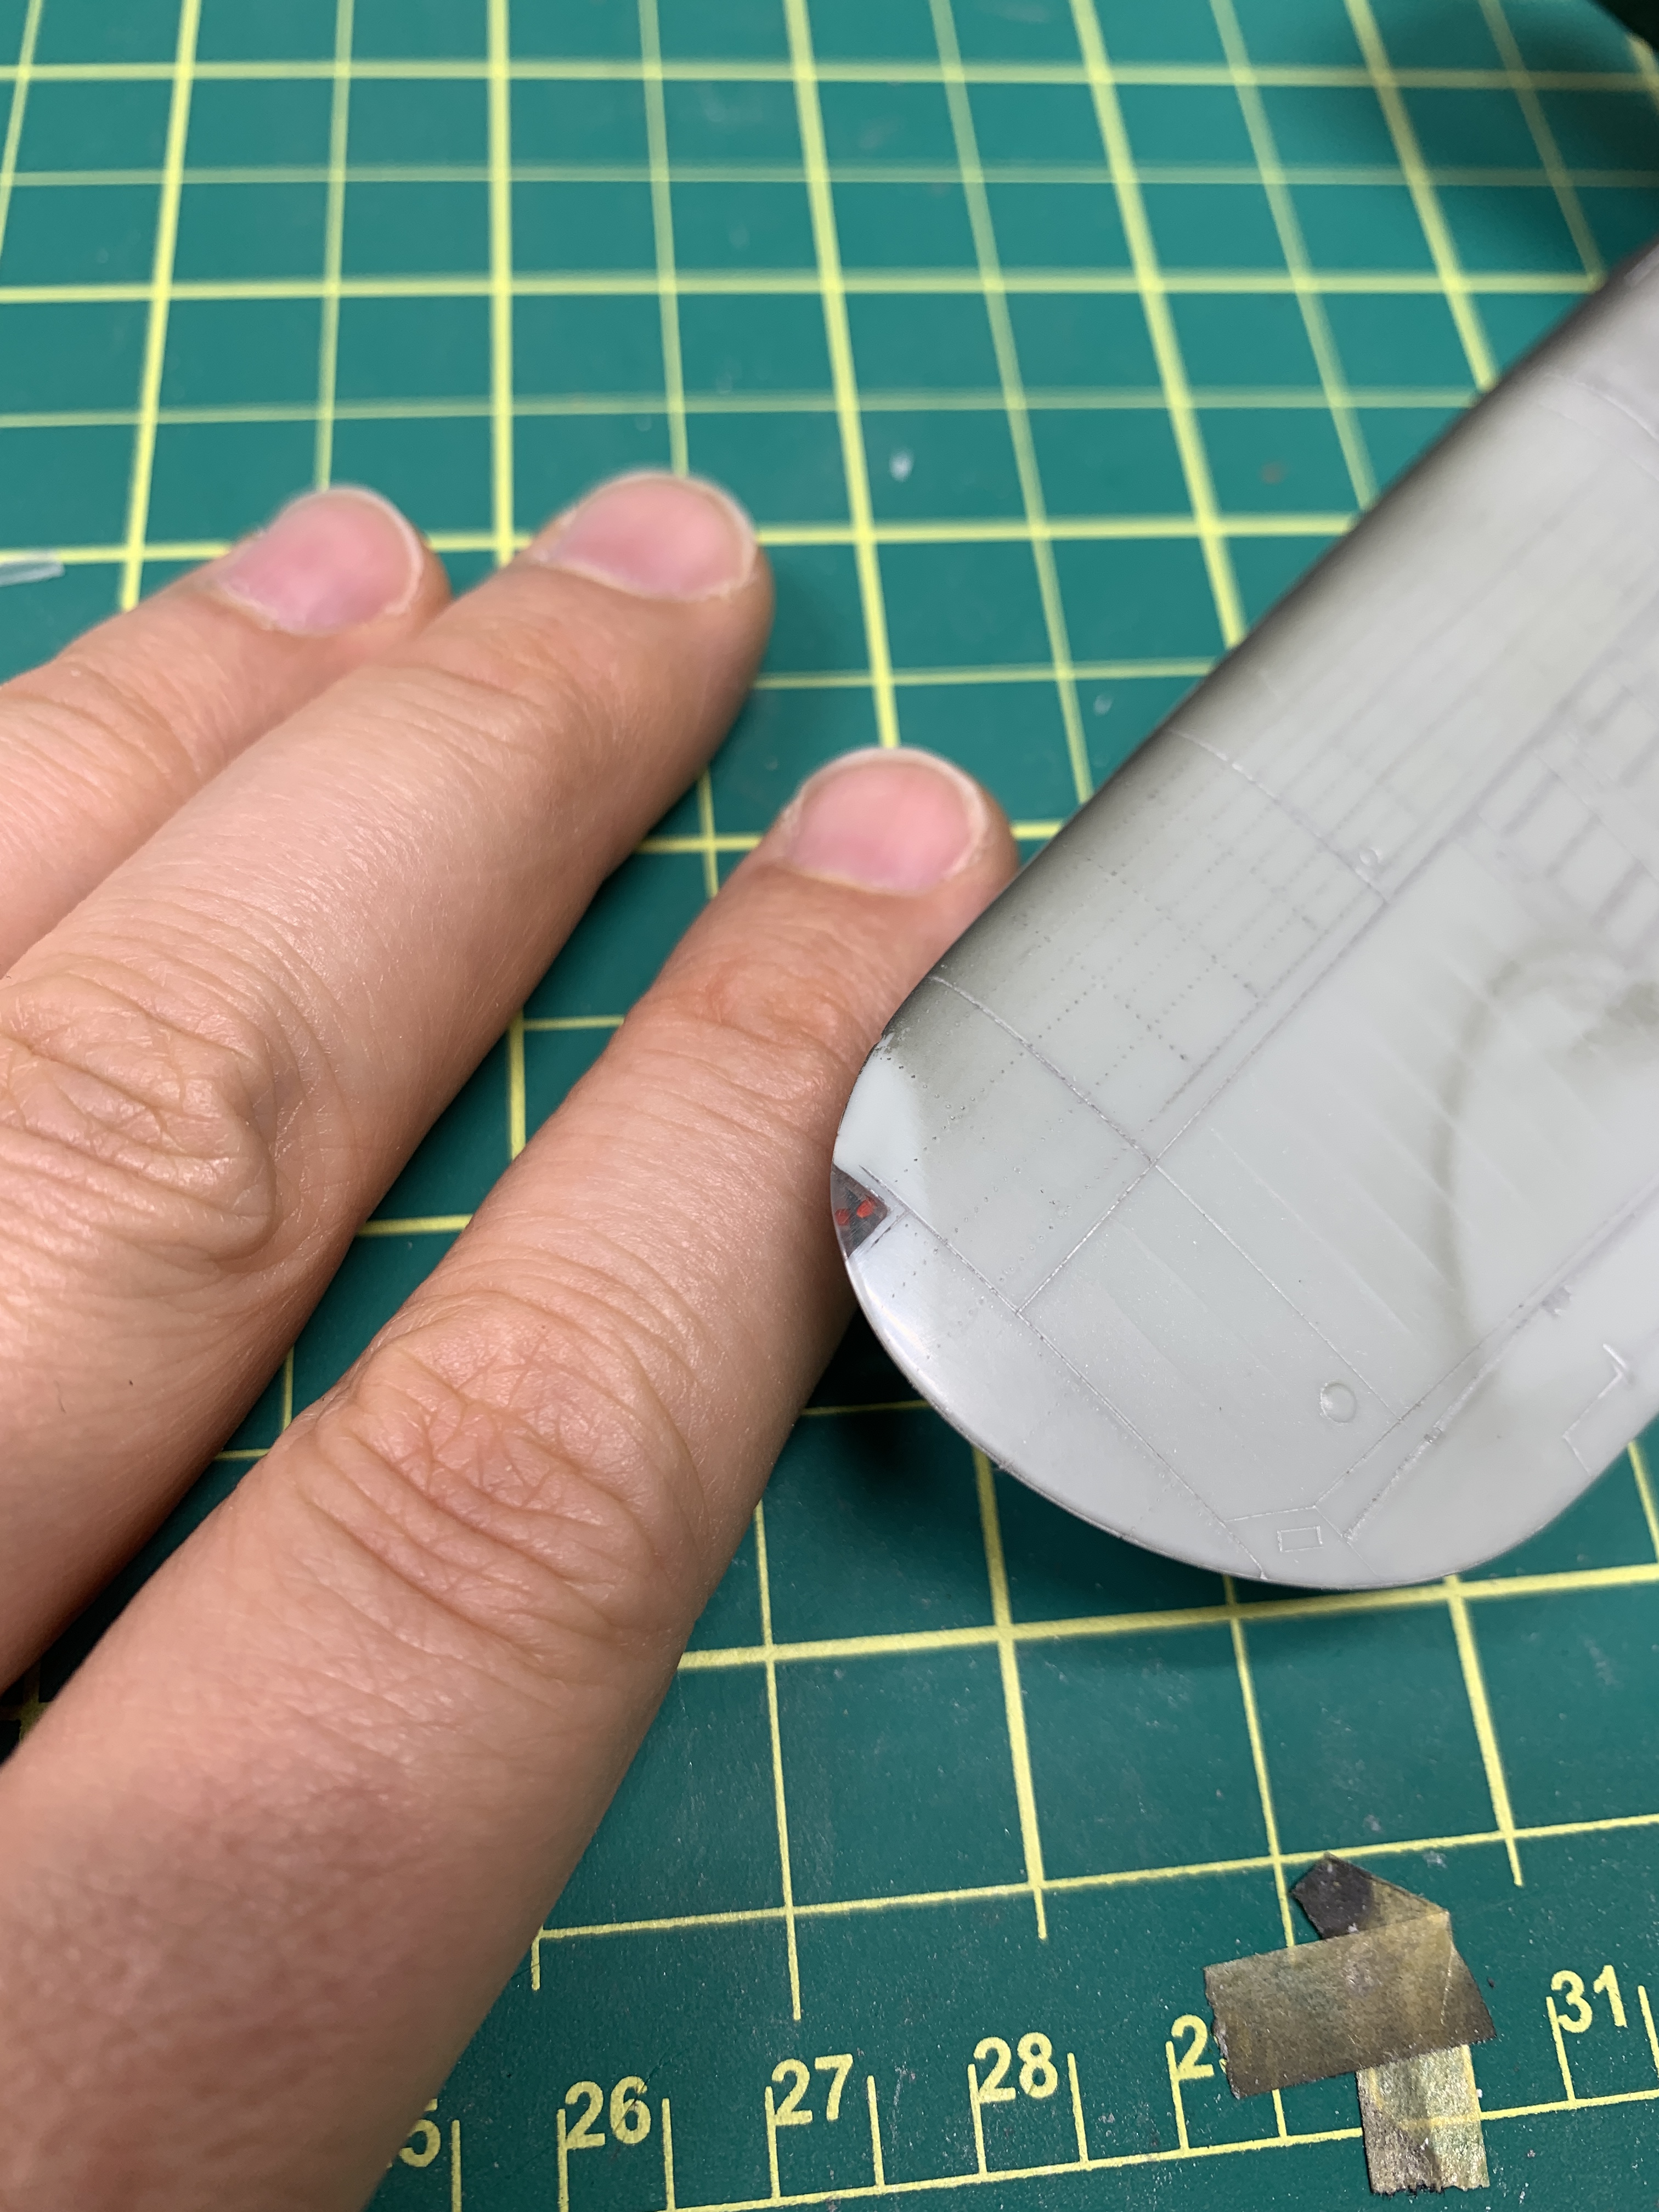
Another new technique was used for the wing tip lights: UV curable resin. Normally, I find some clear plastic fret, wedge it into the wing and sand it to shape. UV Resin is far easier and it gives a better result. It does take a bit of time to build up the material (because you can’t do it all in one go), but each layer is cured for only a couple of minutes under the UV light.
Ready For Paint
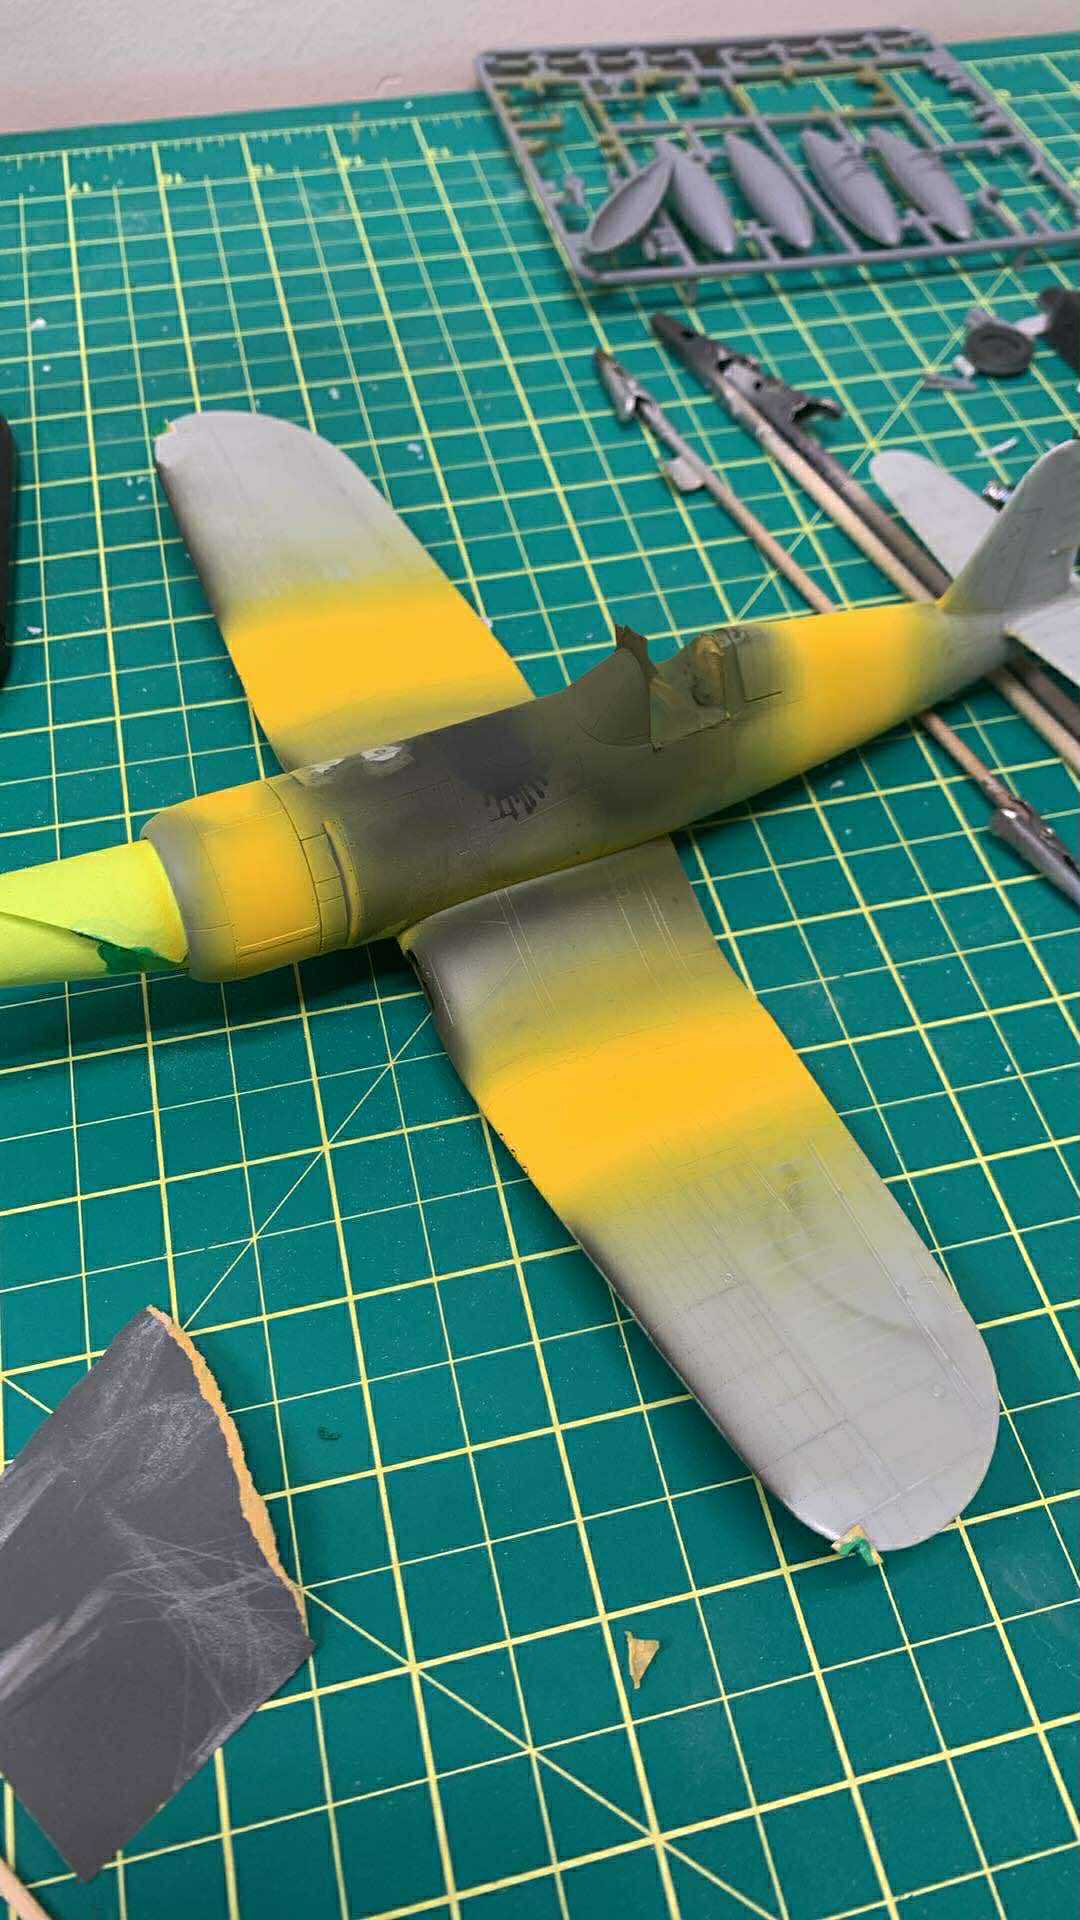
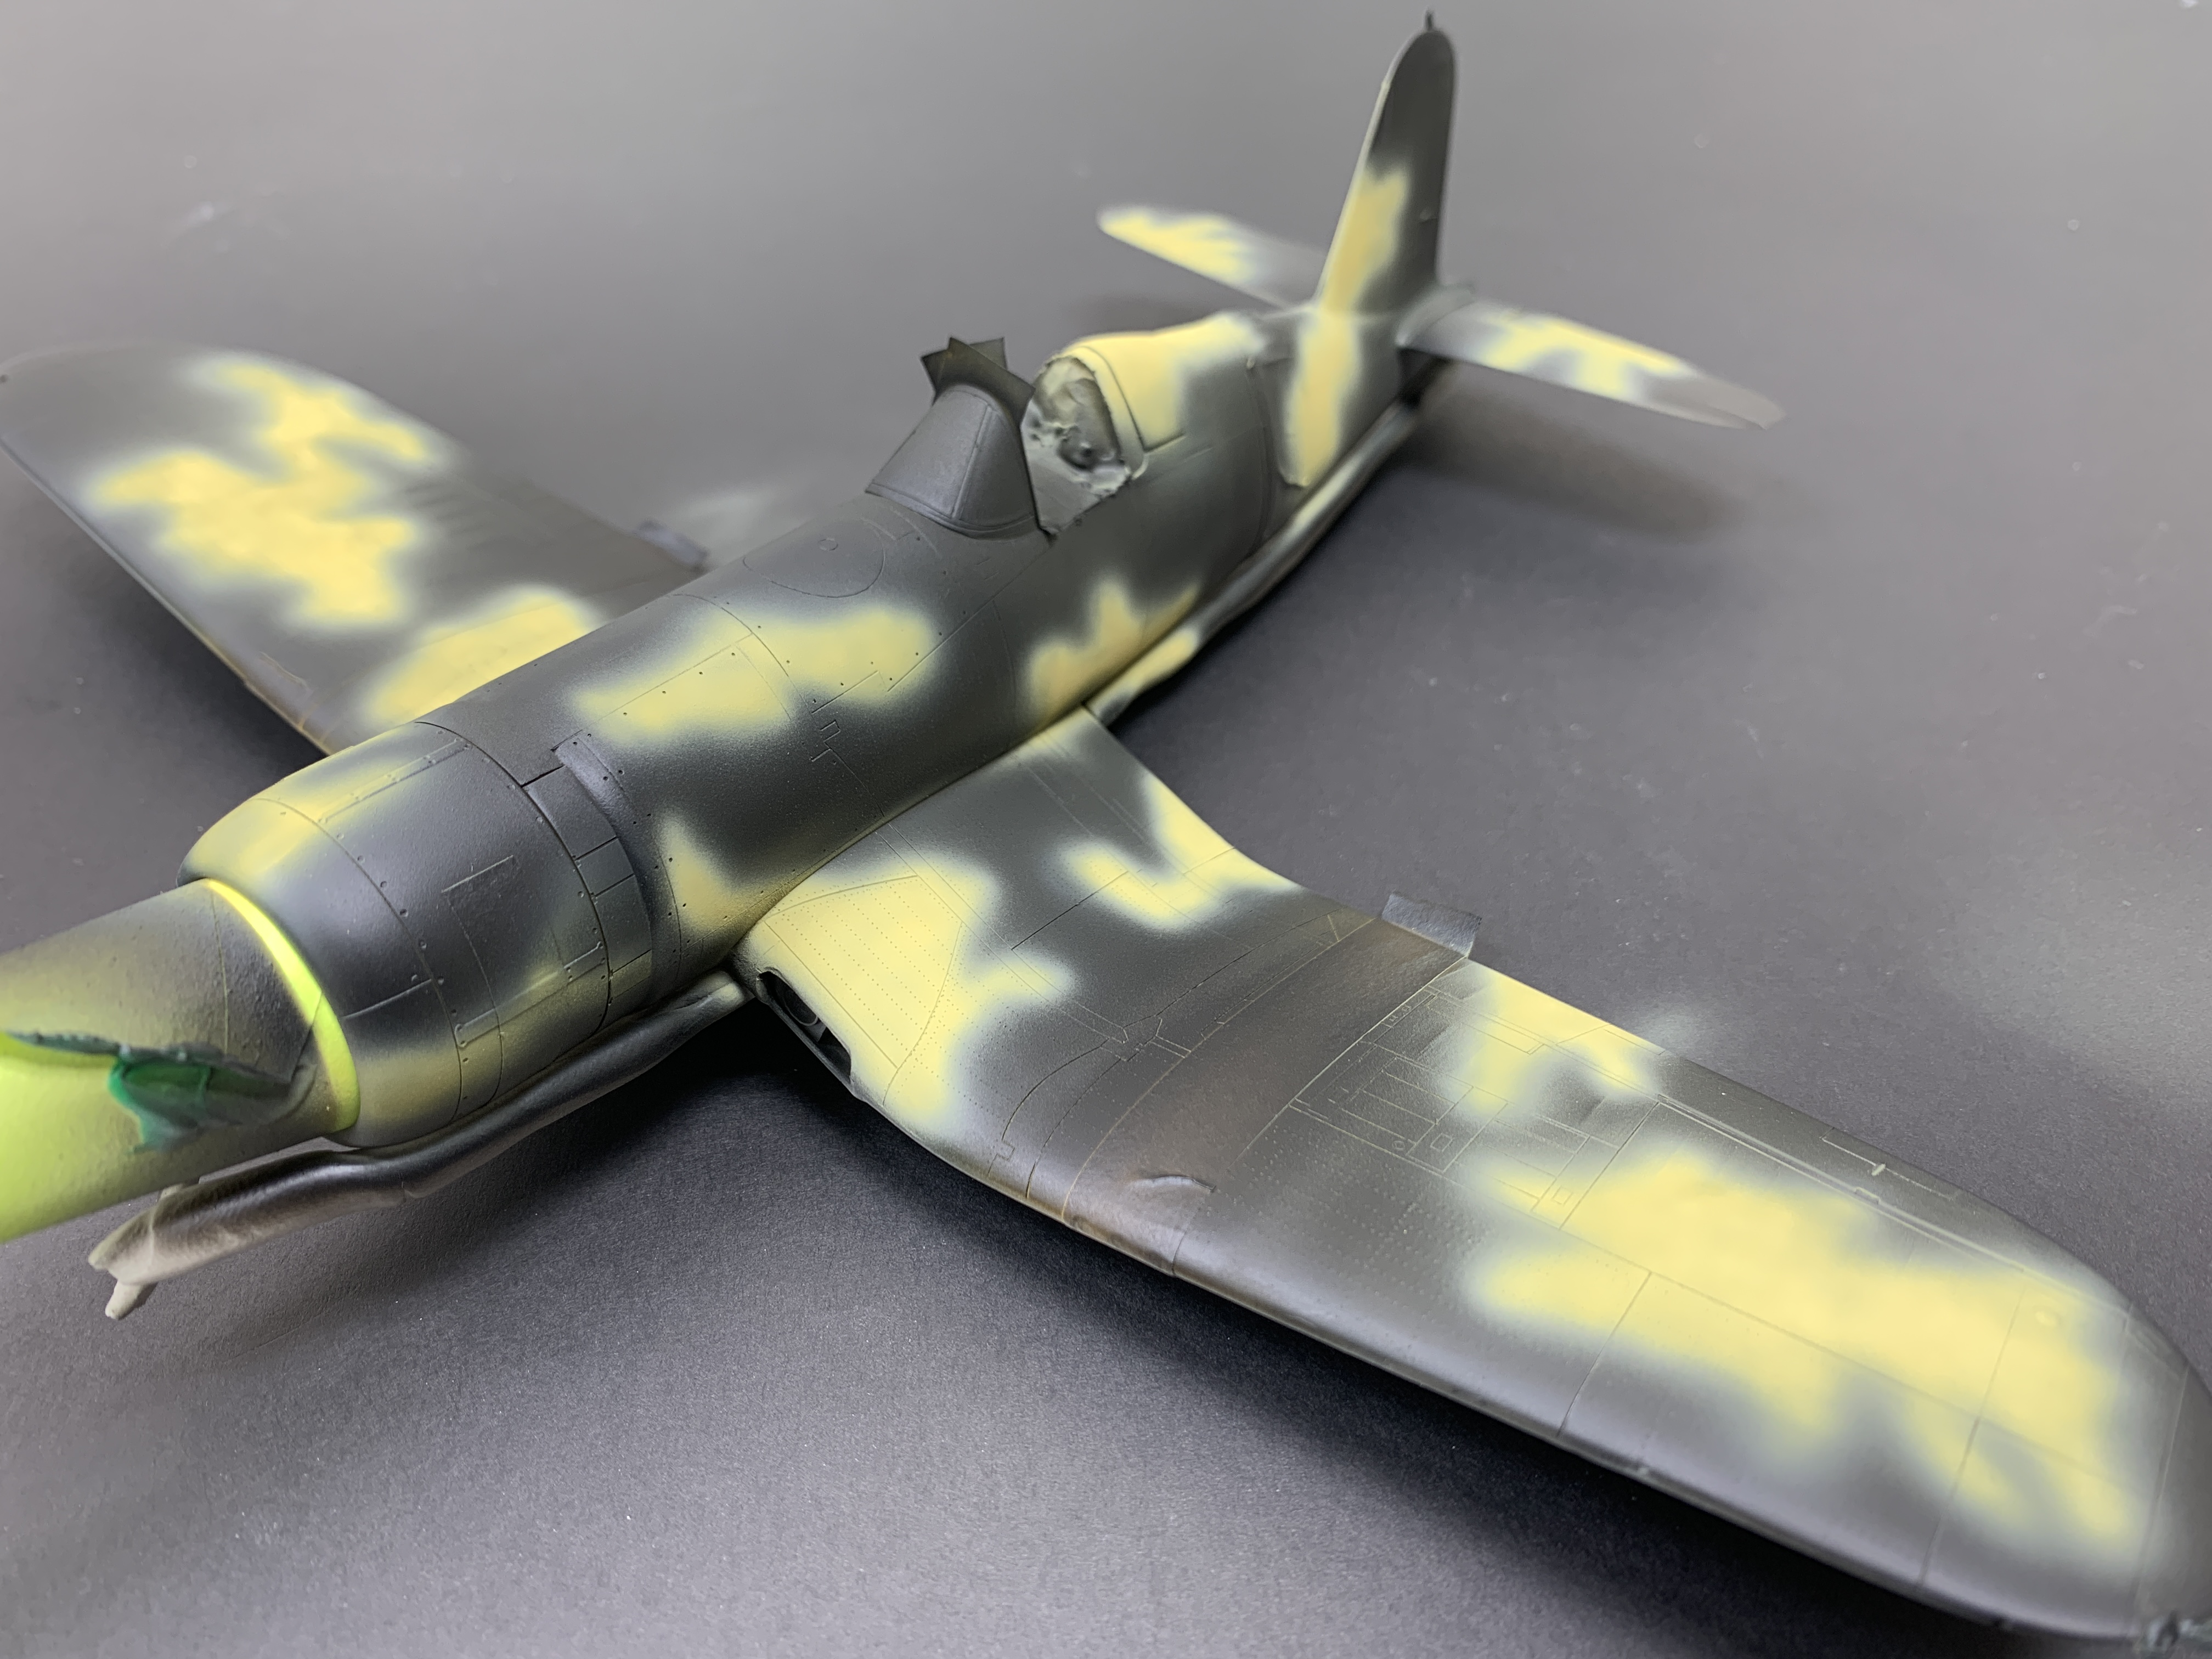
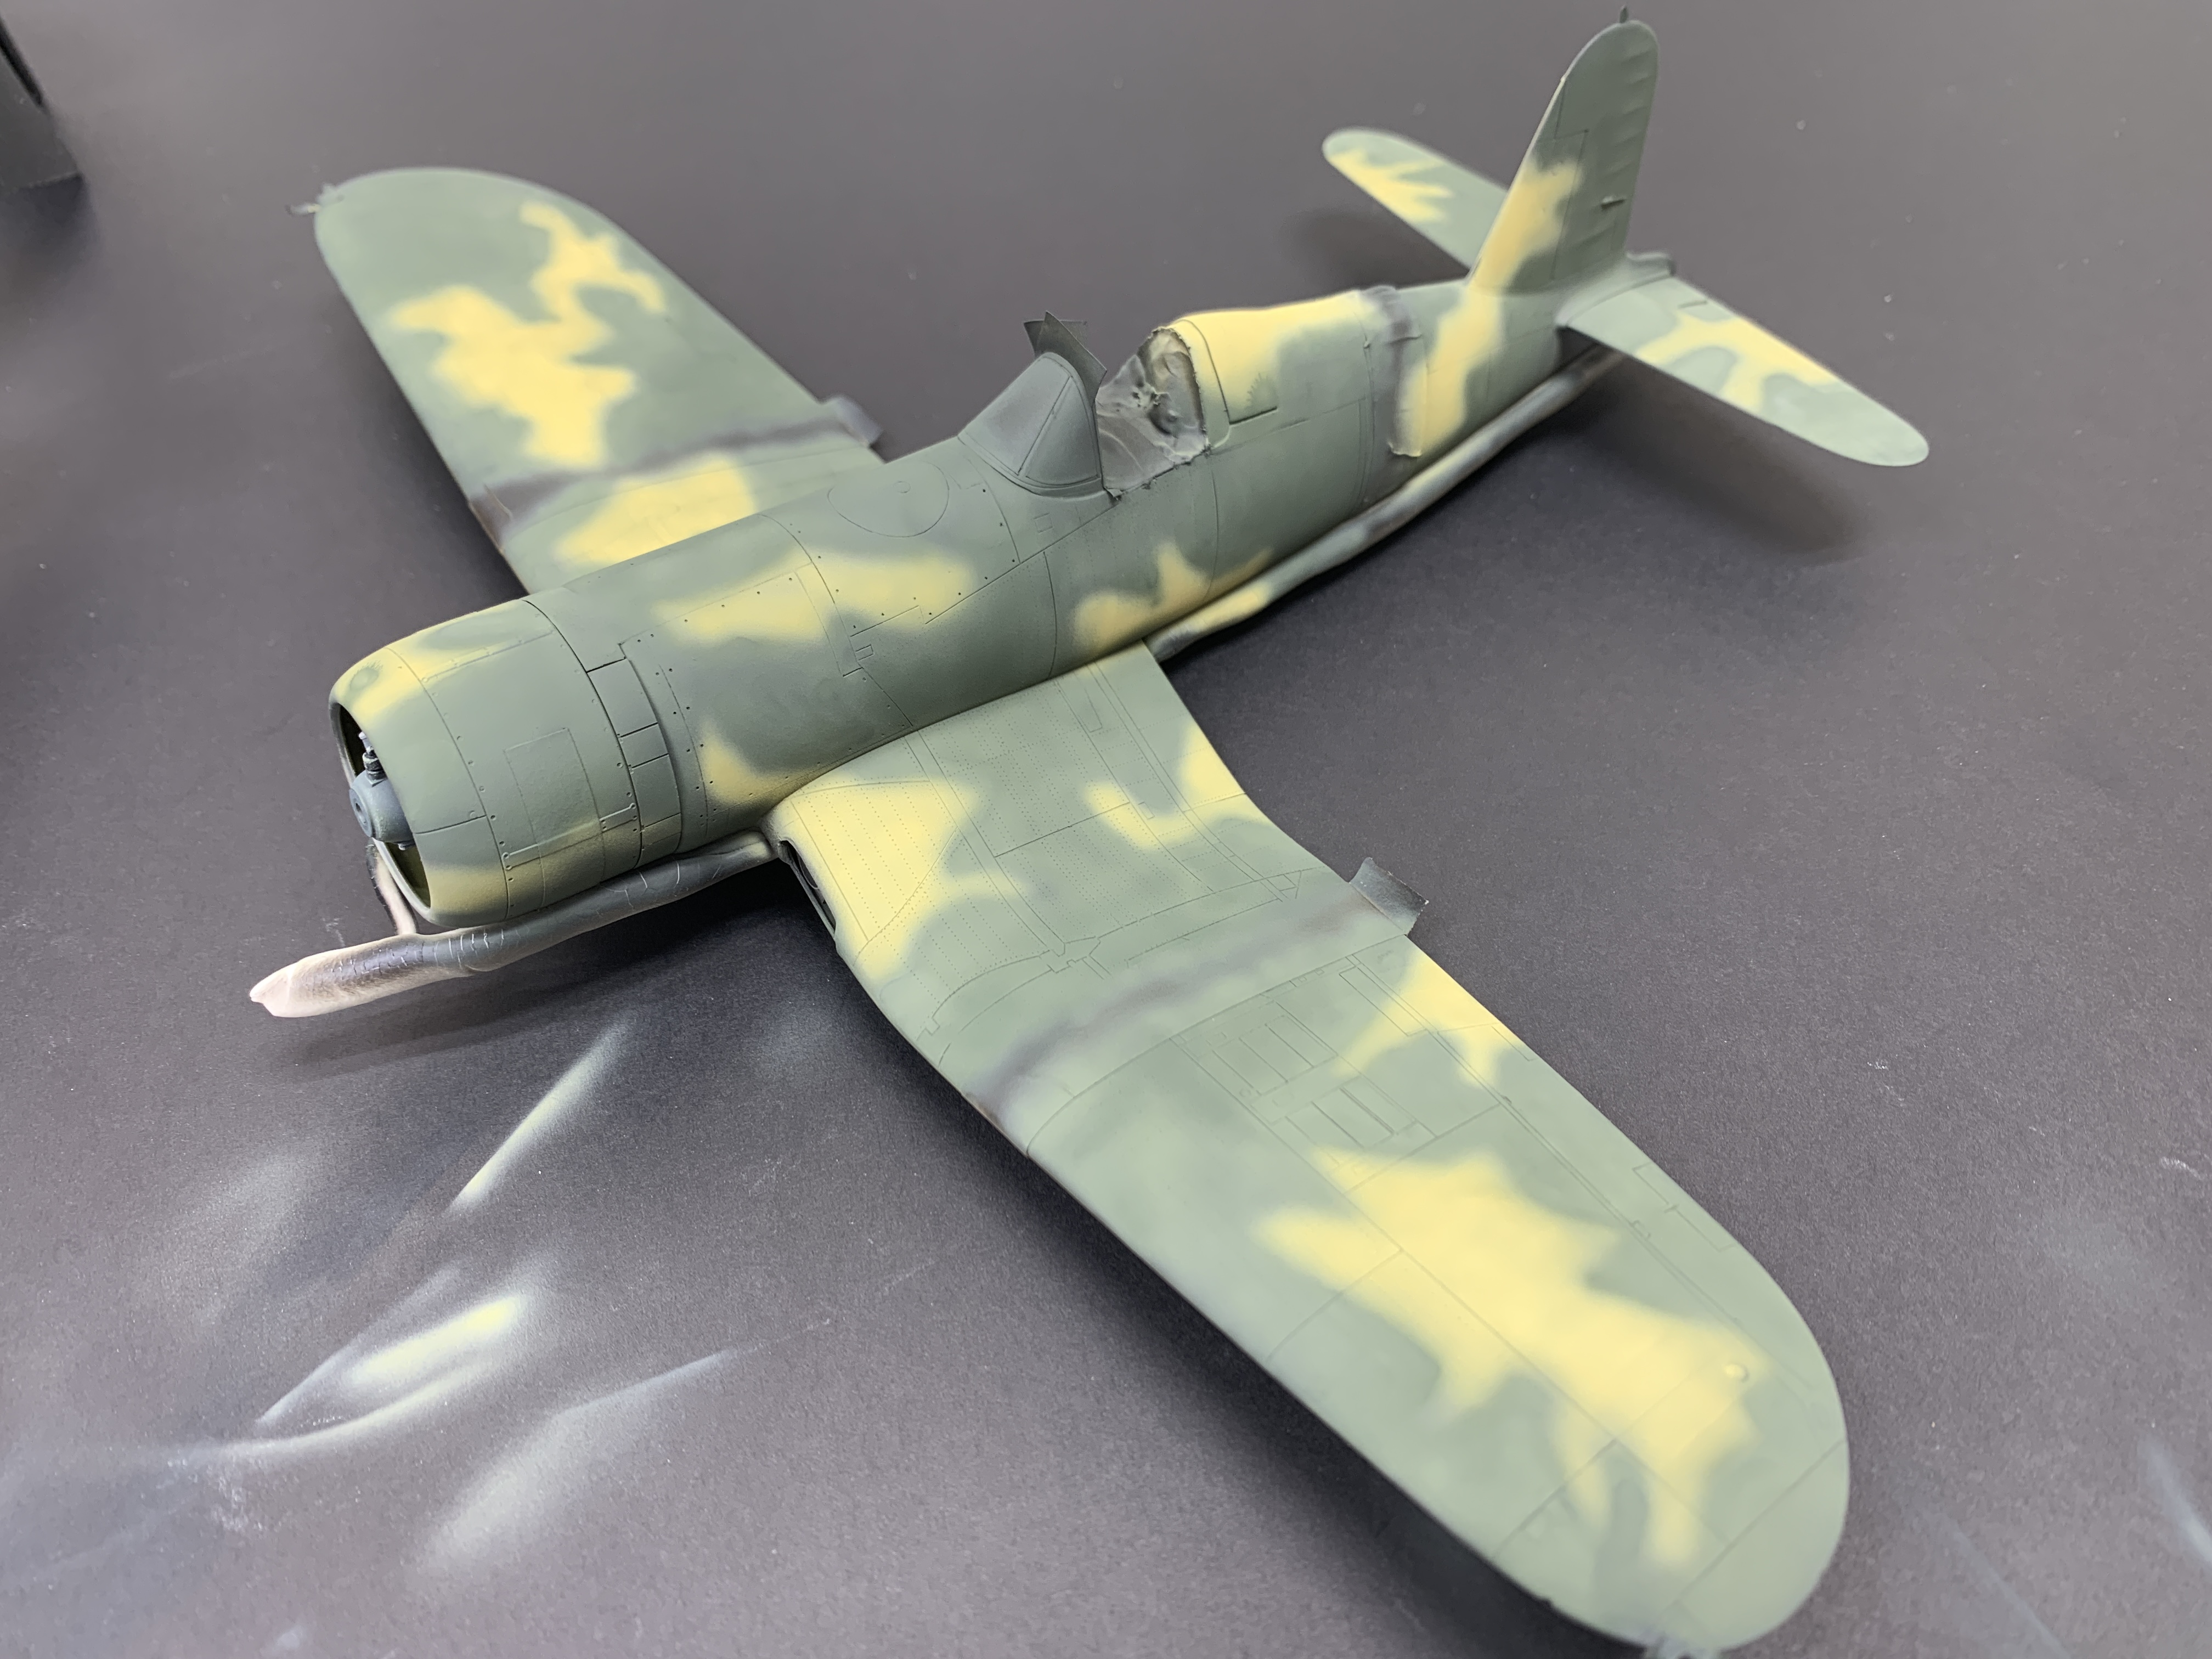
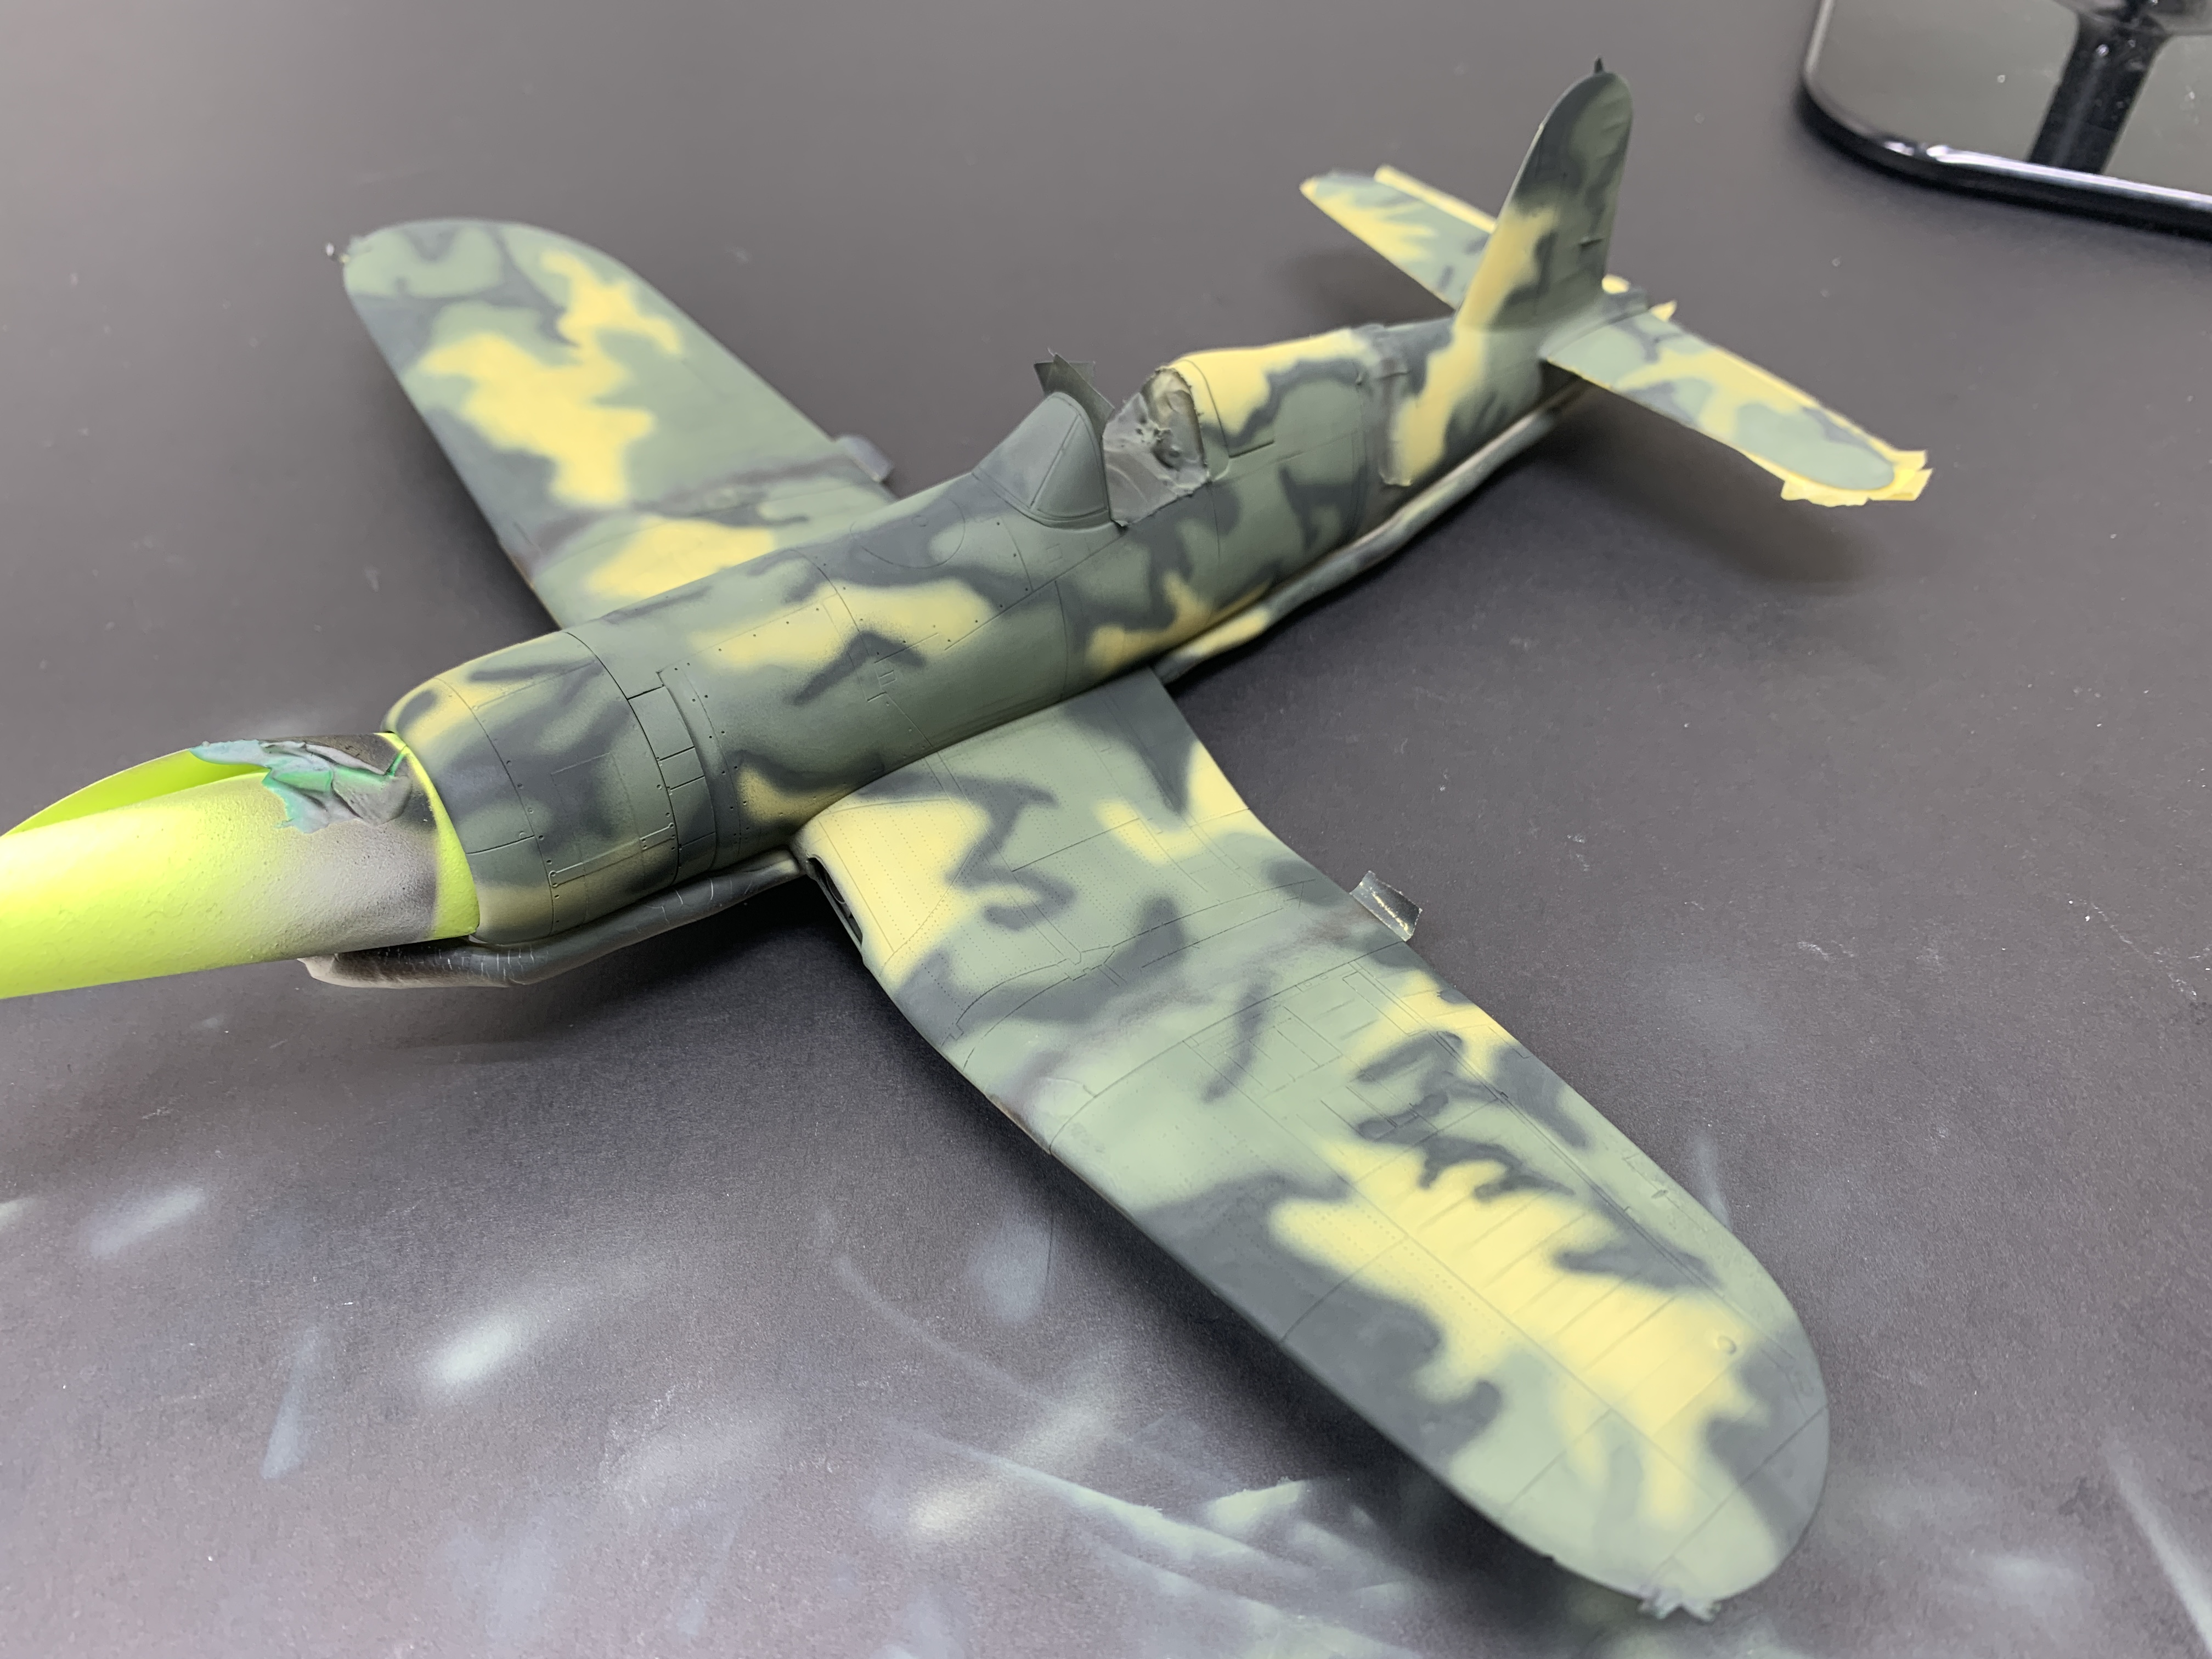

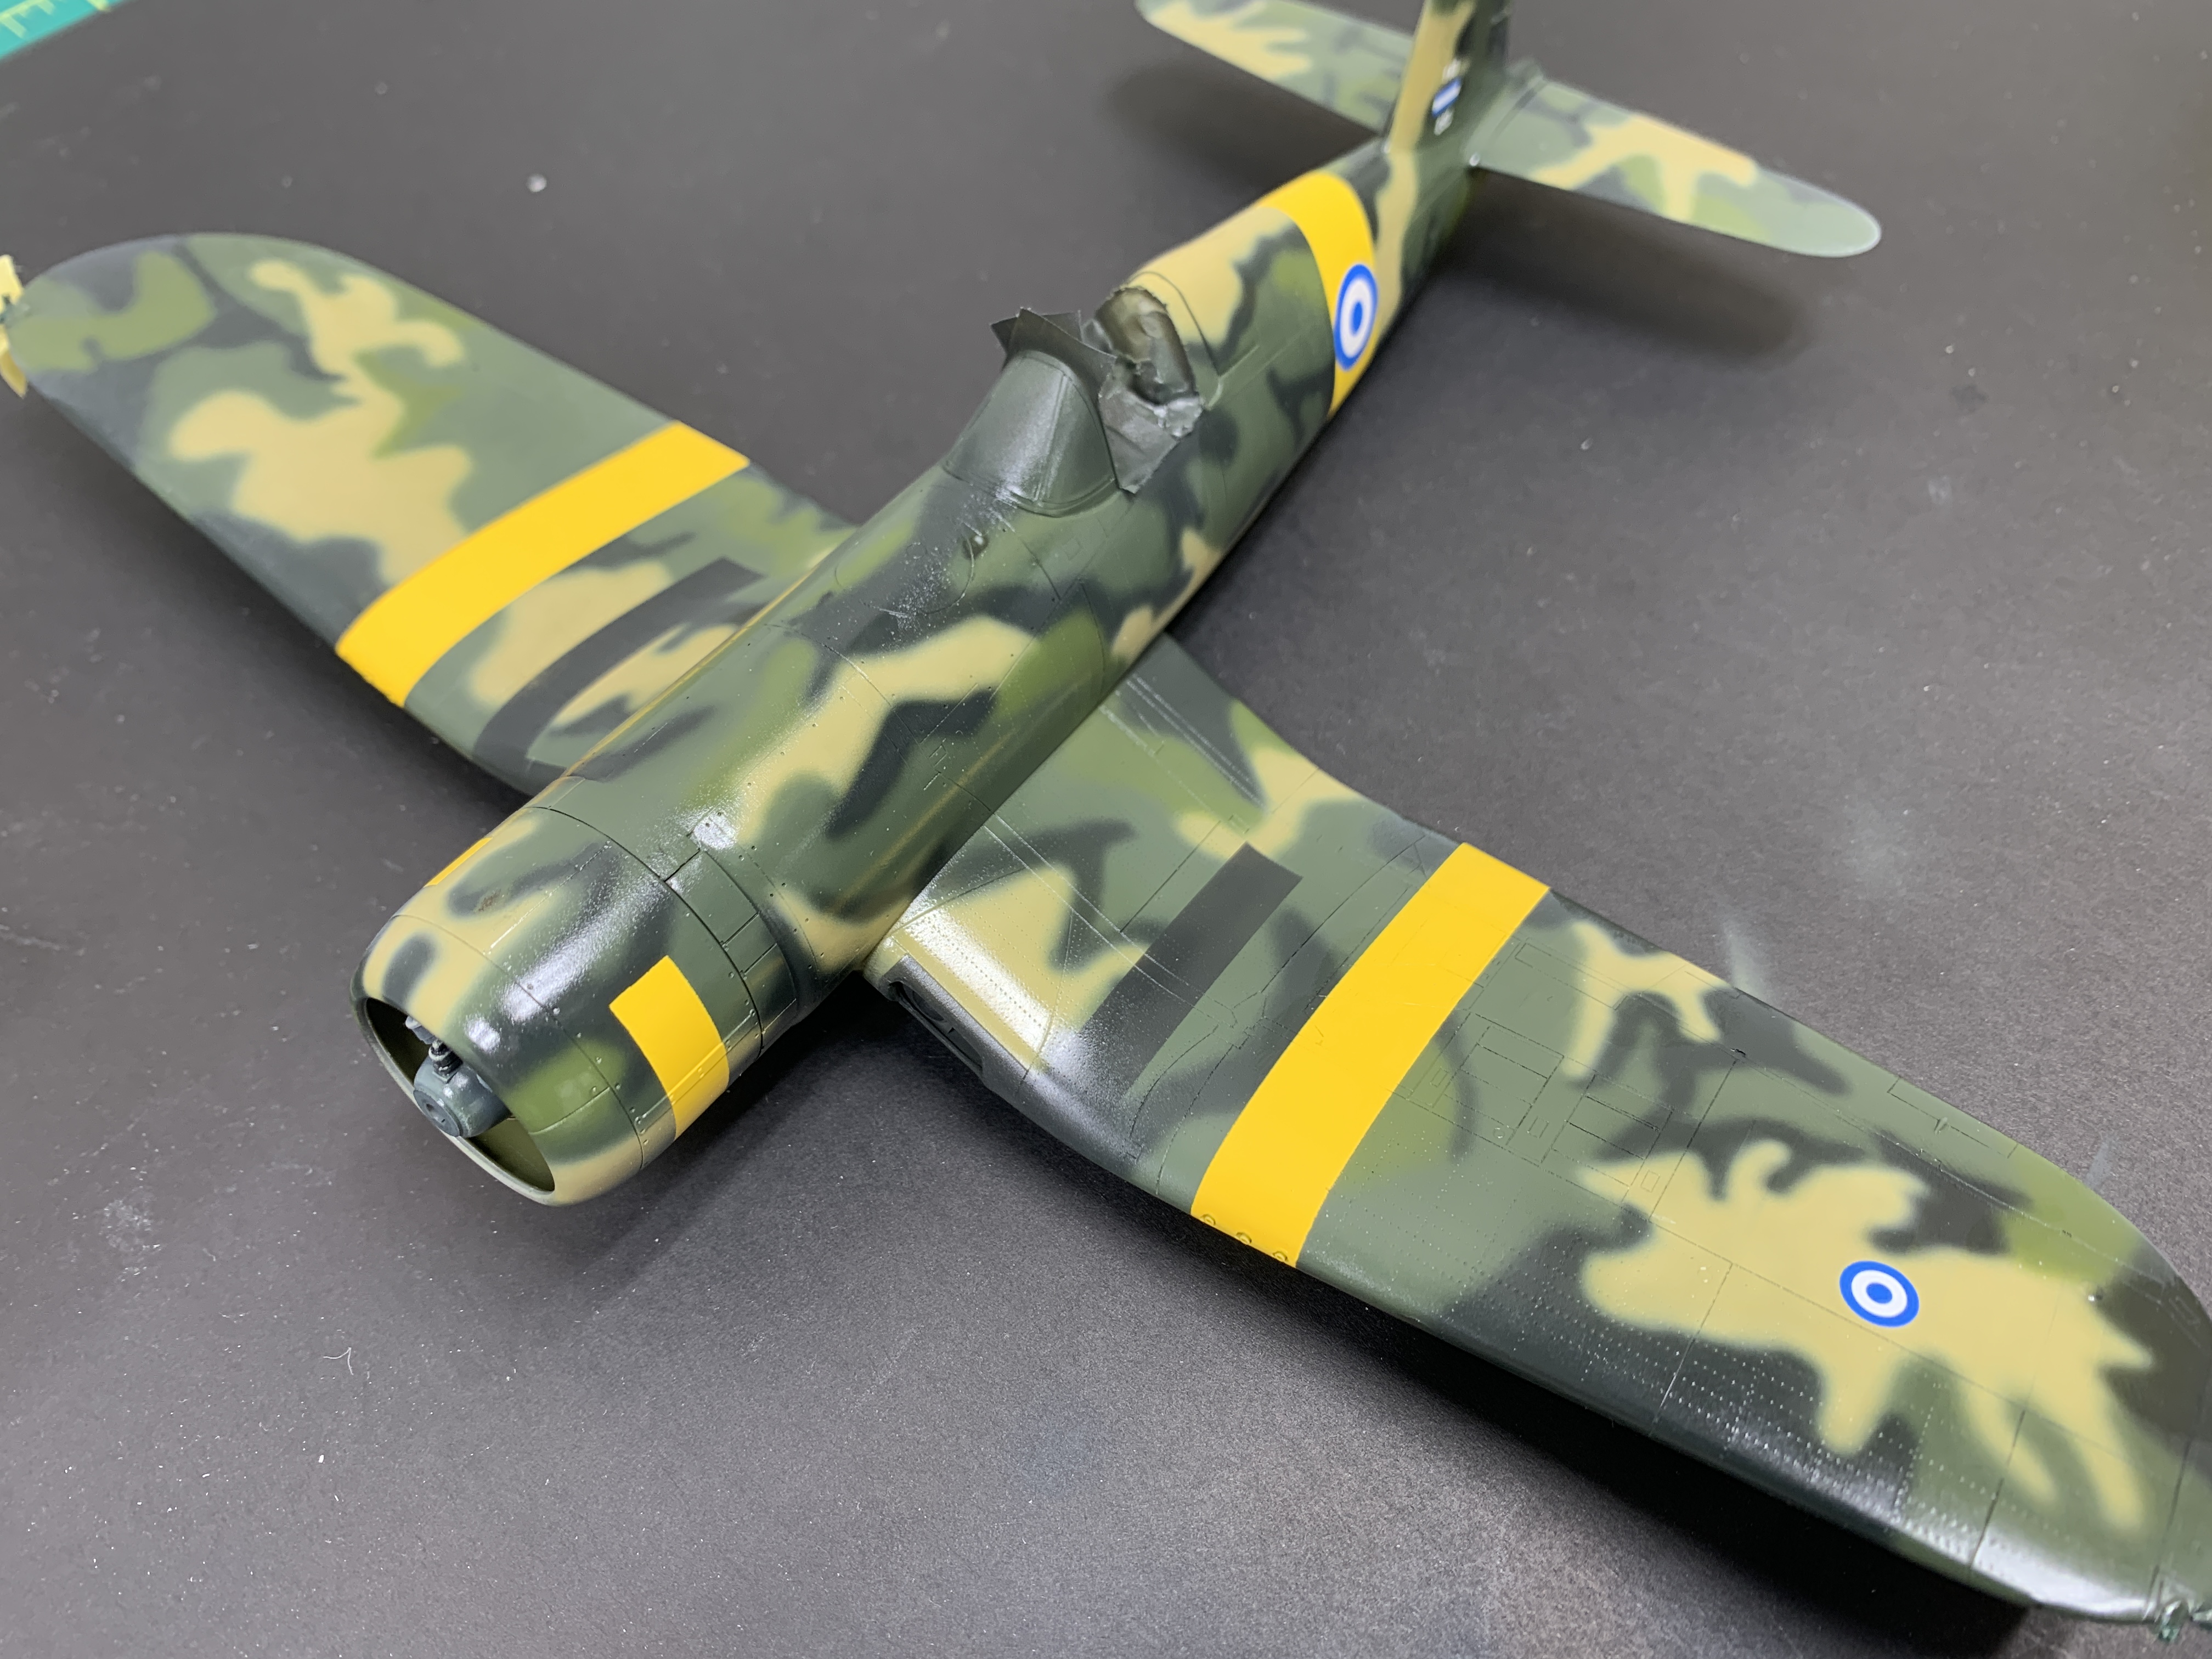
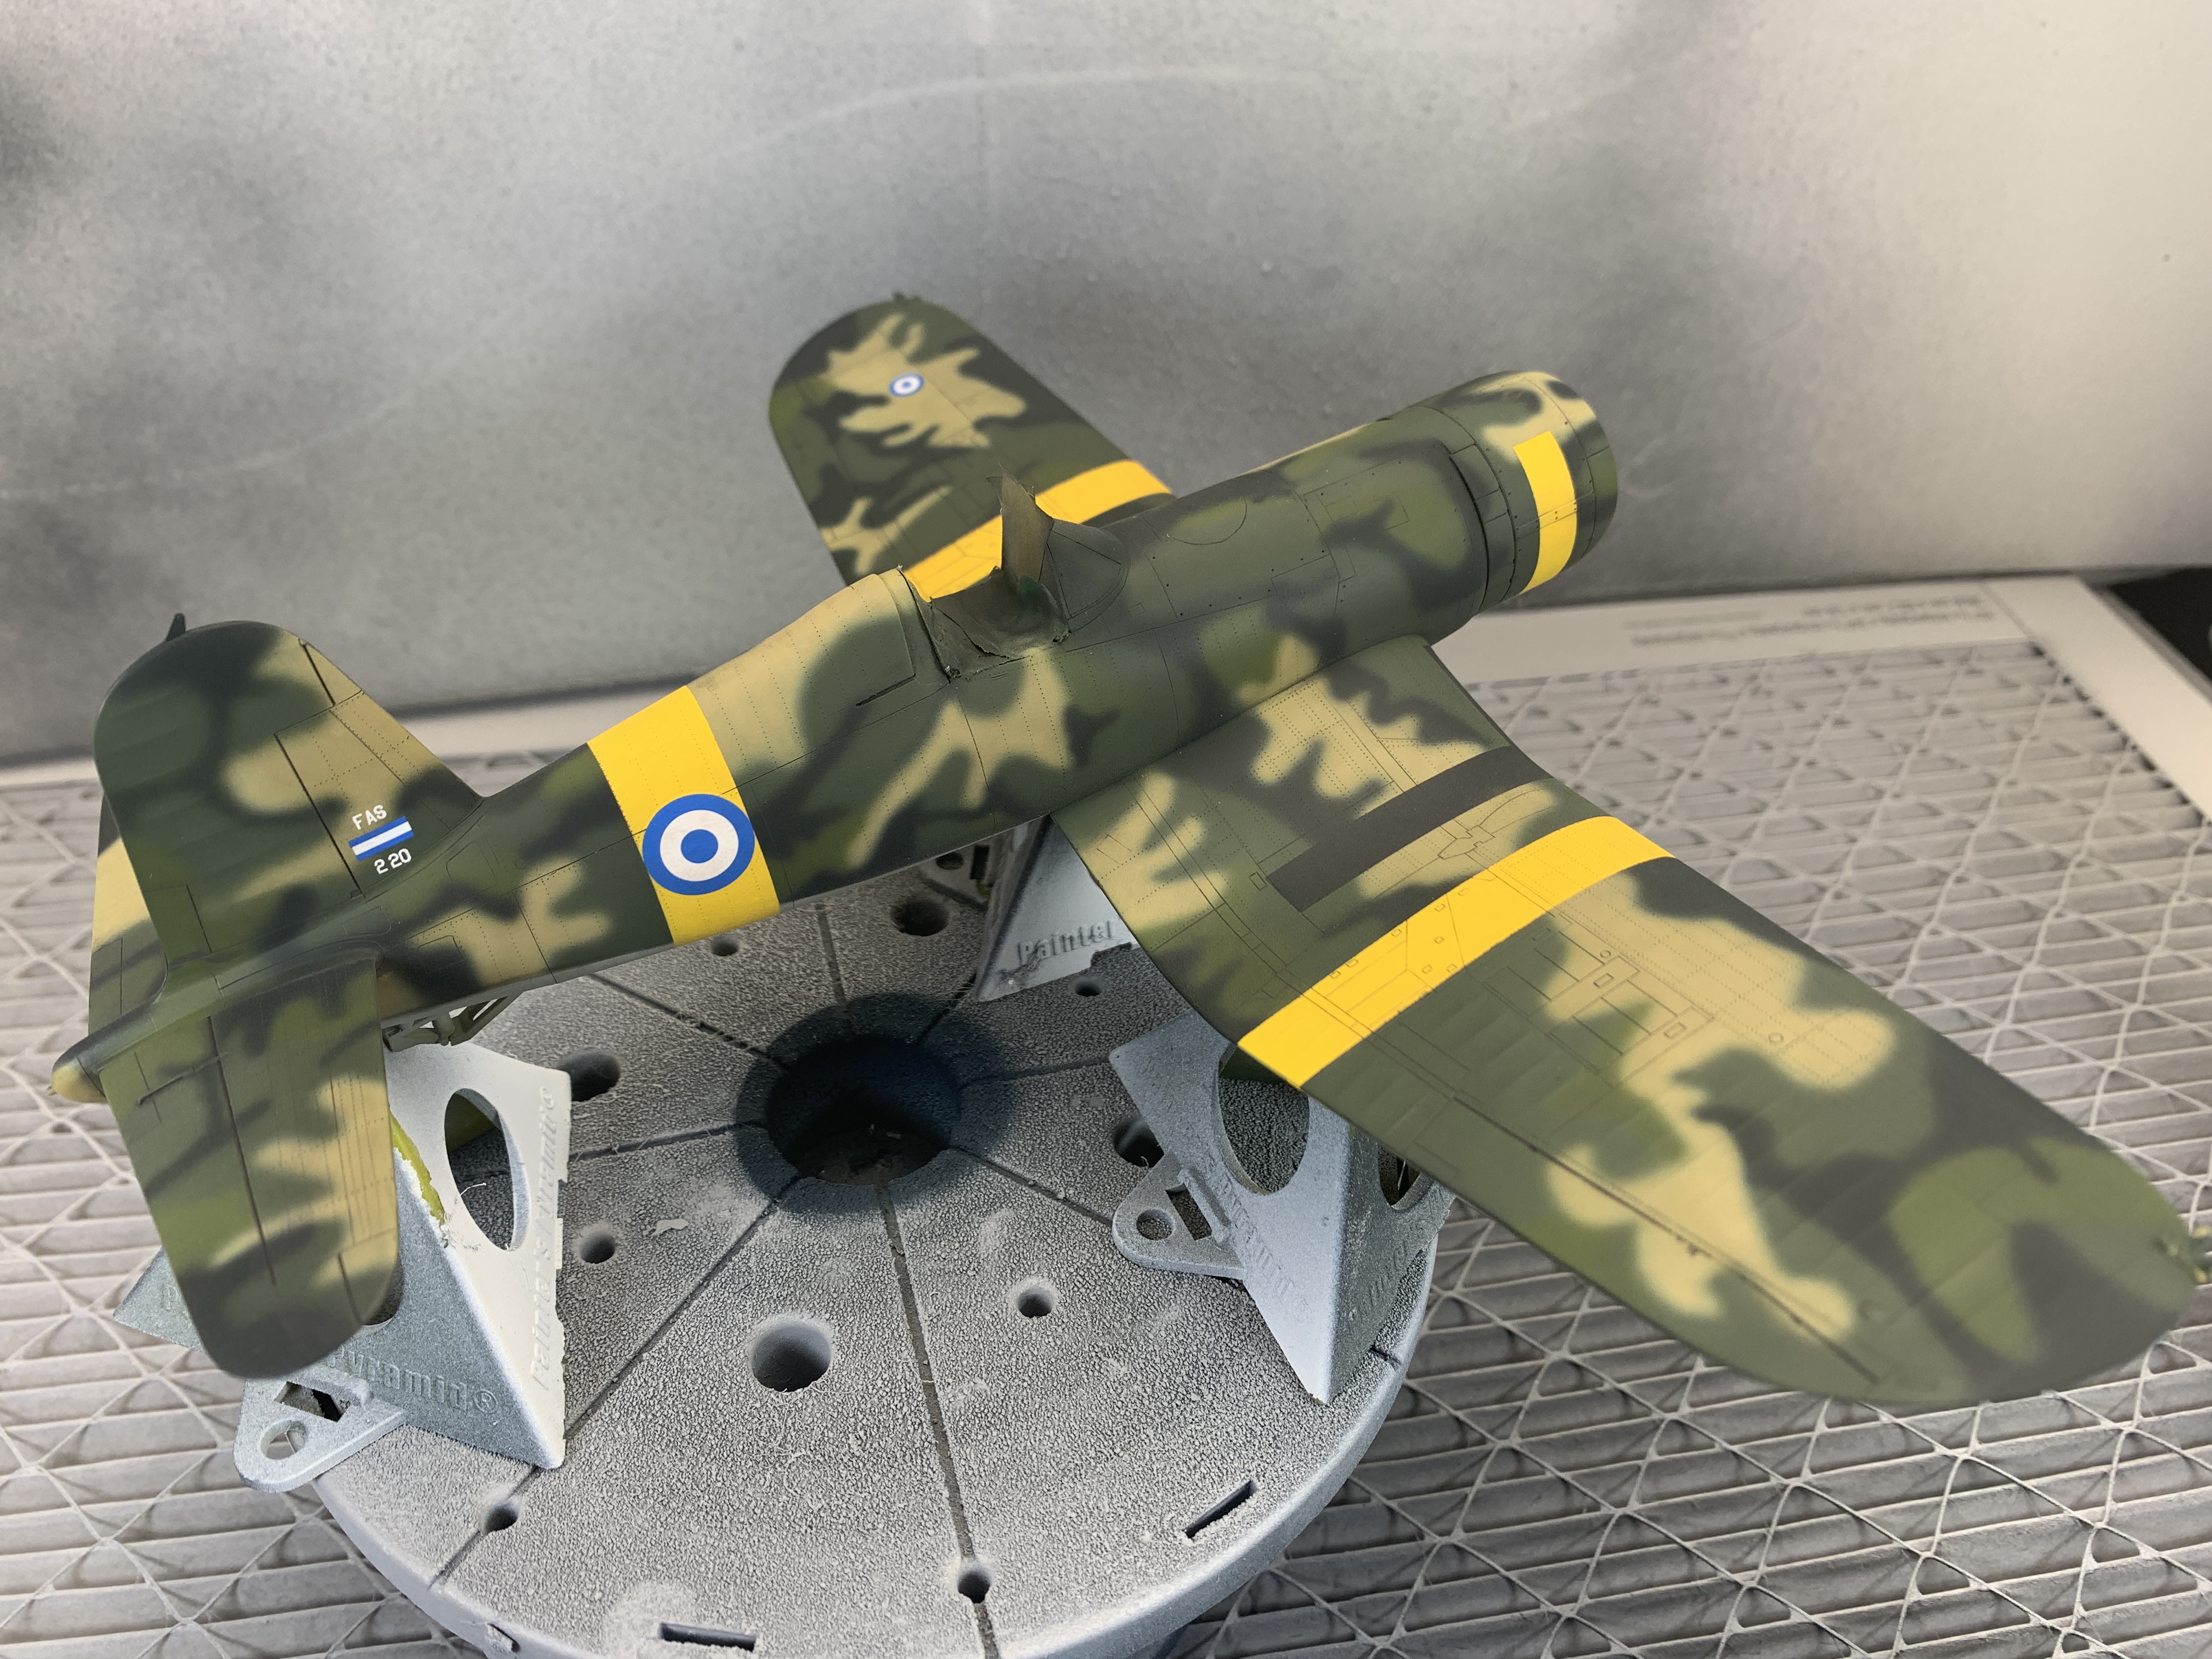
Gaahleri airbrushes sent me their Mobius to test. It is an inexpensive dual-action airbrush with a 0.2mm tip and an air valve that is normally found on more expensive airbrushes. They wanted to challenge me to use it to paint a tight freehand camouflage pattern with it.
Every airbrush is just a little different. I had to experiment a little with the mixes, pressures and the air valve but I did get it to paint thin lines of Tamiya acrylic paint. I found that 2 parts thinner to 1 part paint worked well with the pressure turned to slightly less than 10psi.
As for the colours, there are conflicting references out there. Some say there was a tan and two greens. Others say a tan and three greens. I believe both theories can be true at the same time. This is because these planes were repainted in service. I went with Dave Aungst’s paint suggestions in his excellent Salvador Corsair article over at Hyperscale. I came up with my own Tamiya mixes to match these colours:
| Colour | Mix (All Paints Tamiya Acrylics) |
| Tan | XF-78 (10 Parts), XF-3 (5 Parts), XF-2 (5 Parts), XF-67 (1 Part) |
| Green 1 | XF-67 (4 Parts), XF-80 (1 Part) |
| Green 2 | XF-27 (4 Parts), XF-1 (1 Part) |
| Green 3 | XF-67 (3 Parts), XF-3 (2 Parts) |
| Grey (Underbody) | XF-80 |
After painting I prepared the landing gear and all of the final assembly bits. I kept it simple by using the kit’s landing gear. I dressed the main gear up a bit by adding brake lines, and springs. I grafted a Tamiya wheel onto the tail gear and I drilled out some holes to mimic what is on the real Corsair.
Wanna See A Video Showing The Whole Build?
Last Thing
It was a lot of fun combining a decades old rescue kit with cast off Corsair bits from Tamiya, Hasegawa, Hobby Craft and god knows what else I have collected over the years. I think my riveting experiment was a success. It certainly added a lot of visual interest to the model. I definitely learned a lot and I will be riveting a few of my future builds.
Lastly, painting a camouflage freehand was a bit of a challenge but tinkering with mixes and pressures makes this a lot easier. Thanks again to Gaahleri for sending me the Mobius airbrush, I was impressed with the performance, especially at its price point.
If you want a Mobius Airbrush or any other Gaahleri airbrush, and you want to save some money, you can order directly from them using my discount code 10MODELS:
Official Gaahleri Website Link: Discount 10MODELS automatically applied
Amazon (US & Canada): Discount code: 10MODELS (same code for both US & Canada)!

Corsair build was a neat idea and looks good too.
As far as keeping parts; with doing several genres of model building which also include sci-models, sci-fi game miniatures, trains in several scales, and others, there have been times where parts kept for several decades have turned out to be just the thing. Drop tanks, missiles, large bombs, have been very useful for the hulls of sci-fi game miniatures.
And there’s instances like, “Oh, wish I had a triple valve for the air brakes under that RR car, but I want to do that now and get the car done, don’t want to order just one of those … hey, ya know … well look at that, this little whatever it is from whatever kit it was, will look good enough in the shadows as long as that car stays sunny side up.”
LikeLiked by 1 person
I have been thinking there might me just one more little project before I send this stuff out. Something fun and stupid
LikeLike
Oy. Do I have parts. Aircraft, Armor, the occasional four-wheeled thingy, and spacecraft both real and fictional. Yeah. I gots parts. And as many (many) parts as I gots, I also gots tons o’ stuff. Broken watches (gears, y’know), chopsticks (great handles for homemade tools), enough solder (conduits, wiring) to rewire the Battlestar Gallactica, brushes, jars, chemicals, vacuum station, molding station, lathe, triple beam scale (when I mix something, I don’t guess about ratios), and it’s evident that I buy tweezers by weight, but absolutely zero sanity on hand (in any grit).
So in looking at all the scheibe I have that’s modeling related, in context my spare parts bins are statistically insignificant.
LikeLiked by 1 person
What a fun build Chris, and it turned out great! I did something similar with Spitfire parts a few years back, had a lot of fun and it was a skills challenge. The spare parts bin has saved me several times over the years and I keep thinking some unspecified Steampunk or Sci-Fi subject would be fun to cobble together from all the left-overs at some point.
LikeLiked by 1 person
Fully agree with your sci-fi subject as a fun project
LikeLike