")
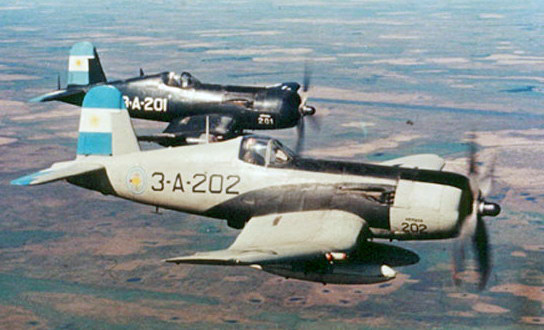
Pretty isn’t it? I like the late Corsair variants; they were more bomber than fighter at this point and armed to the teeth. As for their service in the Argentine navy I don’t know much. However, with the blue on the rudder and the big anchors on the wings – these Corsairs are just wonderful. I really enjoyed this build despite the challenges of the Hasegawa late Corsair series molds. Here is what I started with:
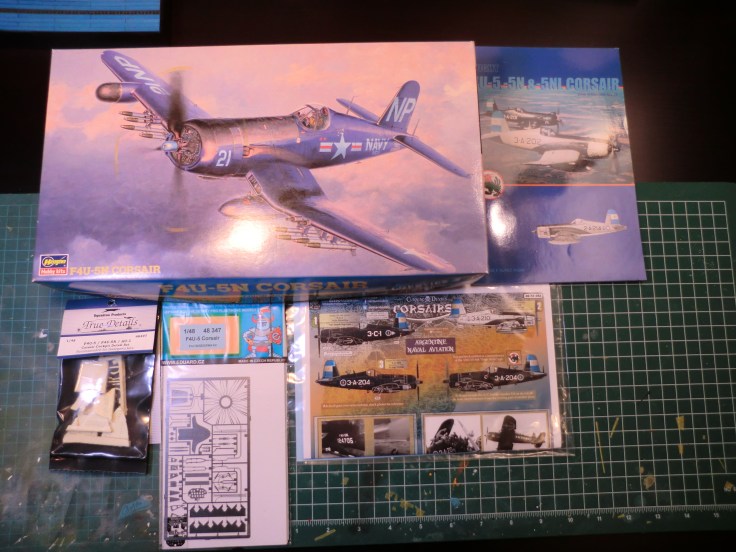
Photoetch AND resin? Turns out it was a bit of overkill. The resin left a bit to be desired but I used most of it. The Aztec decals were outstanding. More on that below.
And it begins….


The cockpit is a medium grey (a first for me!) I did as much highlighting as I thought would be noticeable. The cockpit is from True Details and honestly, aside from the seat, its not too much better than the kit pieces. Actually, the resin instrument panels (there are different ones for the -5, -5N, -5NL) are not very nice at all. I tried to use the -5 specific resin panel and it never looked good – so I modified the kit part to fit with the resin cockpit tub. Corsair experts will know this is the wrong instrument panel but what can I say? I liked the looks of this one better.
Gear Bays
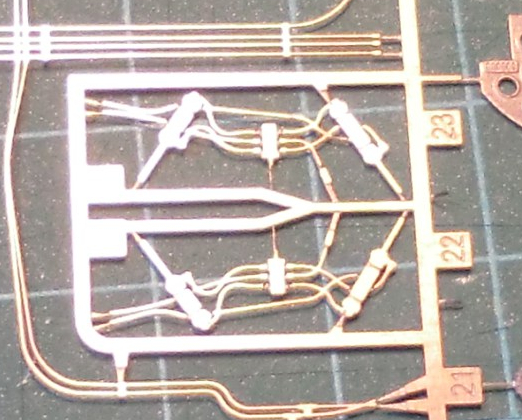
With the cockpit is done I am moving onto the gear wells. The eduard set has some wiring but I think its not very convincing (its flat) and difficult to work with. The hydraulic actuator on the PE fret is strange as the real thing is very 3 dimensional and this one could not be more flat:
So I am stratch building – using a little evergreen round I made the… well, I don’t know what it is, the hydraulic manifold for the gear door actuators? I also made the pistons that open the gear doors with the same rod and some tamiya tape cut thin. I drilled out everything for the 0.10 led wire:


Last part is the gear itself. For the tail gear, I used the bits from the eduard set – the hook actuator and the… well, what do you call it? A tie down? I then drilled out some holes on one of the braces as the real plane has that. Onto the main gear – I found the eduard hinges difficult to work with because they are very offset – I don’t see why they did it this way but its the 3rd time I am seeing it. So I made the best of it but I am afraid it will be the weakest part of the build. Other than that I added the tractor pull rings. I used more lead wire for the brake cable and I used thin wire to create some springs.


The Hasegawa Corsair Nose Insert
Ask anyone who has built the Hasegawa Corsairs from -5 to -7 and they will tell you about the dreaded “nose insert”. I think Hasegawa wanted to have more flexibility with their molds so they made the fuselage part separate from the nose. Mind you, this is not just the cowl, its the “front” of the fuselage. Anyway – no matter what, you end up with a strange step in the middle of a panel that must be smoothed out. The step is inconsistent between models and boxings – some have a hard ridge and some are barely a bump.
The problem is that its right beside a lot of detail – so one has to be careful when trying to sand, file or blend this step in. How I deal with this is to make the panel lines slightly deeper (just run your scriber a couple of times along the panel lines. Then I deepen the rivet holes. Once this is done I carefully sand down the ridge.
As well, the fuseleage needed a spacer near the nose to properly mate with the bottom wing. I learned that lesson the hard way the last time I build this model. The other ‘problem’ is the attachment of the cowl… despite hasegawa’s obvious cleverness with this design, its not a perfect mate and some clamps, sanding, will have to be used. But this is supposed to be a ‘shake and bake’ right? 🙂
Drop Tanks
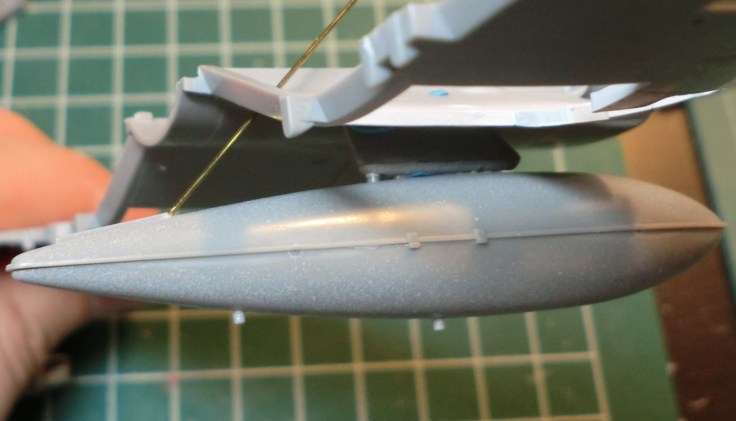
With a bit of work and a nice photo to work from, you can scratch build the “bar” that attaches the back of the drop tanks to the wing. The attachment point on the bottom of the wing is actually molded on:
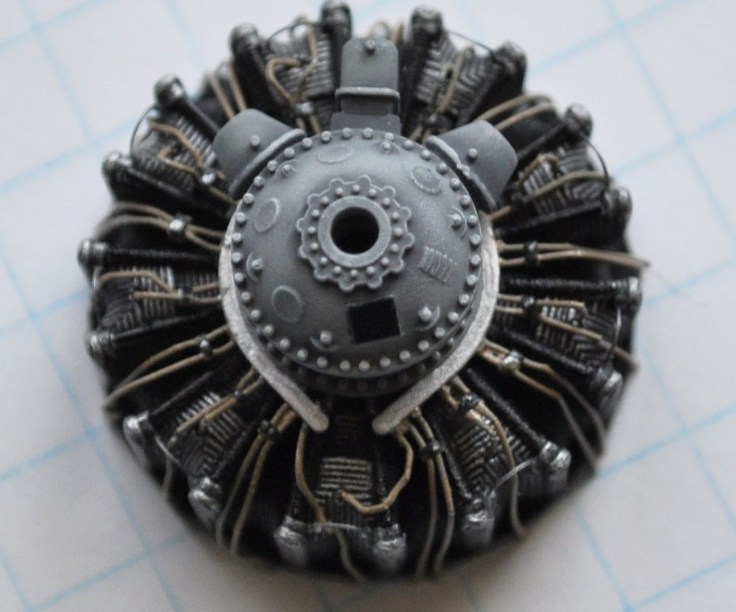
Engine
Here is my engine. I made the ignition wires from lead thread. The ‘clamps’ are tamiya tape. The rest is just paint and some post shade with some drybrushing:
Sights
This is a later mark gunsight and was part of the true details F4U-5 set. I cut out some plastic from a bubble package to act as the reflector and added some led line from the sight to the dash… not sure where it connects or what it does but it looks cool.


Painting, Decals, Panel Lines
I really can’t remember the mixes used for this build except to say that everything was tamiya acrylic. The Aztec decals were excellent. I highly recommend them. The panel lines were washed with Flory washes.


Final Thoughts
This Corsair really stands out in the collection and has a very attractive paint scheme. I have done well with it at a few contests despite some challenges in finding the right category (its not WW2 and its really not an “Allies”).

Leave a comment