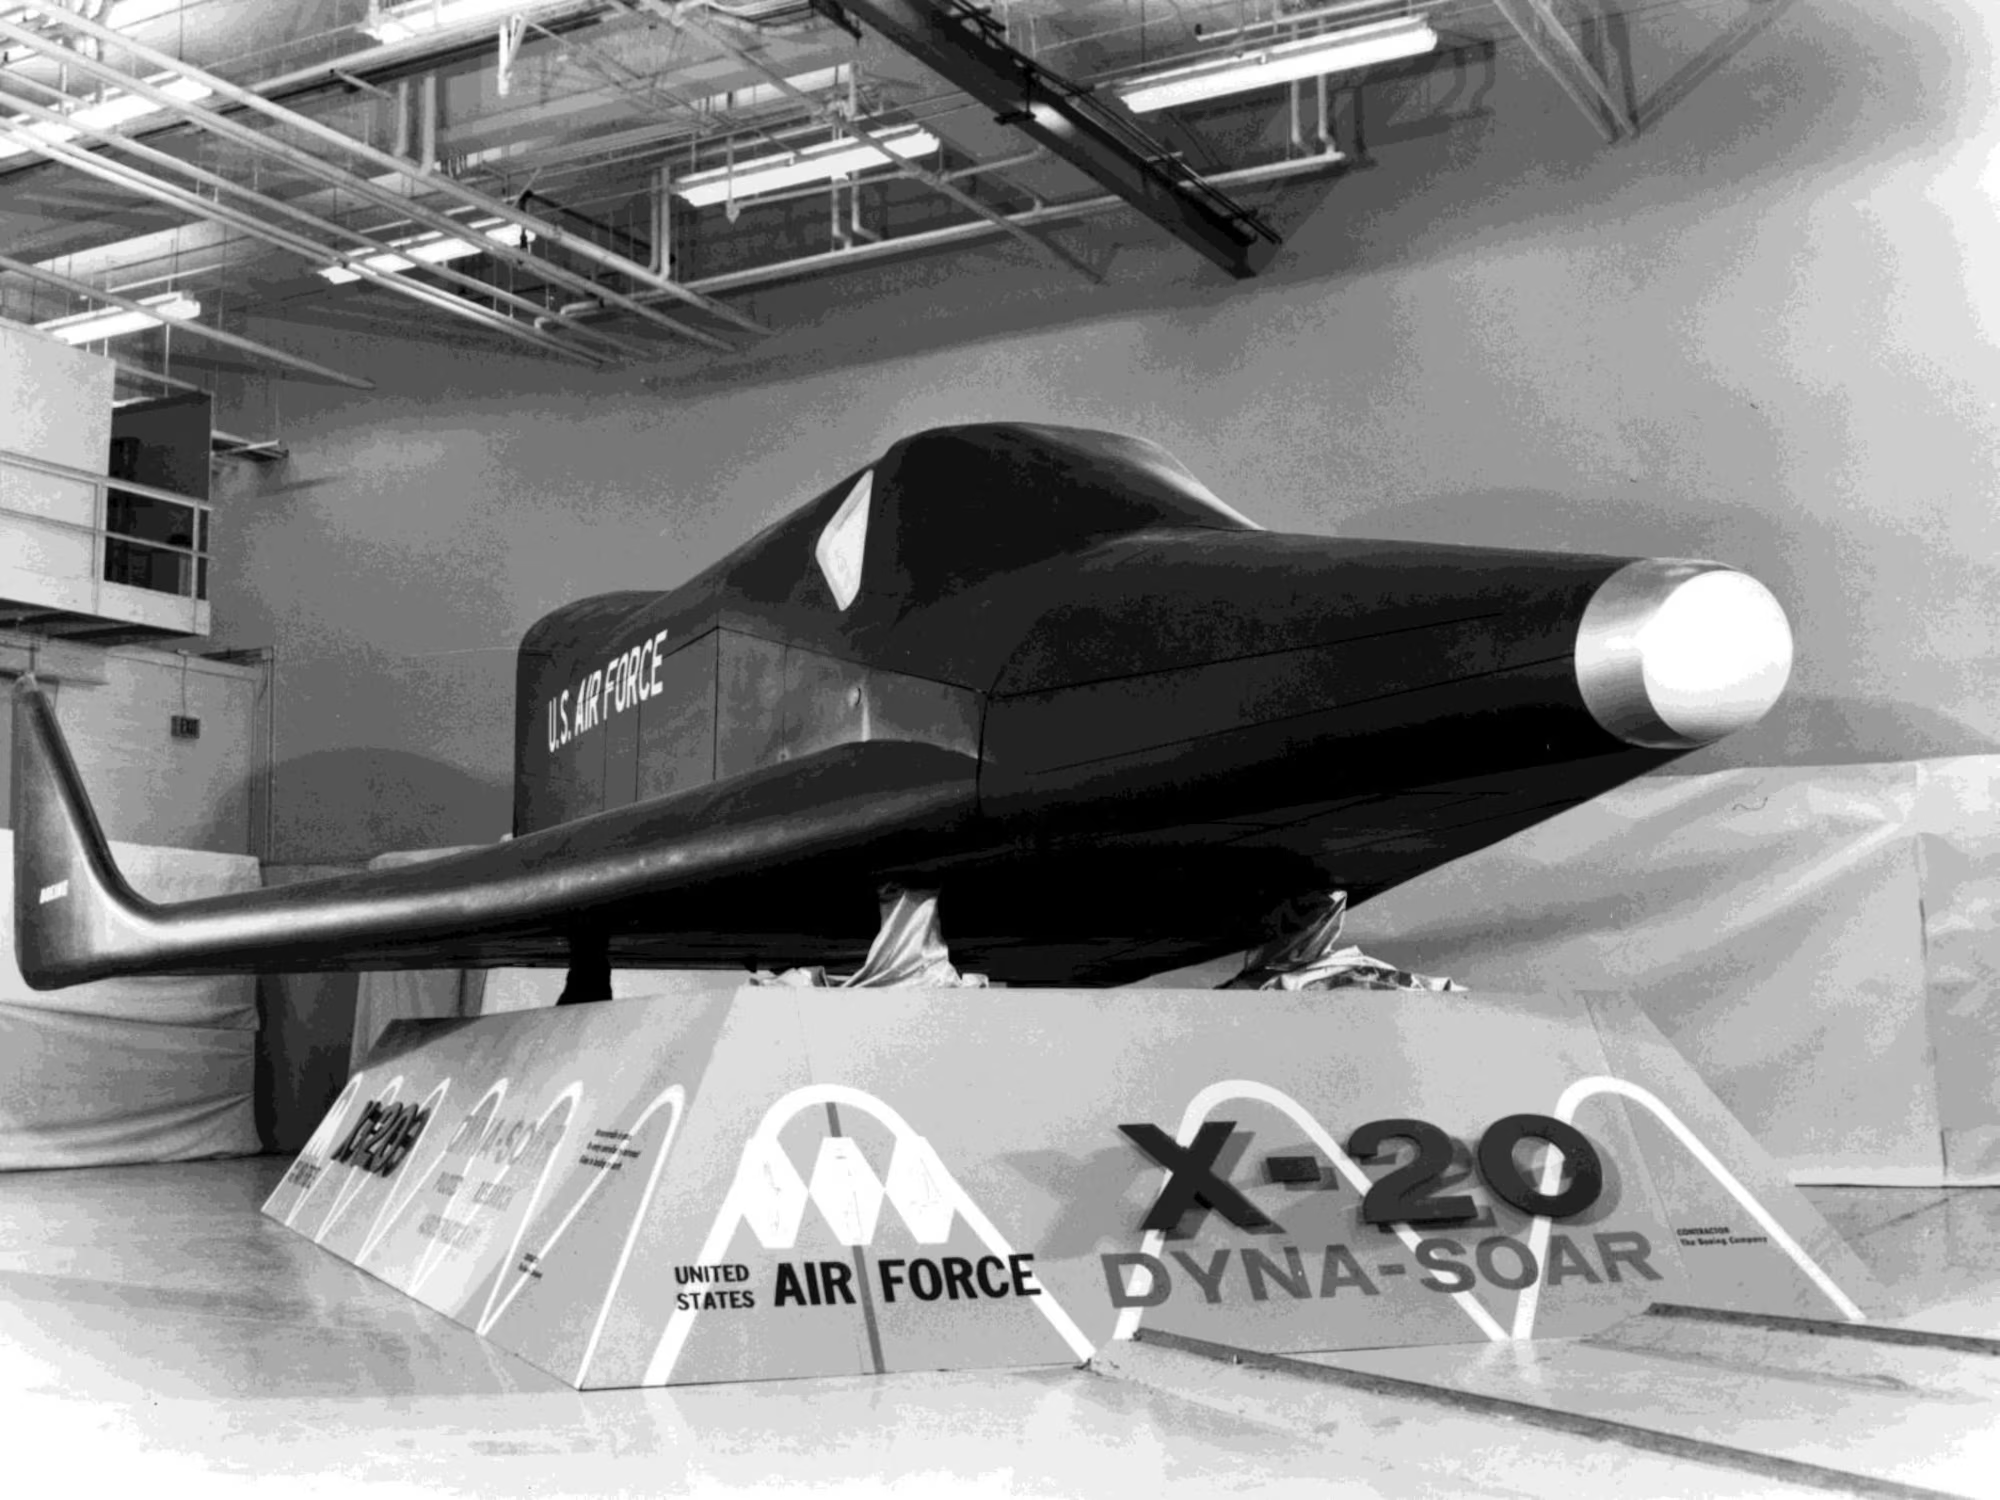
Remember that time when money wasn’t tight, man-made wonders were constantly being built and funding for every conceivable aerospace program was announced weekly? Yeah, me neither. But I imagine it was like that when the X-20 was conceived and plotted out. The equivalent of five and a half billion of today’s dollars was spent to bring this pre-shuttle design to the mock-up stage. Keep in mind, at the same time the Mercury space program was well underway and the follow-on Gemini program was ramping up. Ahh to have all that money available. It must have been heady times in the aerospace industry.
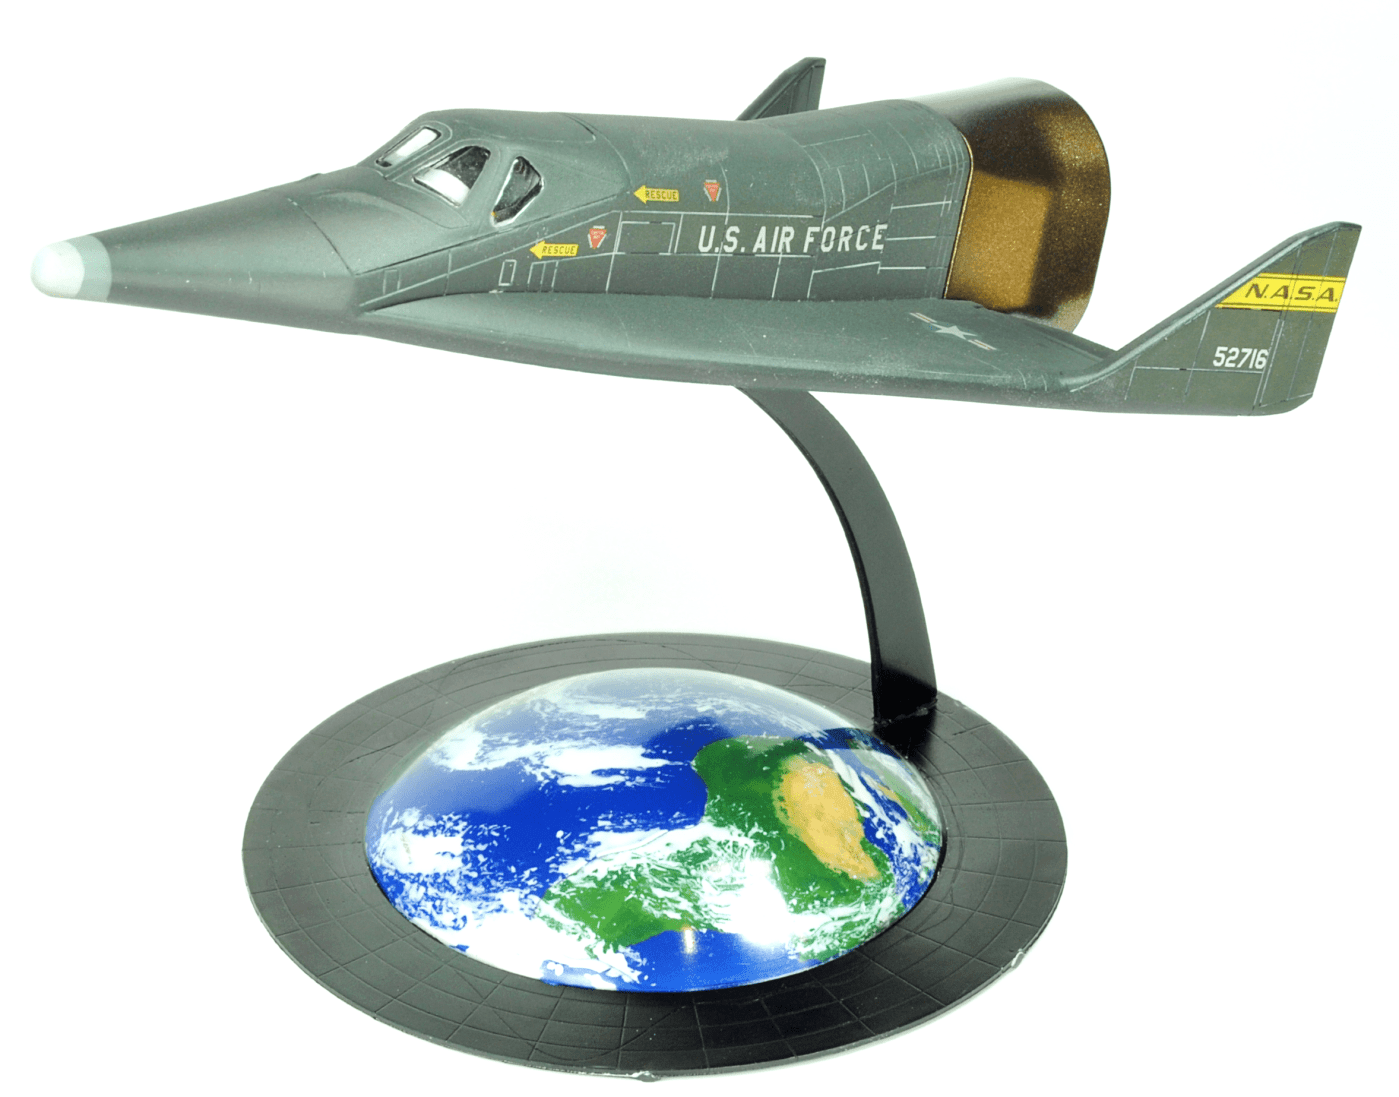
The X-20 was to be, essentially, a mini-space shuttle owned and operated by the Airforce (and not NASA). Shot to orbit with a rocket, there were several potential missions this spacecraft could do on paper: launch or retrieve a small satellite, repair a satellite, bring up to 4 very cramped astronauts to space, conduct spy missions and possibly intercept enemy satellites. Considering that every maneuver in space required months of training, reams of procedures, and rooms of ground control people with very thick glasses, I am thinking the Airforce was somewhat ambitious with its sales pitch. Ultimately it was determined that NASA needed no competition for crewed spaceflight and well, maybe 1960s budgets were finite things after all.
Still, it was a cool concept and the Airforce never shut it down completely. A little over ten years later, the Airforce and NASA started the development of the much larger and more capable Space Shuttle. The same basic idea with a much clearer mission.
The AMP Dyna Soar
I believe I first saw this kit announced on Scalemates last spring. I had never heard of AMP before, and I had no idea whether they made good kits. I didn’t care. My decision to purchase was powered by the subject and the box art. The kit is a few steps up from a short-run kit in that it had a few issues. Now, none of the issues are fatal to the build. But if the builder is looking for a perfectly engineered Tamiya quality kit, well, that builder will be disappointed. I found there to be a lot of parts cleaning, parts shaping, parts aligning and parts modifying needed to get the ship together.
And after all that, I simply could not get my canopy to fit perfectly onto my model. I got it close but not as I would have liked it. I am still not sure whether this was some fault with the kit or I messed up something or somethings along the way. Both are possible. Of course, there was the option to go full on rip and repair, full re-scribe, and the like but due to the strange placement of the instrument panel inside the cockpit, this was never going to be what I had in my mind’s eye. To be blunt, the build ran out of steam for me and I wanted to move onto other things.
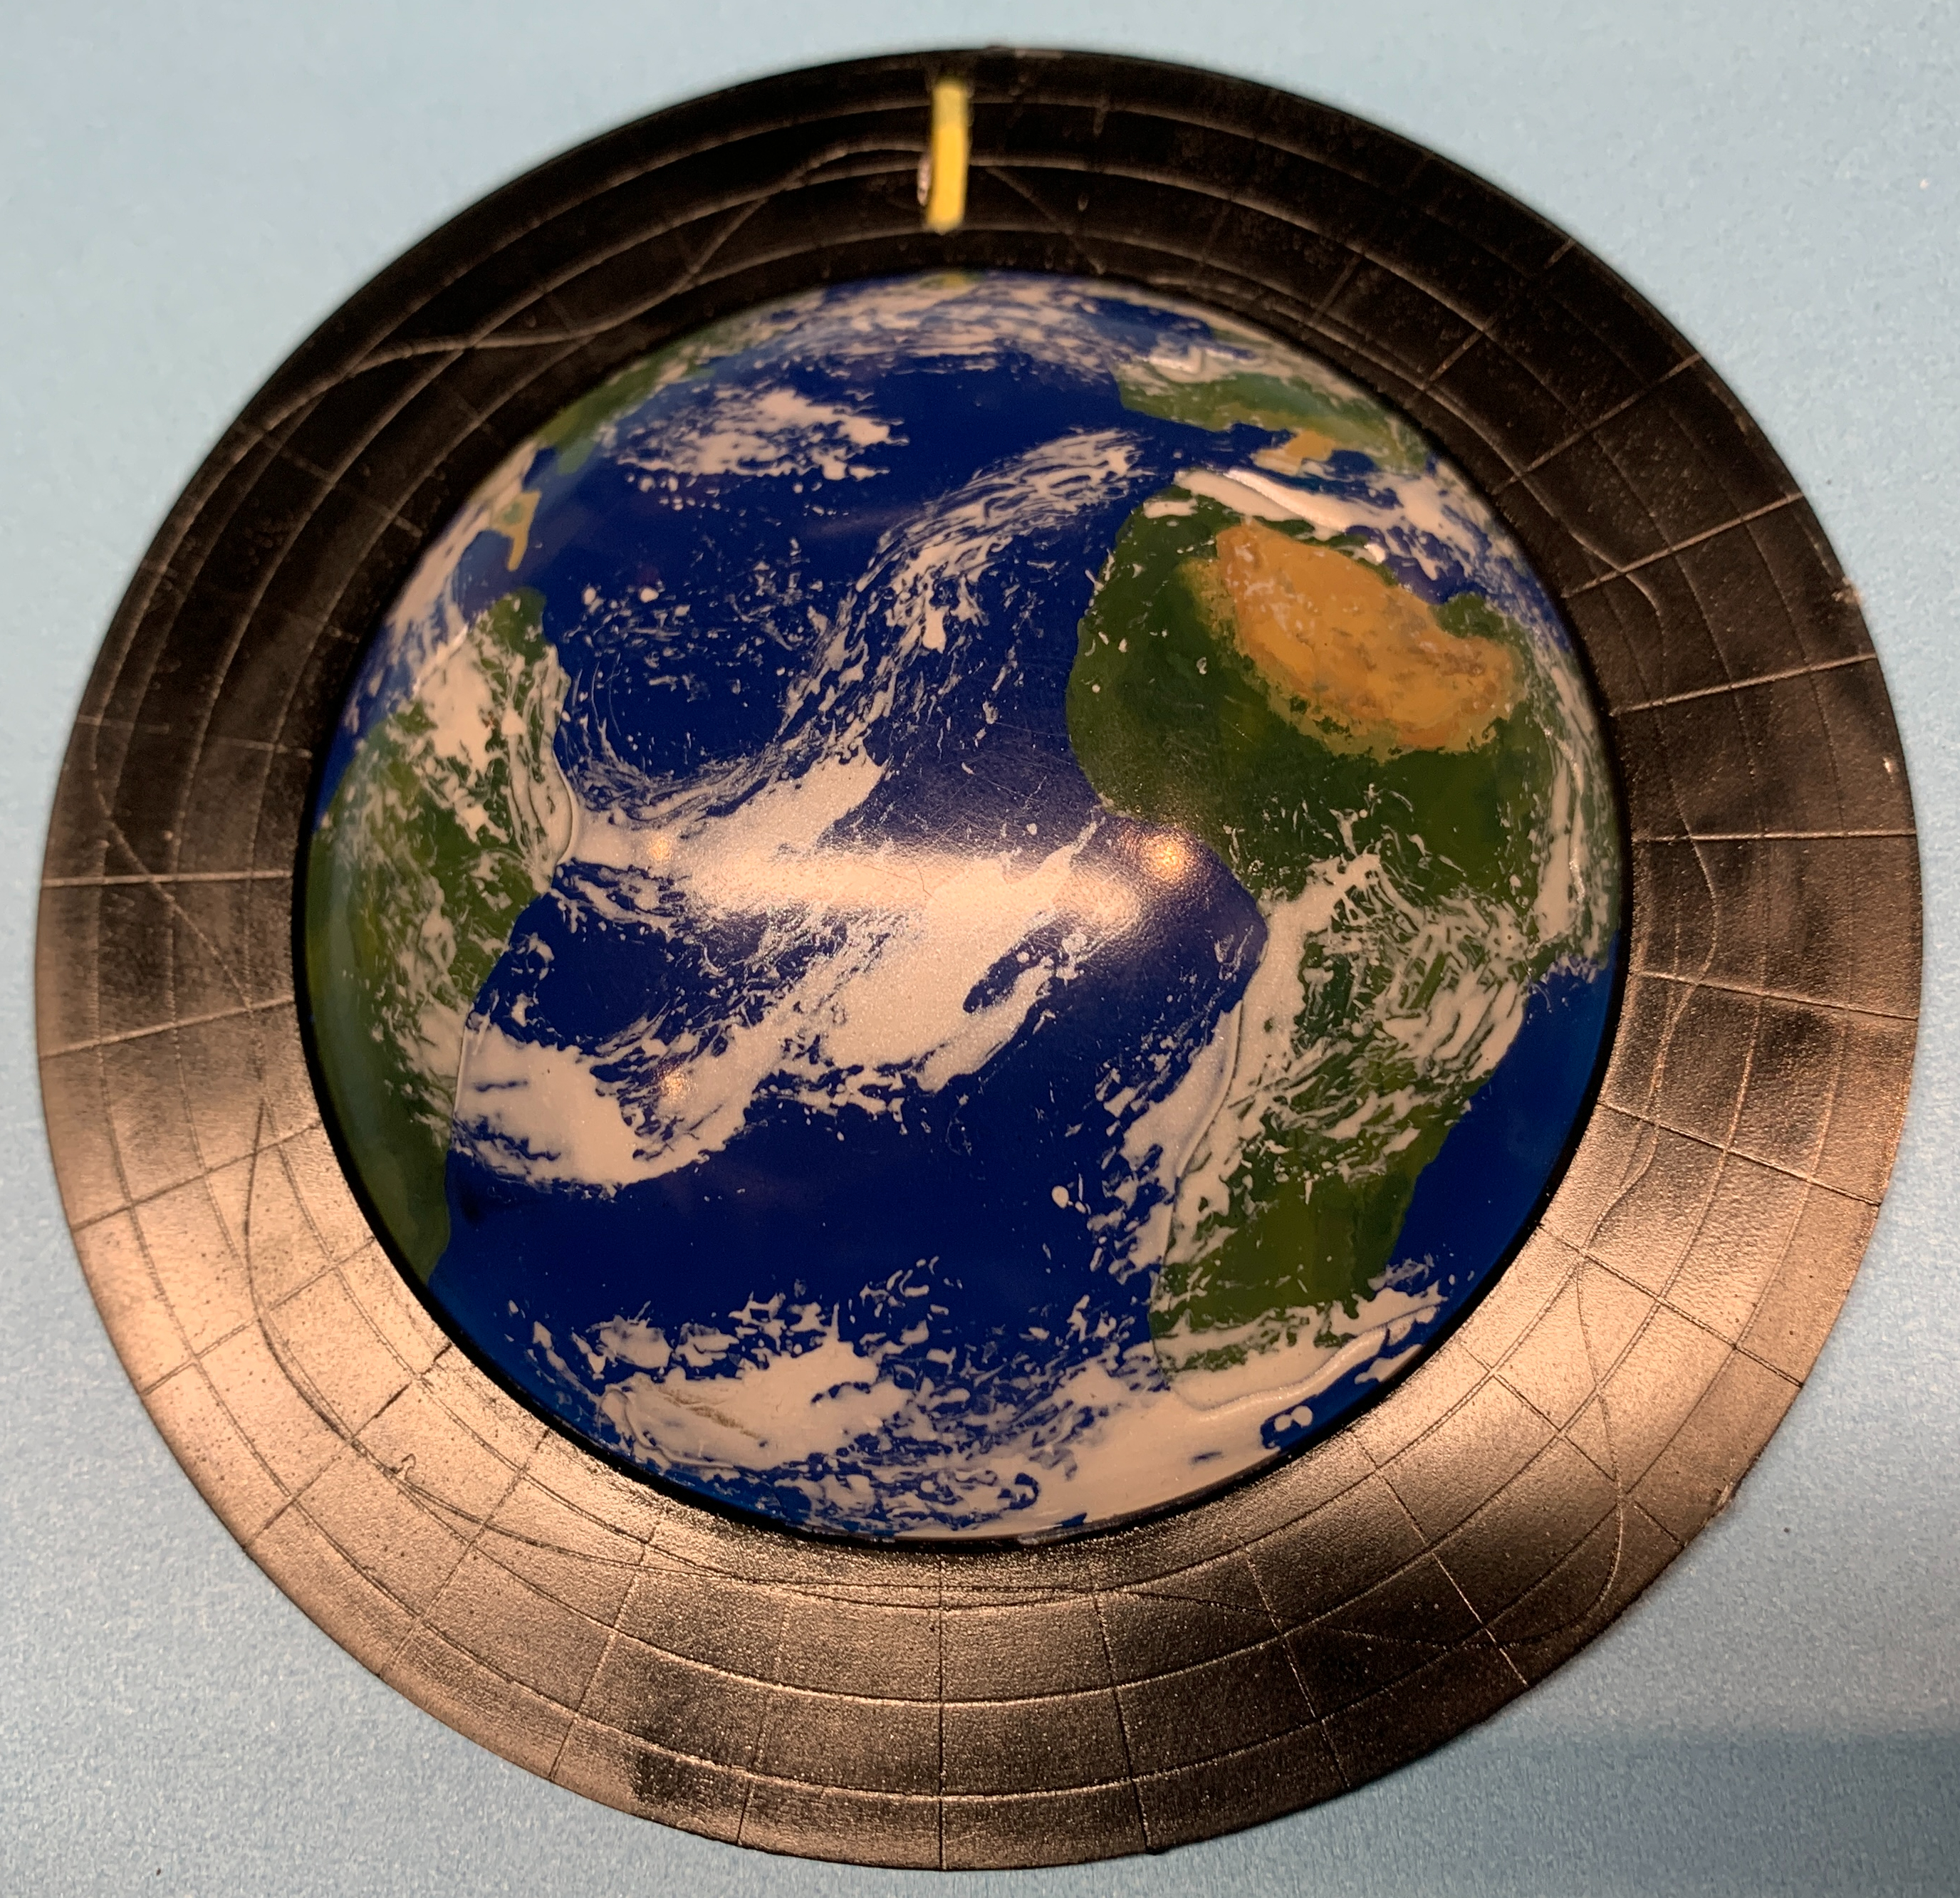
It was the base, of all things, that kept me going.
I decided to forego perfection and take the opportunity to try something new. New for me, anyway. I finished the build with a basic finish on the paint so that I could concentrate on weathering techniques to replicate scorched surfaces. I went for AK weathering pencils and I tried wet and dry application methods. I also used brushes, q tips, and paper towel to manipulate the pigment. What I ended up with was a very scorched underside that I ultimately toned down with a thin overcoat of Nato Black. I was not happy with it but at least I got to try some new things and learn a little.


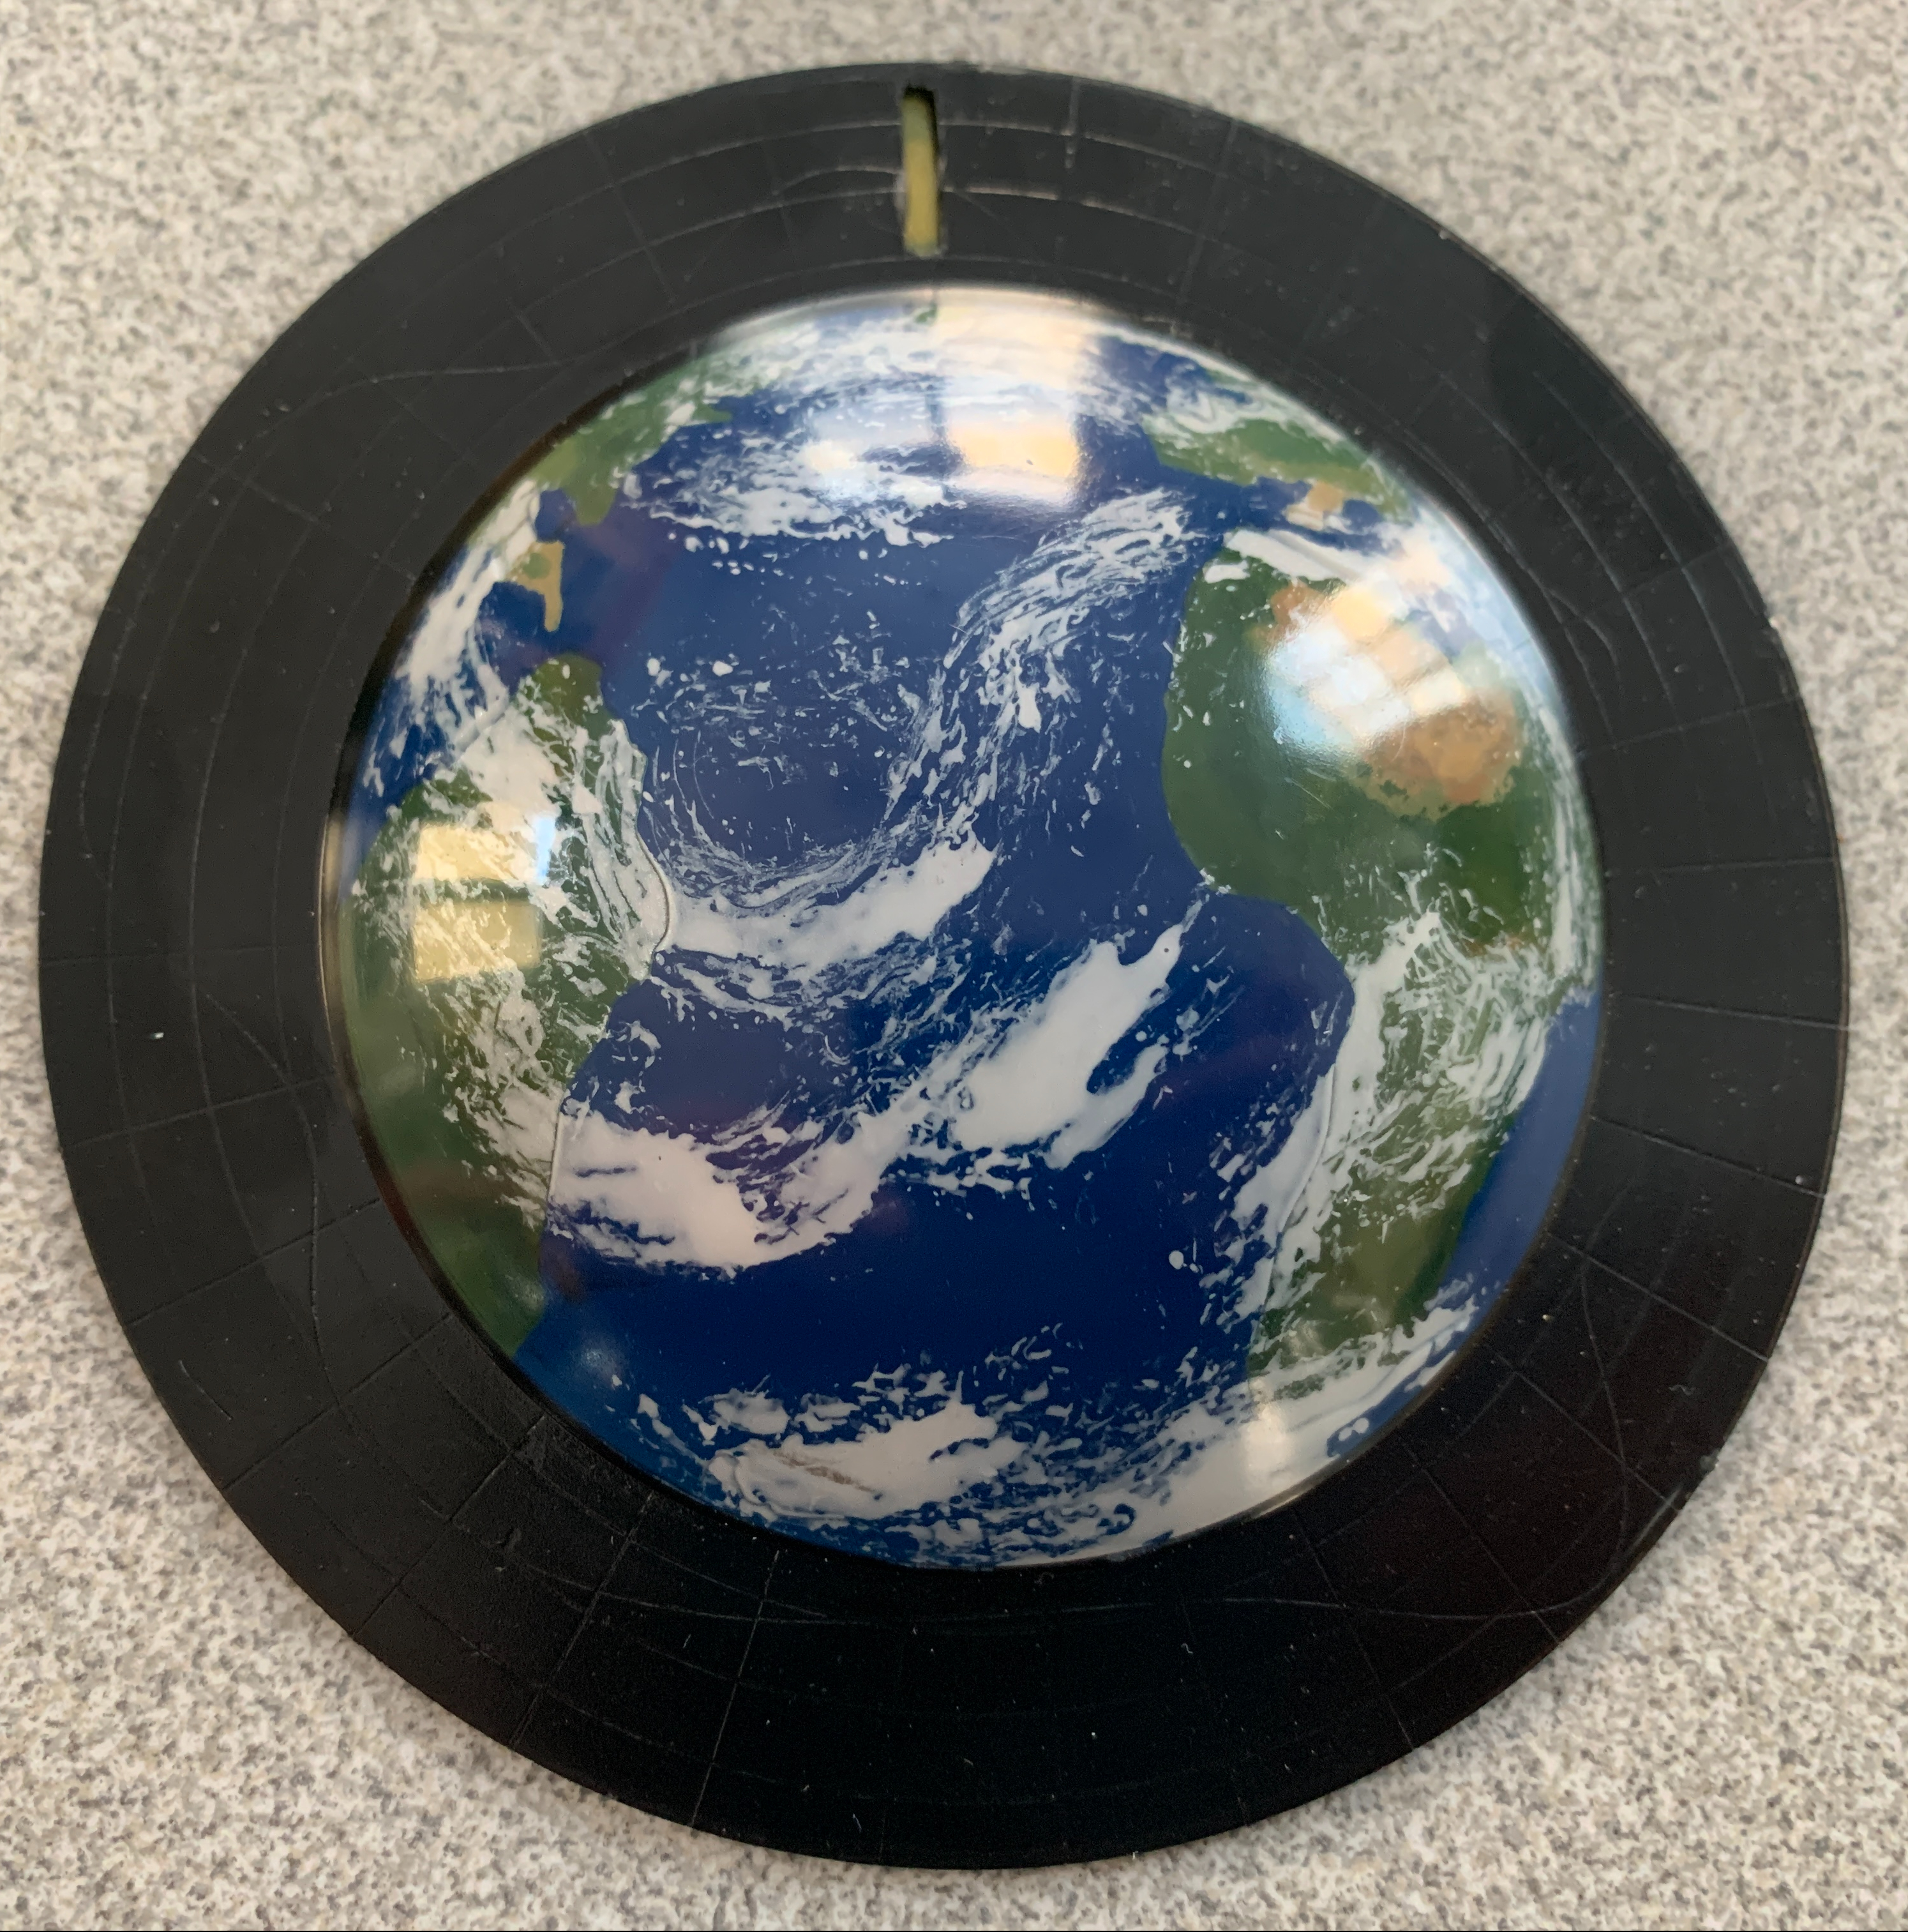
Next up was the base. The part was made from clear plastic and had continents molded in on the reverse side (ie, the outside of the base was smooth). I wanted to paint it in reverse and I wanted clouds. I painted the clouds using a ripped bit of spongy material and dabbed and dragged white lacquer paint. This allowed me to use wet mixes of acrylics to paint the continents without having the clouds ‘melt’ into the paint. I was very happy with this result.
A ‘How-To’ Video
If you are interested in seeing how I did these things, there is a video I put together and you can see it here or click below:
Forgoing Perfection
The strange thing about the stand included with the kit is that the instructions make no mention of it and builders are on their own as to how to attach the support arm. I went with the tried and true drill and scrape technique. Once I mated the kit to the stand, I enjoyed the build a little more.


Final Thoughts
This model could have easily been tossed in the trash or put aside to forever be a shelf queen living in the box of shame. But they can’t all be winners. And that’s ok. I think it is far better to finish a kit with a few lessons learned under my belt then to pretend the whole thing never happened. The model on the base is a unique combination. I’m glad I stuck with it.
Now…. onto the next project!

Interesting subject.
I really love what you did with the clouds.
LikeLiked by 2 people
I agree with Pierre, the base sells this build. All that cleaning, shaping, aligning, and modifying sounds like modeling!
LikeLike